Vegan Ponytail Kimchi aka Chonggak-Kimchi Recipe.

Crunchy.
Spicy.
DELICIOUS.
Ponytail kimchi or chonggak kimchi (총각김치) is, without a doubt, my favorite type of kimchi. It’s a fermented Korean side dish made out of ponytail radishes or Korean baby radishes. When you see one at the Korean grocery store, you’ll understand why they are called “ponytail” radishes–they come with long, leafy greens that look an awful lot like the aforementioned ponytail! Ponytail radish kimchi is an absolute staple of Korean cuisine–my grandmother used to keep mason jars of it along with the more well-known napa cabbage kimchi in our fridge all the time. Whether this is your first time making kimchi or you’re a kimchi pro, this ponytail kimchi will make a delicious addition to your banchan collection!
Let’s get into it!
Disclaimer: Some of the links in this post may be affiliate links for products I use and love. If you make a purchase after clicking one of those links, I may earn a small affiliate commission, perhaps enough to buy some extra gochujang or gochugaru 🙂
What Is Ponytail Kimchi?

If you’re new to kimchi or Korean food, you may not know that “kimchi” doesn’t just refer to the spicy, red cabbage side dish that always goes viral on TikTok. Believe it or not, there are hundreds of different types of kimchi. While napa cabbage kimchi or “baechu kimchi” is undeniably the most popular, this ponytail kimchi is not that far off in terms of ubiquity.
Ponytail kimchi is made out of Korean baby radish. These radishes are even sweeter than the fully grown Korean radish (which you should be familiar with from my VIRAL VEGAN KIMCHI RECIPE) and they are incredibly crunchy. Unlike radish kimchi or kkackduggi (a recipe you can find in my cookbook, Homemade), the baby radishes aren’t cubed or cut into smaller pieces. They are kept whole (if they’re small enough) or halved (sometimes quartered, if they’re humongous).
What does ponytail kimchi taste like? Other than the texture, ponytail kimchi is very similar to baechu kimchi. In fact, many people use the same exact kimchi paste (or one very much like it) to make ponytail kimchi. When I’m feeling extra ambitious, I’ll often make both baechu kimchi and ponytail kimchi at the same time and just double the sauce.
In terms of flavor, ponytail kimchi will be:
- Tart
- Sweet
- Salty
- Spicy
- Green-y
I added that last lovely adjective because, again, the long leafy stems definitely can add a bit of a salad vibe to this kimchi.
Due to the extra crunchy texture of the Korean radish, many people often rank ponytail kimchi above baechu kimchi. Plus, because of the variability between the radish and the tender greens, you really get two kinds of kimchi in one with this particular kimchi! BUT, because the cute little radish is a bit harder to acquire (they really need to be in season) and the salting process is a bit harder to nail down, it isn’t offered as frequently as one might like at a Korean restaurant. But, lemme tell you: whenever we saw it growing up, you better believe it was one of the first side dishes that needed to be replenished!
Why do they call it “bachelor kimchi”?

So, yes. In Korea, ponytail kimchi is sometimes referred to as “bachelor kimchi” or “bachelor radish kimchi.” In fact, the word “chonggak” literally translates into “bachelor” or “single men.” I mean, one look at them and you’ll see why…. 🤣 Ok, ok, we are a [mostly] family friendly affair here at The Korean Vegan, but I couldn’t pass that one up!
Back in the old days of yore, in Korea or Choseun (as it was called back then), young men would wear their hair in a long braid. If you’ve watched any period k-dramas, then you know what I’m talkin’ about. Because the baby radishes with their long, green tails looked so much like the braids worn by unmarried men, the vegetable was soon named after them: bachelor radish or chonggak mu. I love random, historical facts like these and always try to include them in these blog posts, even though most of you won’t read this 🤣
KEY INGREDIENTS AND NOTES ON SUBSTITUTIONs For This Ponytail Kimchi Recipe.

The following are the key ingredients as well as substitution recommendations for this ponytail kimchi recipe:
Korean Baby Radish.

Ponytail kimchi requires ponytail radish, aka Korean baby radish, aka chonggak radish, aka bachelor radish, etc. etc. You’ll likely only find this radish available at a Korean grocery store; so, unless you live next to a Korean market, you likely will not find this at your local grocery store or even farmer’s market. A lot of times, these baby radishes are imported from Korea (as is the case with adult Korean radishes).
How to pick out Korean baby radishes? Usually, the baby radishes are going to be about 2 to 3 inches long and around 1 to 1 1/2 inches thick. The best way to tell whether the radishes will be good (i.e., sweet and crunchy) will be to look at the leaves. If they look super brown and gross, you’re not going to want to eat them and, chances are, the radishes they’re attached to will be soft. You’ll also want to see a tinge of green towards the base. Now, don’t worry if the radishes themselves, or the leaves, appear dirty–that’s normal. You’re going to clean them up pretty as a picture anyway.
You can go with larger baby radishes, but the larger they are, the less sweet they tend to be (in my opinion). Plus, I think they look prettier when the radishes are kept whole, but if you do get larger ones, you will be halving or quartering them into spears.
There are no substitutions for ponytail radishes if you want to make ponytail radish kimchi!
Sea Salt.

As we discussed in the baechu kimchi recipe, salt is the next most important ingredient in any kimchi (after the vegetable). First, do not use table salt to make any kimchi, including ponytail kimchi. Use a coarse sea salt (Korean kimchi salt is the best, if you can get your hands on it) or coarse Kosher salt.
Sweet White Rice Flour.
In order to make the rice paste for the kimchi sauce for this ponytail kimchi recipe, you’ll need a couple tablespoons of sweet white rice flour (aka, glutinous white rice flour). I find this to be the easiest way to make the rice paste. But if you can’t get your hands on sweet white rice flour, you can also substitute the rice paste with 1/4 cup of cooked white rice blended with 1/4 cup of water.
Onion.

The kimchi sauce for this ponytail kimchi requires two different kinds of onion: a regular onion (i.e., the round one) and a green onion (the long, skinny one). I like to use yellow or white onions for my kimchi, but you can use whatever kind of onion you have on hand. As for the green onions, you’ll be using both the whites and the greens for this ponytail kimchi. If you don’t have green onions, you can substitute with garlic chives or Korean chives.
Apple and/or Korean Pear.
In order to add a little sweetness and to optimize the fermentation process, this ponytail kimchi recipe requires apple and/or Korean pear. I like to use both in all my kimchi recipes, but if you only have one, that’s fine. I prefer a Fuji apple (which is pretty readily available in both the United States and Korea), but honestly, any sweet apple will do (I would avoid granny smith for this one, as it’s too sour).
Garlic.
This is a kimchi recipe. Of course it’s going to have garlic. I don’t have a substitution recommendation for garlic–if you don’t have it or don’t like it, you can skip it (though this will absolutely affect the flavor of your kimchi). BTW, though my mom would evil-eye you, I have no problem with you using store-bought, pre-peeled garlic. If you’re desperate, you can even use that pre-minced stuff! Better than no garlic, in my view!
Ginger.
I’m not a big ginger fan, but I’ll grudgingly admit that kimchi just doesn’t taste the same without it. Same thing as with garlic: if you don’t like it or have it, just skip it. And, I have no problem with the store bought stuff.
Plum Syrup.
I prefer sweetening my kimchi sauce with plum syrup, which, I know, isn’t easy to get here in the United States. But it is very much what Korean ajummas use in Korea to make their kimchi, which is why I like to use it myself. If you’re going to the Korean grocery store anyway to pick up your radishes, just hop on over to the syrup aisle to get plum syrup or “meh-shil-chung.”
If you forgot to pick up plum syrup while you were there, you can substitute in brown rice syrup, agave syrup, corn syrup, straight up sugar, or even maple syrup (though, fair warning–when I proposed this as a sub in a recent video, some ajumma called me “crazy”–which is practically a swear word in Korean).
Gochugaru.

Come on, you didn’t think I’d give you a kimchi recipe without gochugaru, did ya? Ok, well, tbh, I do have a kimchi recipe without gochugaru, but this ponytail kimchi is not it! As you probably already know, gochugaru is Korean pepper powder or Korean chili flakes. As with all my kimchi recipes, I recommend you go with a coarse gochugaru. Sometimes, the packaging of the gochugaru will also indicate how spicy it is (yes, there is a fair amount of range when it comes to spice level for gochugaru). But if you’re grabbing what you can from the non-Korean grocery store, you’ll probably end up with a not-overly-spicy gochugaru.
I do not recommend substituting gochugaru with paprika or cayenne or some other kind of chili flake for this ponytail kimchi. Gochugaru is sweet and smoky and a little fruity, while also being coarse in texture. I don’t know any other chili flake that precisely matches those features. Plus, while I am not a complete Korean ajumma, even I need to draw the line somewhere!
Fishy Sauce.

Ok, so the thing that makes most kimchi, including ponytail kimchi, not vegetarian or vegan, is the fish sauce or anchovy sauce. And I’m not going to sugarcoat it for you and say “don’t worry, your kimchi will taste exactly the same without it!” It won’t. But here’s the good news!! One of the most popular recipes out of my cookbooks is my “Fishy Sauce”–an entirely vegan sauce that tastes so much like Korean fish sauce, it had my omma’s eyes absolutely POPPING–, but you can also find it right here, on my blog, for free! It’s like the easiest recipe, ever, too!
Otherwise, yes, you can purchase vegan fish sauce, but the options I’ve seen are not Korean style fish sauce. They are southeast asian style fish sauces, which are quite a bit sweeter than the Korean kind. In lieu of that, I would rather you use a strong soy sauce (like soup soy sauce or a gluten-free soy sauce to keep this recipe gluten-free) or even yondu (which is a Korean style broth enhancer).
Korean Chives or “Boochoo.”

Many ponytail kimchi recipes, including this one, incorporate Korean chives or “boochoo.” Korean chives are going to be a bit wider than the chives you see in your baked potato. The latter will be hollow and minced up into a garnish, while Korean chives will be flat. They will also have a far more garlicky, onion-y flavor than western style chives. Finally, they will be thinner, though, than Chinese chives, which I often see at the Korean grocery store too. Chinese chives are much wider and thicker than Korean style chives.
For this ponytail kimchi recipe, Korean style chives are the best, but Chinese chives are also a good option. I would not use western style chives, as they will be too stringy. They’ll likely get annoyingly tangled with the radish greens, providing for a not fun texture. If you don’t have access to chives, I’d just substitute more scallion greens or julienned mustard greens (my mom really loves adding mustard greens to kimchi).
equipment you’ll need for This ponytail radish recipe.
I don’t usually have a special call-out for equipment, but for kimchi, it’s always a good idea to go over the things you’ll need:
- Large bowls for salting.
- Blender for the sauce.
- Mason jars or other airtight containers for fermentation.
Step-by-Step Instructions to Making Ponytail Kimchi (You got this).
Ok, let’s be super honest here: kimchi is a journey. Just scroll through the comments of my baechu kimchi recipe–it can be emotional to successfully conquer kimchi making! Why do you think most Korean people do it in groups? It’s for moral support! So, though I won’t be there with you in person, I wanted to make the following instructions so ridiculously and absurdly clear and easy to follow, it’ll be like I am with you. So, roll up your sleeves, gird your loins, and let’s get to it.
Step 1: Clean Your Baby Radishes.
Look at the before and after picture below before you read one more word:

We are not kidding around when it comes to cleaning our baby radishes. This part will take longer than you want, so I like to get comfortable. I take a bunch of paper grocery bags or even newspapers and spread them out on my table and just plop my radishes right on the surface. Listen to an audio book or podcast.

First, you’re going to take a paring knife or a small knife you would use to cut fruit and use it to snip off the unsightly hairy tip of your radish (please keep your mind out of the gutter, folks).

Second, you’re going to remove any dark blemishes, random hairs, or divots with the same knife, kinda like when you’re peeling potatoes. You get rid of the “eyes,” right? Or the gross looking sprouts. Same deal here.

Third, give the radish a light scrape with the sharp edge of your blade. You don’t want to peel the radish, as that’s where so much of the flavor resides. You just want to pick up any stubborn grime.

Fourth, remove any super wilted (or dead) greens from your radish, but do so gently. Otherwise, you risk removing the tail from your pony altogether. 🙁

Fifth, bring your radishes over to the sink. Using steel wool or dish brush scrubber, scrub your radishes clean while running them under cold water. You want them absolutely gleaming by the time you’re done. Make sure to thoroughly rinse the greens, as well, as they tend to collect dirt and sand.


Sixth, pat them dry with a kitchen towel before placing them in a large bowl.
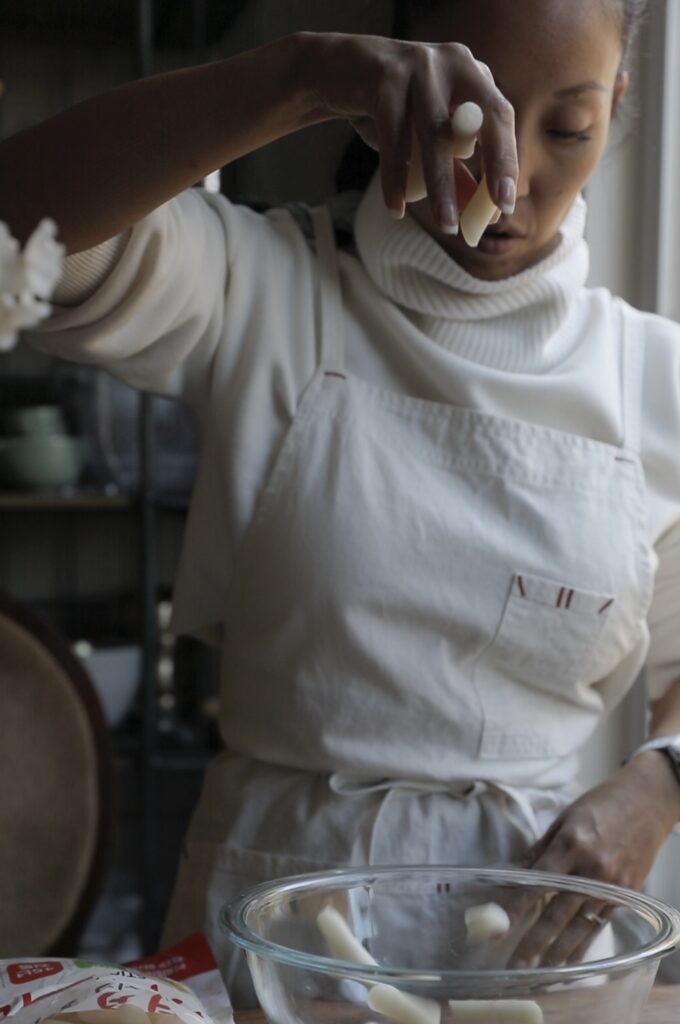
Optional Seventh, if your radishes are very large (longer than 3 inches, thicker than 1 1/2 inch), you’ll want to halve or even quarter them into spears. Again, take care with the radish greens when you do so, to make sure they stay attached. If they do come off, just stick ’em in the bowl with the radishes anyway.
Step 2: Salt Your Radishes.
Sprinkle the salt over your radishes so that it is evenly distributed. Then, sprinkle the water over your radishes, so that they get evenly wet. Thoroughly toss the radishes, to make sure every single radish and radish green gets salted. You’re going to think this is too much salt, but don’t worry–you’ll be rinsing all of it off, later.


Step 3: Pickle the Radishes.
In general, depending on how fresh and large your radishes are, and whether you’ve cut them into smaller pieces, you’ll want to keep them in the brine between 90 minutes and 3 hours. Make sure you stir and flip them every 45 minutes or so, to make sure they get evenly coated in the liquid they release.


Step 4. Prepare the “sludge.”
While your radishes are pickling, prepare the blended mixture or what I call the “sludge.” Place the onion, scallion whites, garlic, apple, pear, ginger, and plum syrup into the blender and blend until smooth. Set aside or place in the refrigerator if your radishes still have a long way to go.


Step 5. Prepare the Rice Paste or “Pul.”
The rice paste or “pul” is the “glue” that will hold the kimchi sauce together. To make the pul, add the sweet white rice flour to a small saucepan over low heat. Add 3/4 cup of water. Increase the heat to medium while whisking the contents of your pan. After about 3 minutes, you’ll notice the mixture starting to thicken. Continue whisking the mixture, then, for another minute or two (so there are no lumps), until it starts bubbling. Remove from heat and set aside.


Step 6. Rinse Your Radishes.
Determining whether your radishes are ready to be rinsed is the hardest part of this recipe. It’s much harder than with baechu kimchi, since (a) you can readily test the “bendiness” of cabbage while radish is still too hard to see how pliable it’s become; and (b) you can always taste the cabbage to see if it’s salty, while the radishes, themselves, are so precious, you often don’t want to waste them by tasting them.
Here are things you can do to tell whether they’re ready:
- Check the greens to see if they are super wilted and soft.
- Cut off the tip of a radish–if it tastes extremely salty, they’re ready.
- Try bending the radish spear–if they readily bend without snapping, they’re ready.
- If you’ve kept the radishes whole like I did, use the photo below as a guide to how bendy they will seem.


Once you’ve determined they are ready, bring them over to your sink and rinse each radish and its attached leaves thoroughly. The general rule of thumb is to rinse each radish twice. Afterwards, dry them off thoroughly with a kitchen towel; otherwise, they will be too wet and will dilute the kimchi sauce.


Step 7. Make Your Kimchi Sauce.
Prepare the kimchi sauce by adding your sludge, rice paste, gochugaru, and fishy sauce into a large bowl. Mix the contents using a large wooden spoon or spatula until it turns into a paste.


Step 8. Add The Vegetables.
Add the salted radishes, together with the scallion greens and chives to the bowl containing the kimchi sauce. Using gloved hands (this is the best) or tongs (this is not ideal), mix the veggies in the sauce until they are evenly coated and distributed. Do not get sloppy here–it is really important that the radishes and radish greens get well coated with the sauce to optimize fermentation.


Step 9. Store Your Ponytail Kimchi.
Storing your ponytail kimchi is part of the recipe (and not just a separate question for leftovers), since how and where you store it will impact how long it takes to ferment. Place your radishes and their greens in a 64 ounce mason jar or other equivalent container. If you’re using a mason jar, you can wrap the green tails around the radishes to create tidy bundles to place in the jar. Press down on the radishes to make sure you squeeze out any air pockets. The final layer of radishes should be smothered in kimchi sauce and sprinkled with a tablespoon or two of salt (this will guard against the growth of yeast).


Seal your container and leave it out at room temperature for 3 days. Then, place in the refrigerator. Your ponytail kimchi should be ready to enjoy about a week to ten days after you’ve placed it in the fridge!

TROUBLESHOOTING YOUR PONYTAIL KIMCHI.

Even the most experienced ajummas can screw up their ponytail kimchi. My mom and even my sister-in-law (the queen of kimchi in our family) admitted that ponytail kimchi can be especially tricky. But the good news is that even the biggest screw ups are usually repairable. Here are a couple of common mistakes and “fixes” for those mistakes, to ensure that this ponytail kimchi is truly the best!
- Not Salty Enough. As I said, your radish should taste “too salty” right before saucing because the saltiness will dissipate over time. You’ll know within the first 24 hours of fermentation whether your ponytail kimchi is salty enough. I know–tasting another piece of that precious radish feels like you’re wasting it, but if you want to get a read on flavor, taste some. If it doesn’t taste salty (it should), simply add 2 tablespoons of salt to your jar. You don’t even need to mix it in. It will taste overly salty, at first, but after a few days to a week, it will be perfect.
- Too Salty. On rare occasions, your ponytail kimchi will be too salty. This usually means that you kept your radishes in the brine for too long. If this happens to you, no worries! Simply cut up some adult Korean radish or julienne some carrot and add it to your ponytail kimchi. The newly added veggies will suck up the extra salt and in a few days, your ponytail kimchi will taste great!
- Yeast on my Kimchi. Sometimes, you might see the formation of white “mold” on the top of your kimchi. This usually forms when your kimchi is exposed to too much oxygen. Simply remove the kimchi on top that has the yeast and the rest of your kimchi is just fine. However, in order to guard against this type of thing happening, make sure you use an airtight container. If you have a lot of space between your kimchi and the lid to your container, sprinkle with a tablespoon of salt or add plastic wrap over the top before sealing the container. Finally, your kimchi should be submerged, as much as possible, in its own juices.
Frequently asked questions.
How do I keep this recipe gluten-free?
You can keep this ponytail kimchi recipe gluten-free by using gluten-free soy sauce and gluten-free vegetarian oyster sauce when you make the fishy sauce. Otherwise, the rest of the recipe is already gluten-free.
How long is ponytail kimchi good for?
Your ponytail kimchi will last for several weeks up to 3 months if stored in the refrigerator after the initial 3 days. Over time, your radishes will soften and lose their crunch and they will turn a dark orange. This is when you know they’re ready to be braised or stewed in kimchi jjigae!
Help! My ponytail kimchi is releasing a dark liquid!
Within 24 hours, the liquid of your ponytail kimchi will go from bright red to a very dark color (almost black). Don’t worry. This is normal! This is largely due to the liquid coming from the greens. Over time, the liquid will go back to being red.
Want More Kimchi Recipes?
Sign up for my weekly emails to get a bunch of kimchi recipes straight in your inbox!
Recipe Card.

Vegan Ponytail Kimchi (Chonggak-Kimchi).
Equipment
- 2 large bowls
- 1 blender
- 1 64 oz mason jar or airtight container
Ingredients
- 3 lbs Korean baby radish (chonggak radish) (~1.5 kg)
- 2 cups course sea salt (don't worry–we'll rinse most of it off!)
- 1/2 cup onion (rough chopped)
- 6 scallion whites (trimmed and rough chopped)
- 1/2 cup apple (or Korean pear or mix of both, rough chopped)
- 1/4 cup garlic cloves (peeled and trimmed)
- 1 knob ginger
- 2 tbsp plum syrup (or brown rice syrup, agave, etc.–check out substitutions section in blog post)
- 2 tbsp sweet white rice flour
- 1 1/2 cup gochugaru
- 1/4 cup fishy sauce
- 2 cups Korean chives (trimmed)
- 6 scallion greens (sliced in half, lengthwise, so they're extra skinny)
Instructions
- CLEAN YOUR RADISHES: First, take a paring knife or a small knife you would use to cut fruit and use it to snip off the unsightly hairy tip of your radish.Second, remove any dark blemishes, random hairs, or divots with the same knife, kinda like when you're peeling potatoes. You get rid of the "eyes," right? Or the gross looking sprouts. Same deal here.Third, give the radish a light scrape with the sharp edge of your blade. You don't want to peel the radish, as that's where so much of the flavor resides. You just want to pick up any stubborn grime.Fourth, remove any super wilted (or dead) greens from your radish, but do so gently. Otherwise, you risk removing the tail from your pony altogether. 🙁Fifth, bring your radishes over to the sink. Using steel wool or dish brush scrubber, scrub your radishes clean while running them under cold water. You want them absolutely gleaming by the time you're done. Make sure to thoroughly rinse the greens, as well, as they tend to collect dirt and sand.Sixth, pat them dry with a kitchen towel before placing them in a large bowl.Optional Seventh, if your radishes are very large (longer than 3 inches, thicker than 1 1/2 inch), you'll want to halve or even quarter them into spears. Again, take care with the radish greens when you do so, to make sure they stay attached. If they do come off, just stick 'em in the bowl with the radishes anyway.
- Sprinkle the salt over your radishes so that it is evenly distributed. Then, sprinkle 2 liters of water over your radishes, so that they get evenly wet. Thoroughly toss the radishes, to make sure every single radish and radish green gets salted. You're going to think this is too much salt, but don't worry–you'll be rinsing all of it off, later.In general, depending on how fresh and large your radishes are, and whether you've cut them into smaller pieces, you'll want to keep them in the brine between 90 minutes and 3 hours. Make sure you stir and flip them every 45 minutes or so, to make sure they get evenly coated in the liquid they release.
- While your radishes are pickling, prepare the blended mixture or what I call the "sludge." Place the onion, scallion whites, garlic, apple, pear, ginger, and plum syrup into the blender and blend until smooth. If you have trouble blending, add a couple tablespoons of water until the blades loosen. Set aside or place in the refrigerator if your radishes still have a long way to go.
- To make the pul, add the sweet white rice flour to a small saucepan over low heat. Add 3/4 cup of water. Increase the heat to medium while whisking the contents of your pan. After about 3 minutes, you'll notice the mixture starting to thicken. Continue whisking the mixture, then, for another minute or two (so there are no lumps), until it starts bubbling. Remove from heat and set aside.
- Here are things you can do to tell whether they're ready: (a) Check the greens to see if they are super wilted and soft; (b) cut off the tip of a radish–if it tastes extremely salty, they're ready; and try bending the radish spear–if it readily bends without snapping, they're ready. Once you've determined they are ready, bring them over to your sink and rinse each radish and its attached leaves thoroughly. The general rule of thumb is to rinse each radish twice. Afterwards, dry them off thoroughly with a kitchen towel; otherwise, they will be too wet and will dilute the kimchi sauce.
- Prepare the kimchi sauce by adding your sludge, rice paste, gochugaru, and fishy sauce into a large bowl. Mix the contents using a large wooden spoon or spatula until it turns into a paste.
- Add the salted radishes, together with the scallion greens and chives to the bowl containing the kimchi sauce. Using gloved hands (this is the best) or tongs (this is not ideal), mix the veggies in the sauce until they are evenly coated and distributed. Do not get sloppy here–it is really important that the radishes and radish greens get well coated with the sauce to optimize fermentation.
- Place your radishes and their greens in a 64 ounce mason jar or other equivalent container. If you're using a mason jar, you can wrap the green tails around the radishes to create tidy bundles to place in the jar. Press down on the radishes to make sure you squeeze out any air pockets. The final layer of radishes should be smothered in kimchi sauce and sprinkled with a tablespoon or two of salt (this will guard against the growth of yeast).
- Seal your container and leave it out at room temperature for 3 days. Then, place in the refrigerator. Your ponytail kimchi should be ready to enjoy about a week to ten days after you've placed it in the fridge!