I VEGANIZE KOREAN FOOD. I KOREANIZE EVERYTHING ELSE.

Entrees
Entrees
Entrees
-

DELICIOUS Jjajangmyeon Recipe-Korean Black Bean Noodles.
-

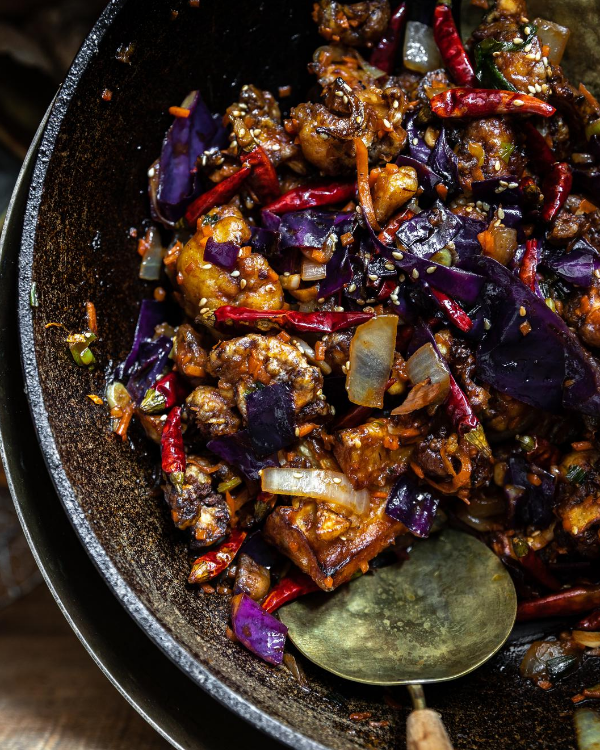
Delicious and Easy Vegan Cashew Nut Stir Fry Recipe.
-

BEST Doenjang Jjigae (된장찌개) – Spicy and Delicious.
-

Easy Creamy Broccoli Gnocchi – Healthy and Delicious.
-

My Mom’s Easy Vegetarian Japchae (Glass Noodles).
-

Homemade Vegan Dumplings Recipe – Kimchi Mandu.
-
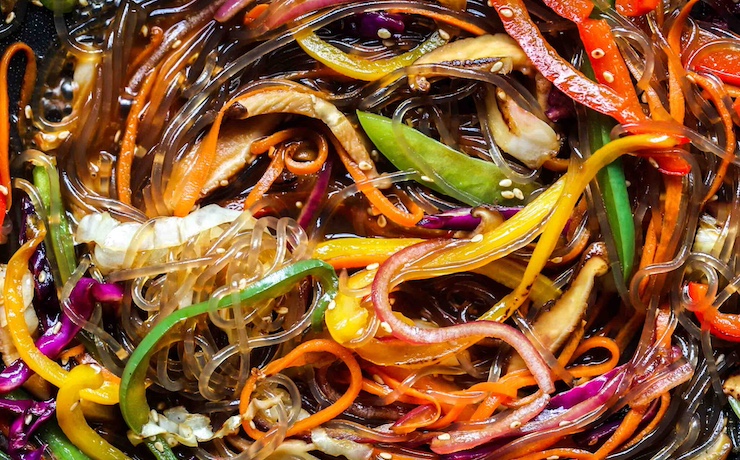
Healthy And Easy Vegan Japchae (Korean Glass Noodles).
-
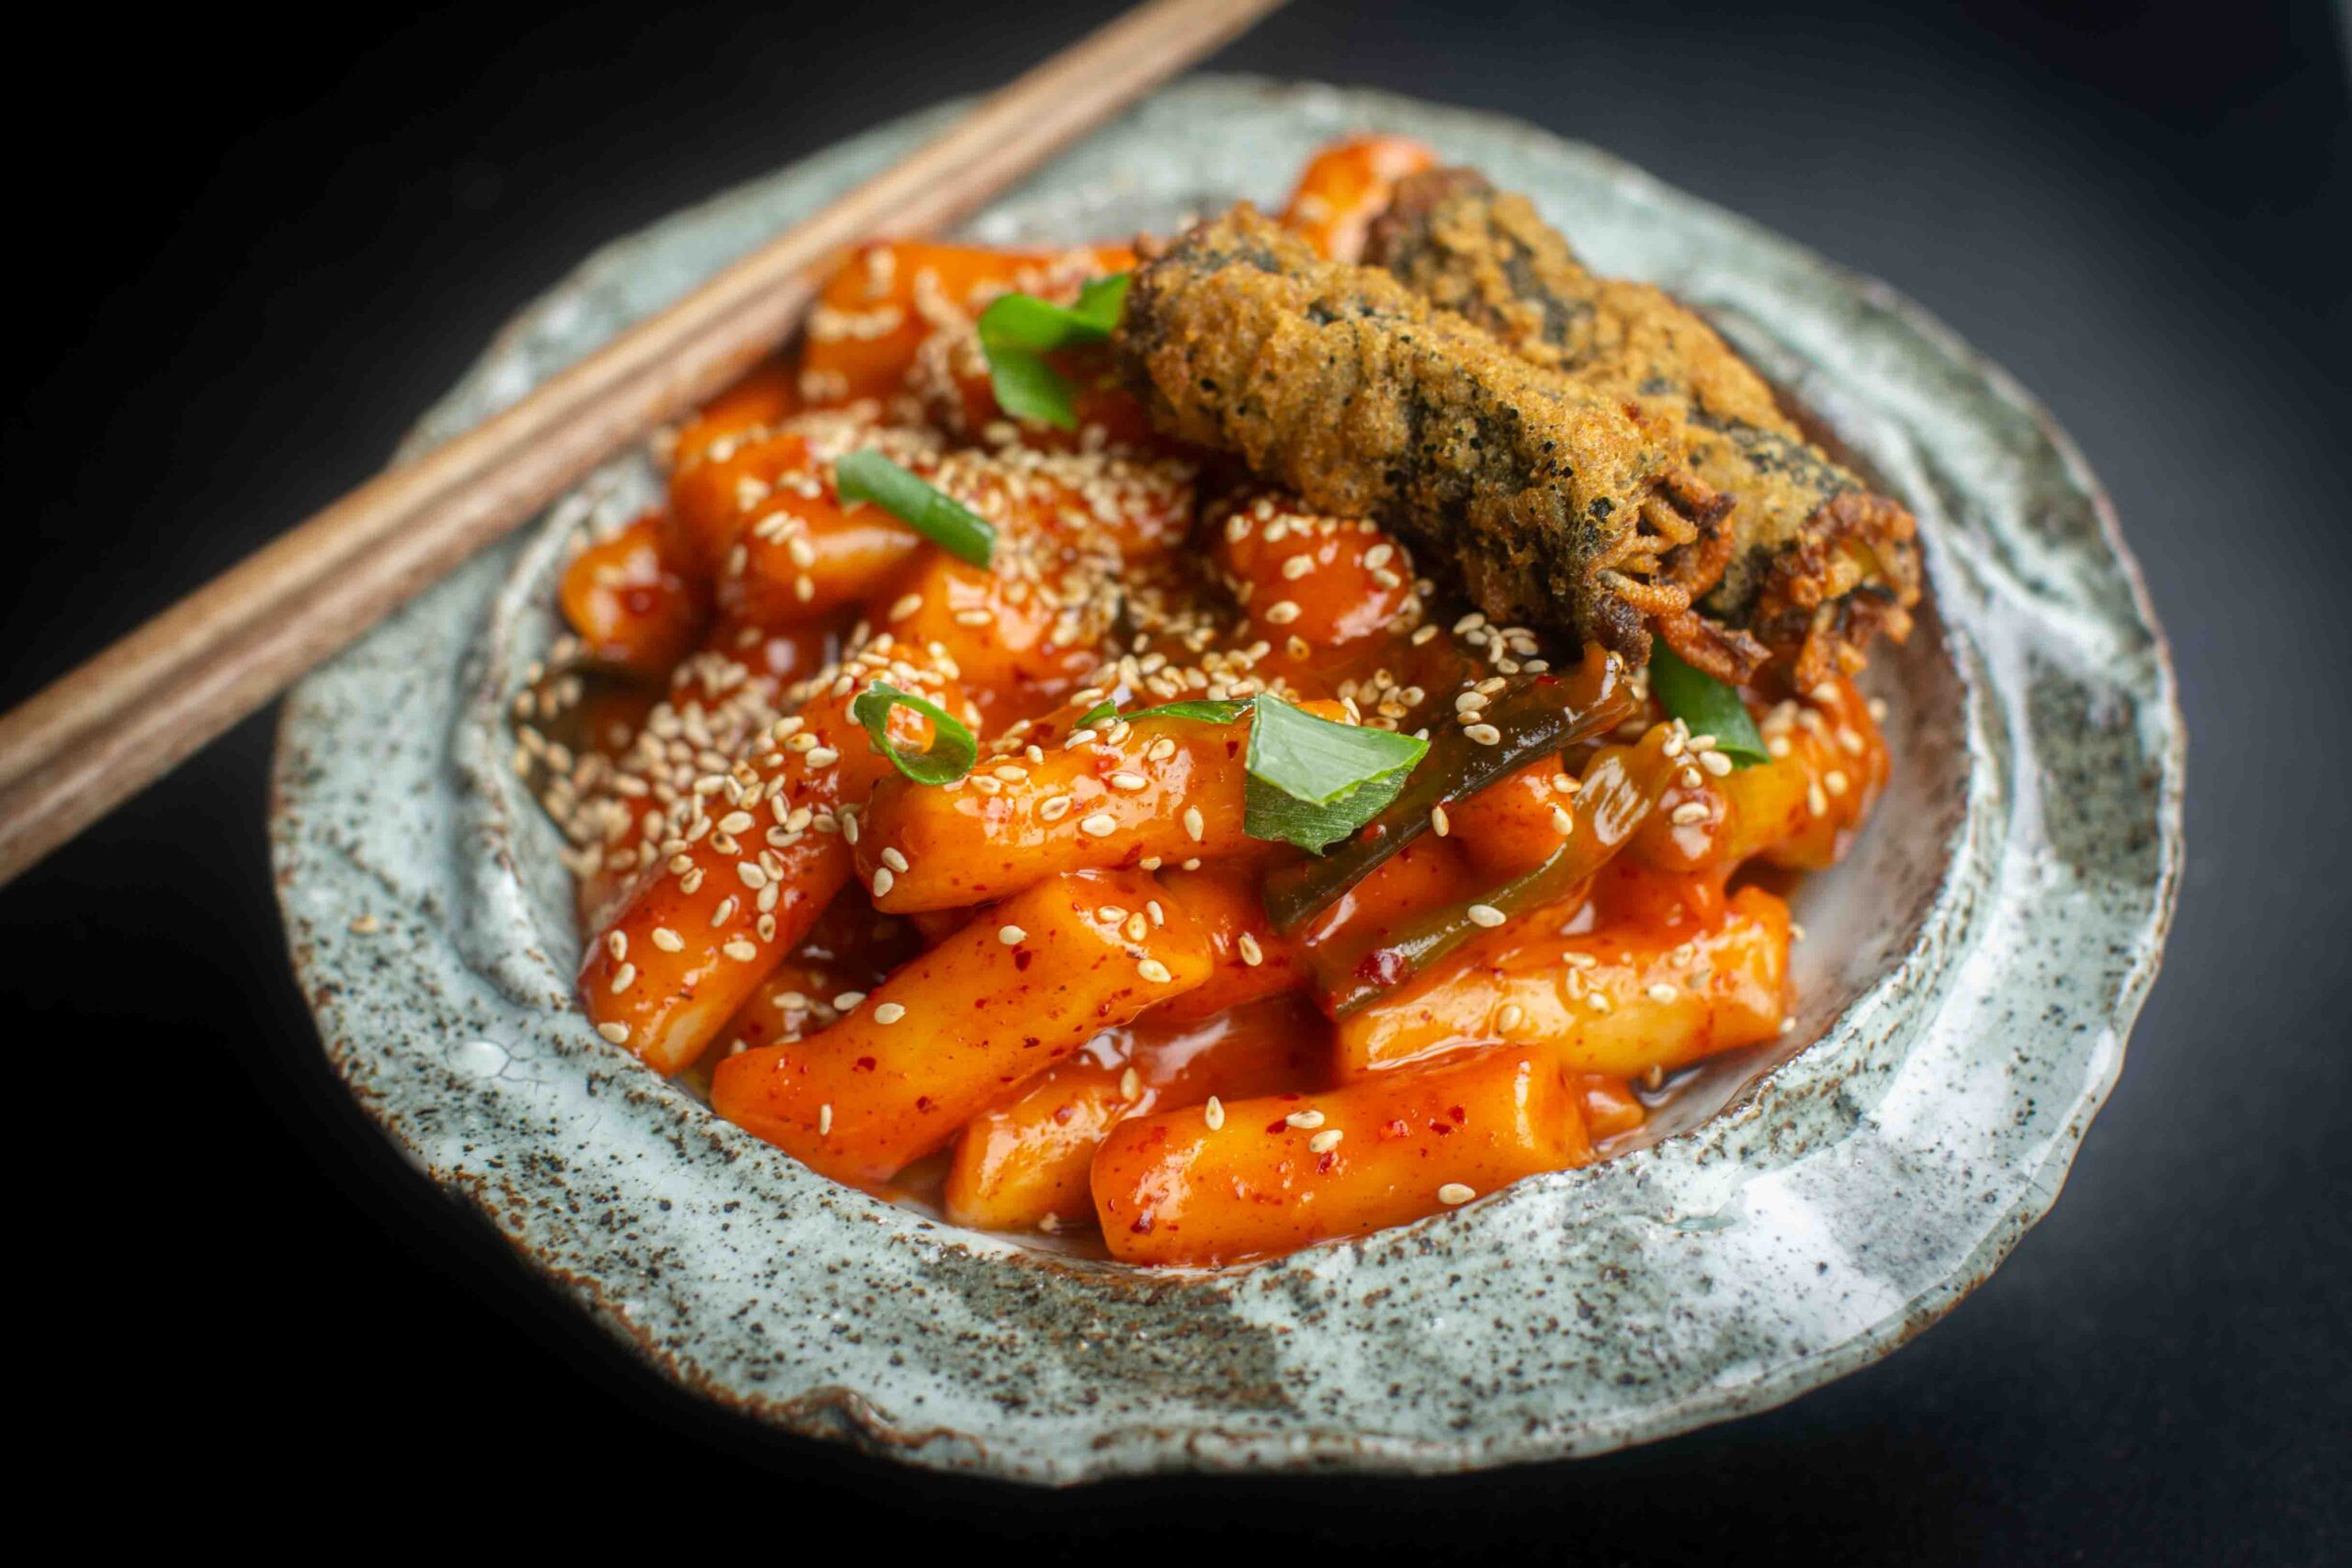
15-Minute EASY Vegan Tteokbokki – Spicy Korean Rice Cakes.
-
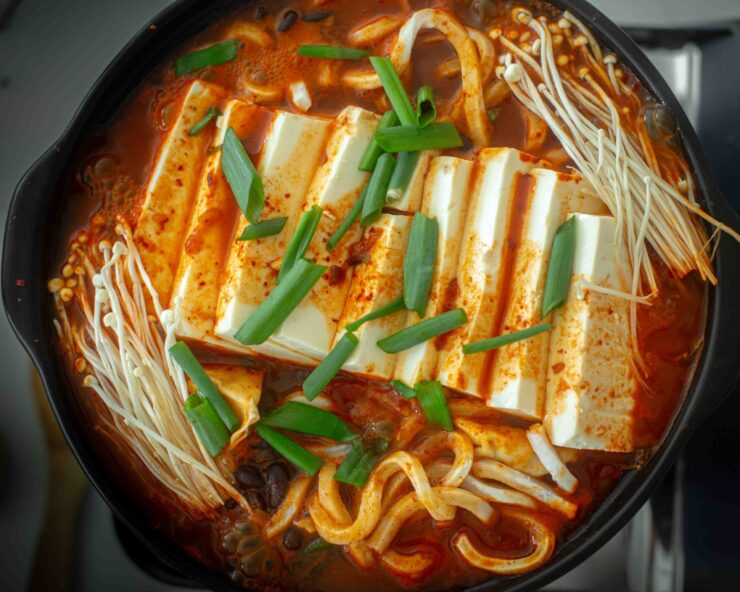
Easy & Hi-Protein Vegan Kimchi Jjigae Reigns Supreme.
-
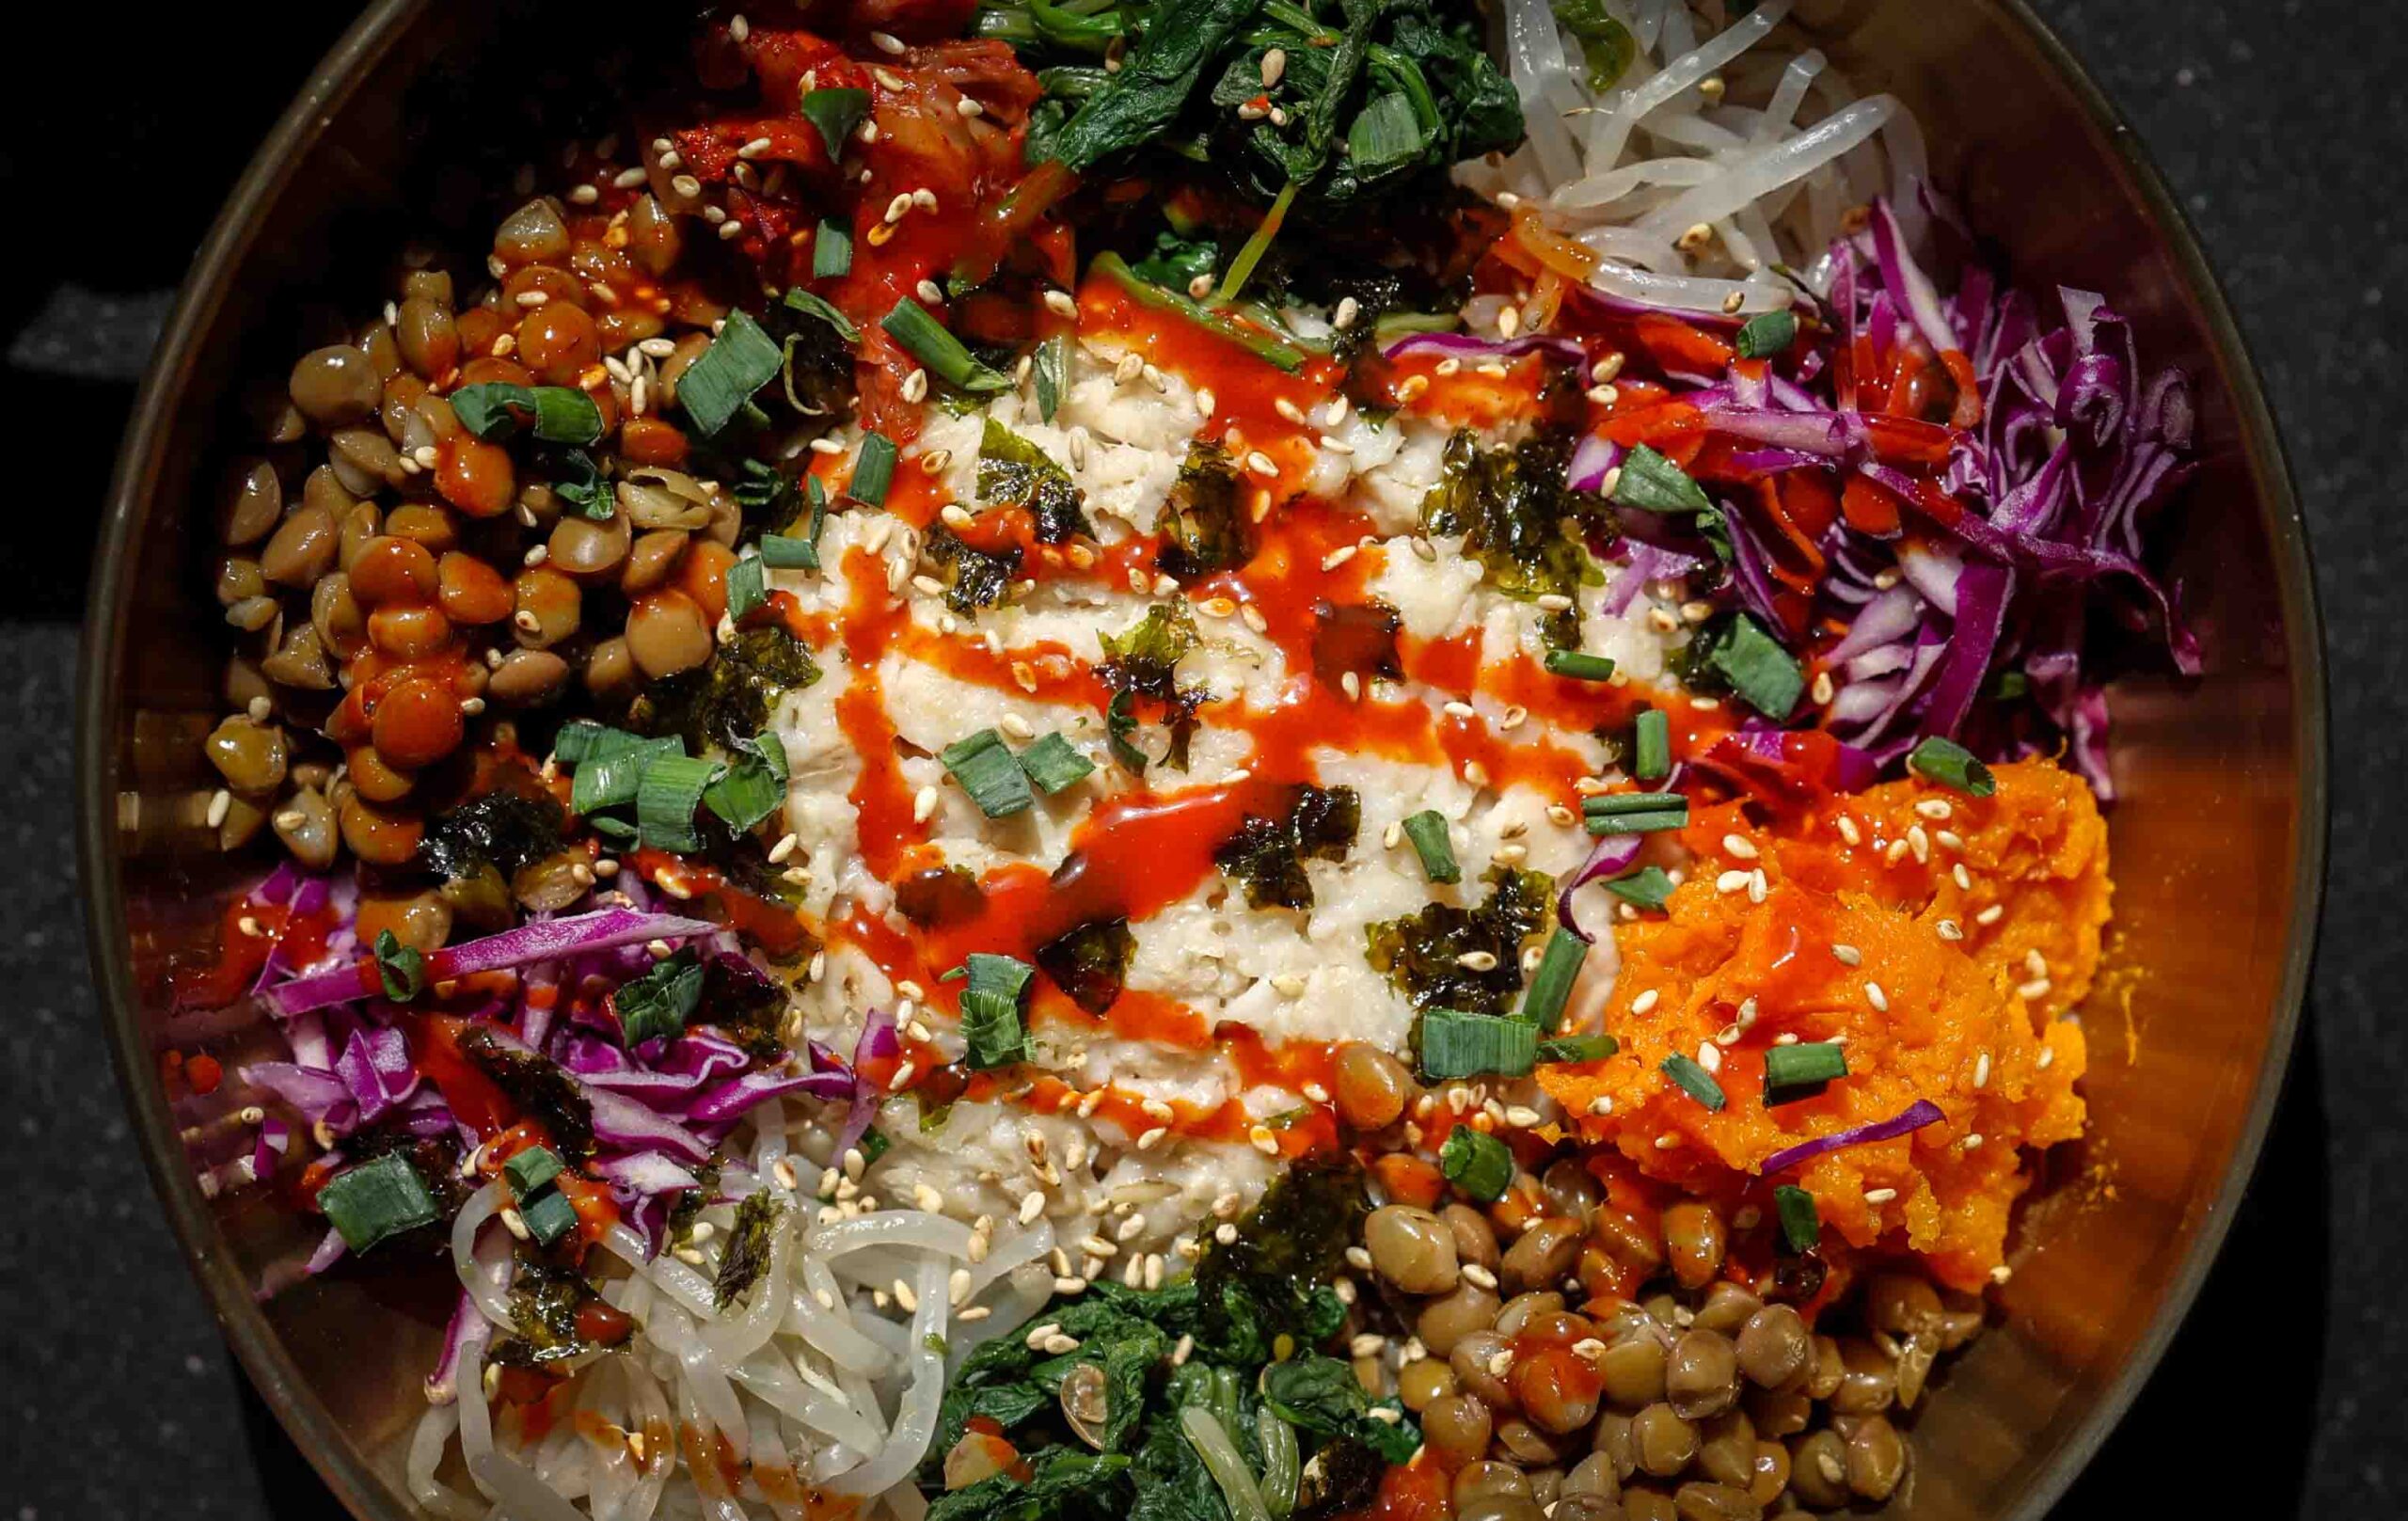
Easy Heart-Healthy Savory Oatmeal Recipe: Bibim Oats
-
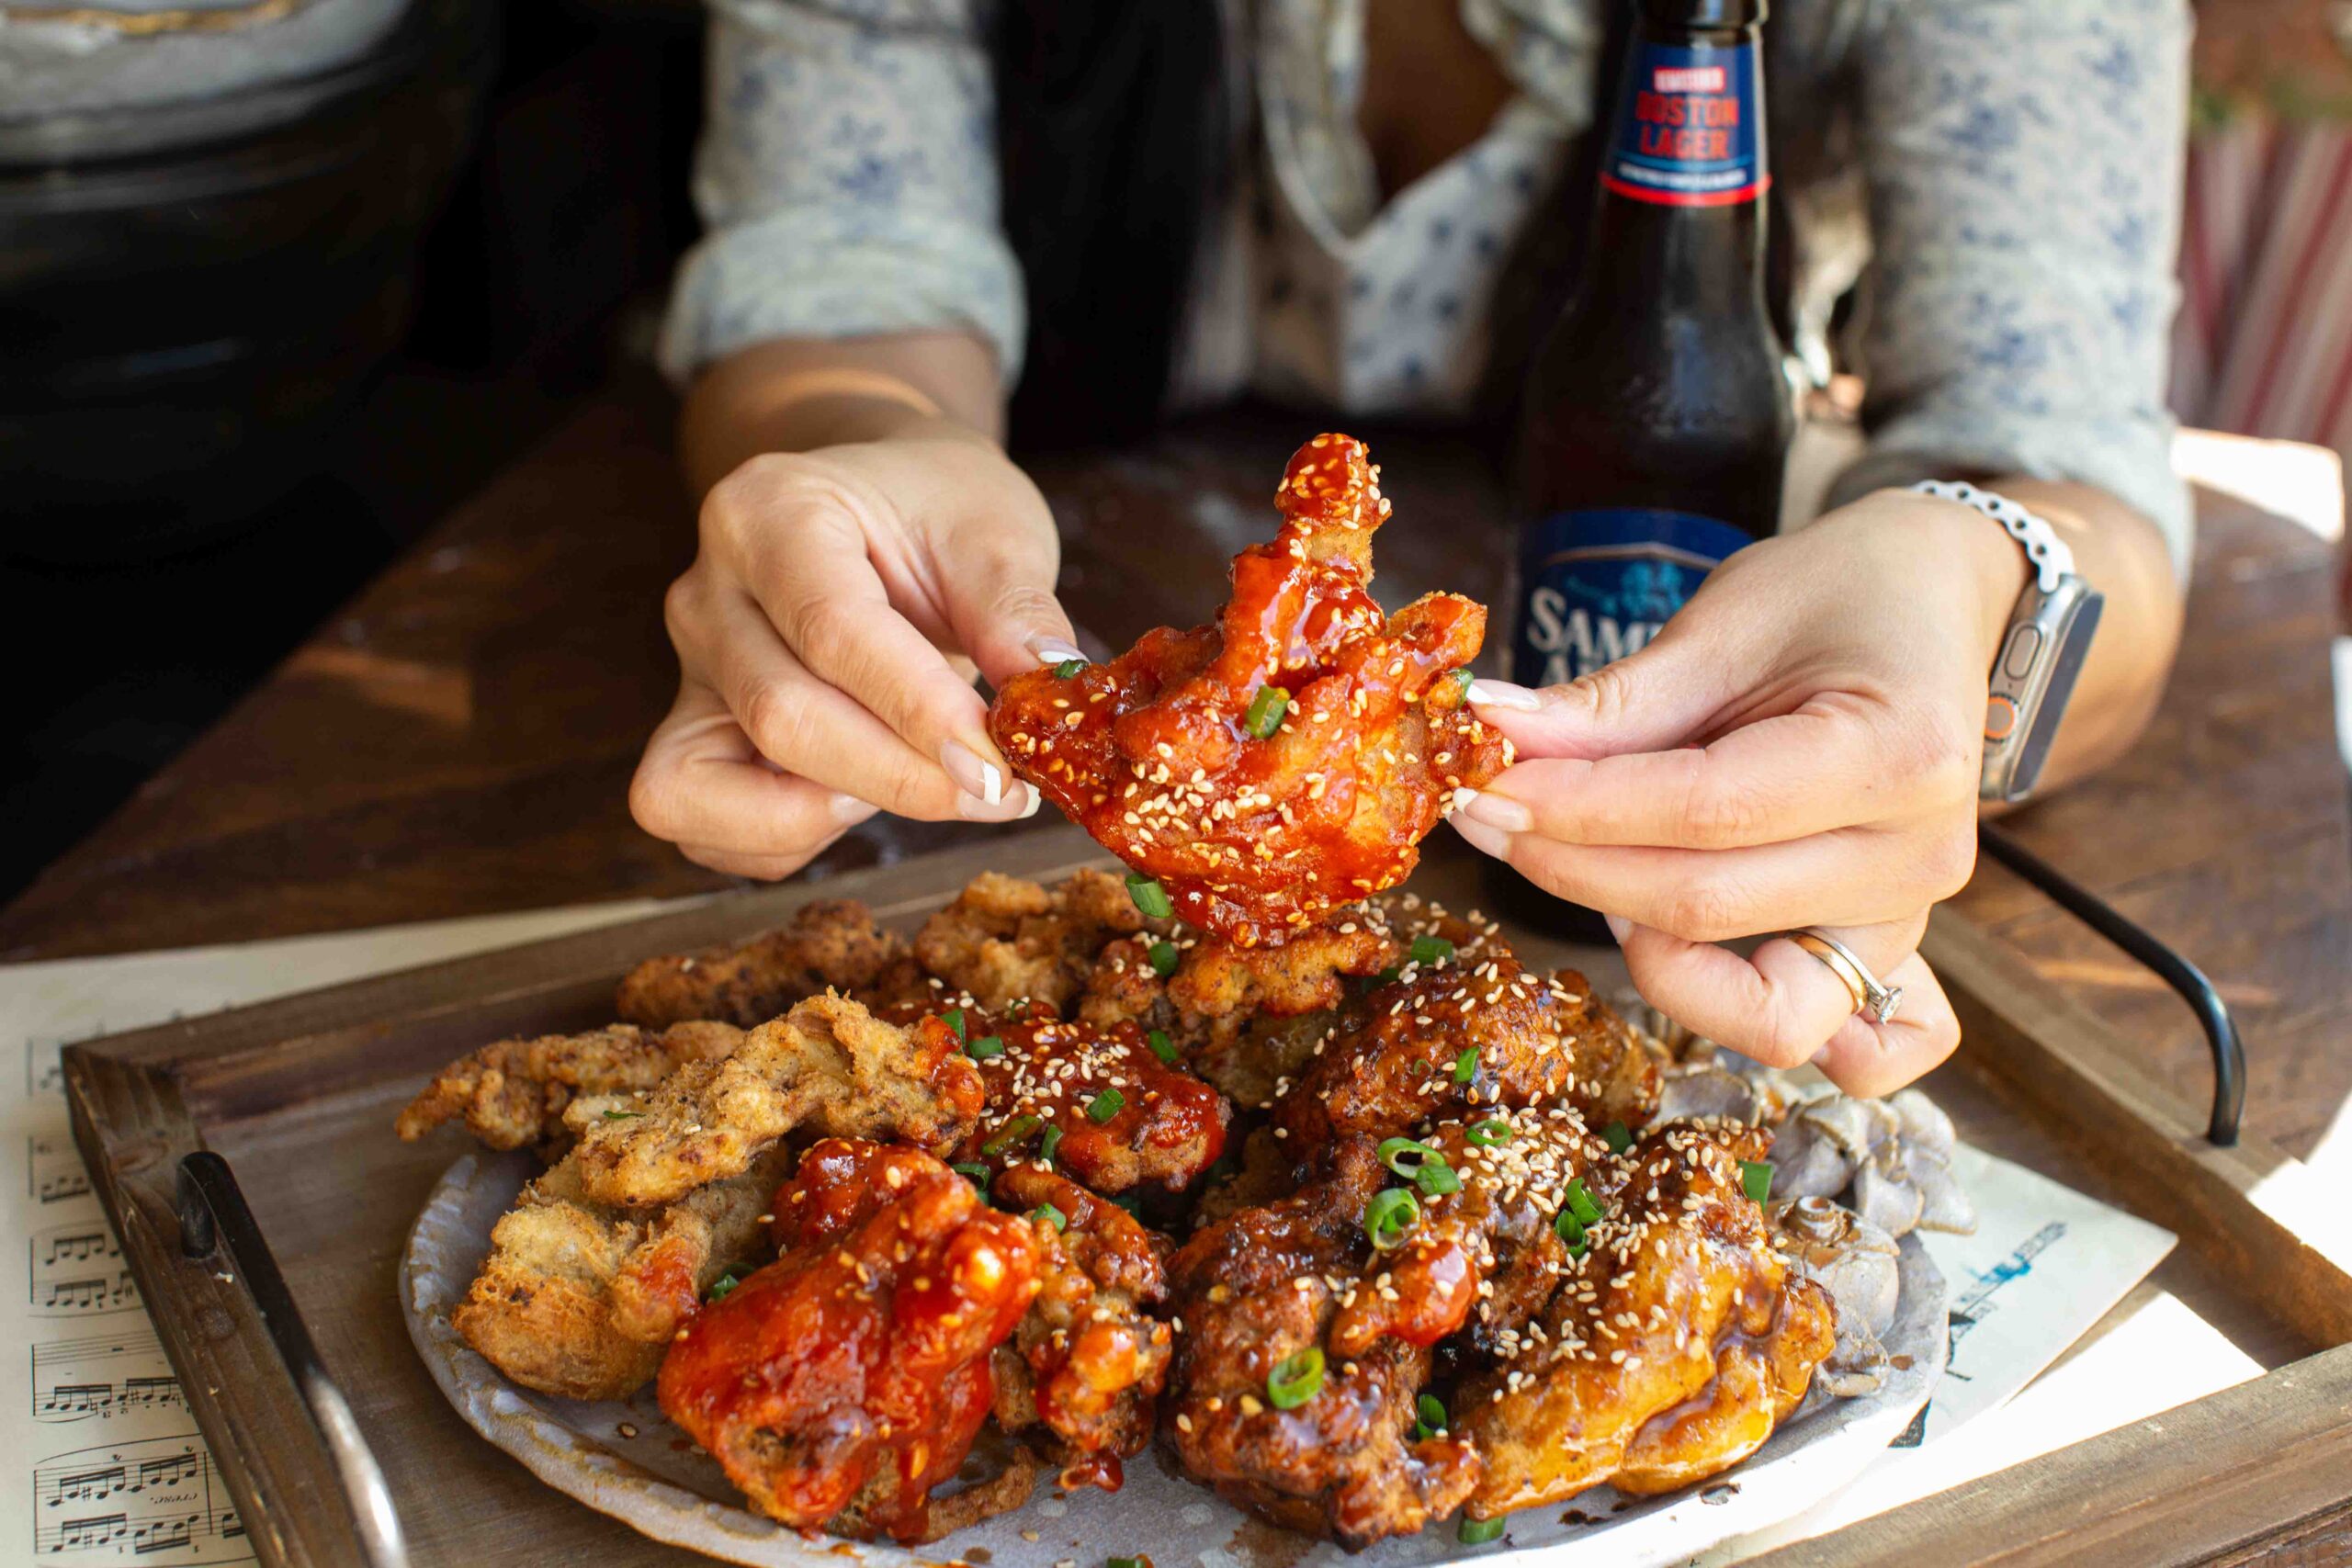
AMAZING Vegan Fried Chicken Recipe (2 Korean Sauces)
-

How to Make 4 Stunning Korean Kimbap Recipes.
-
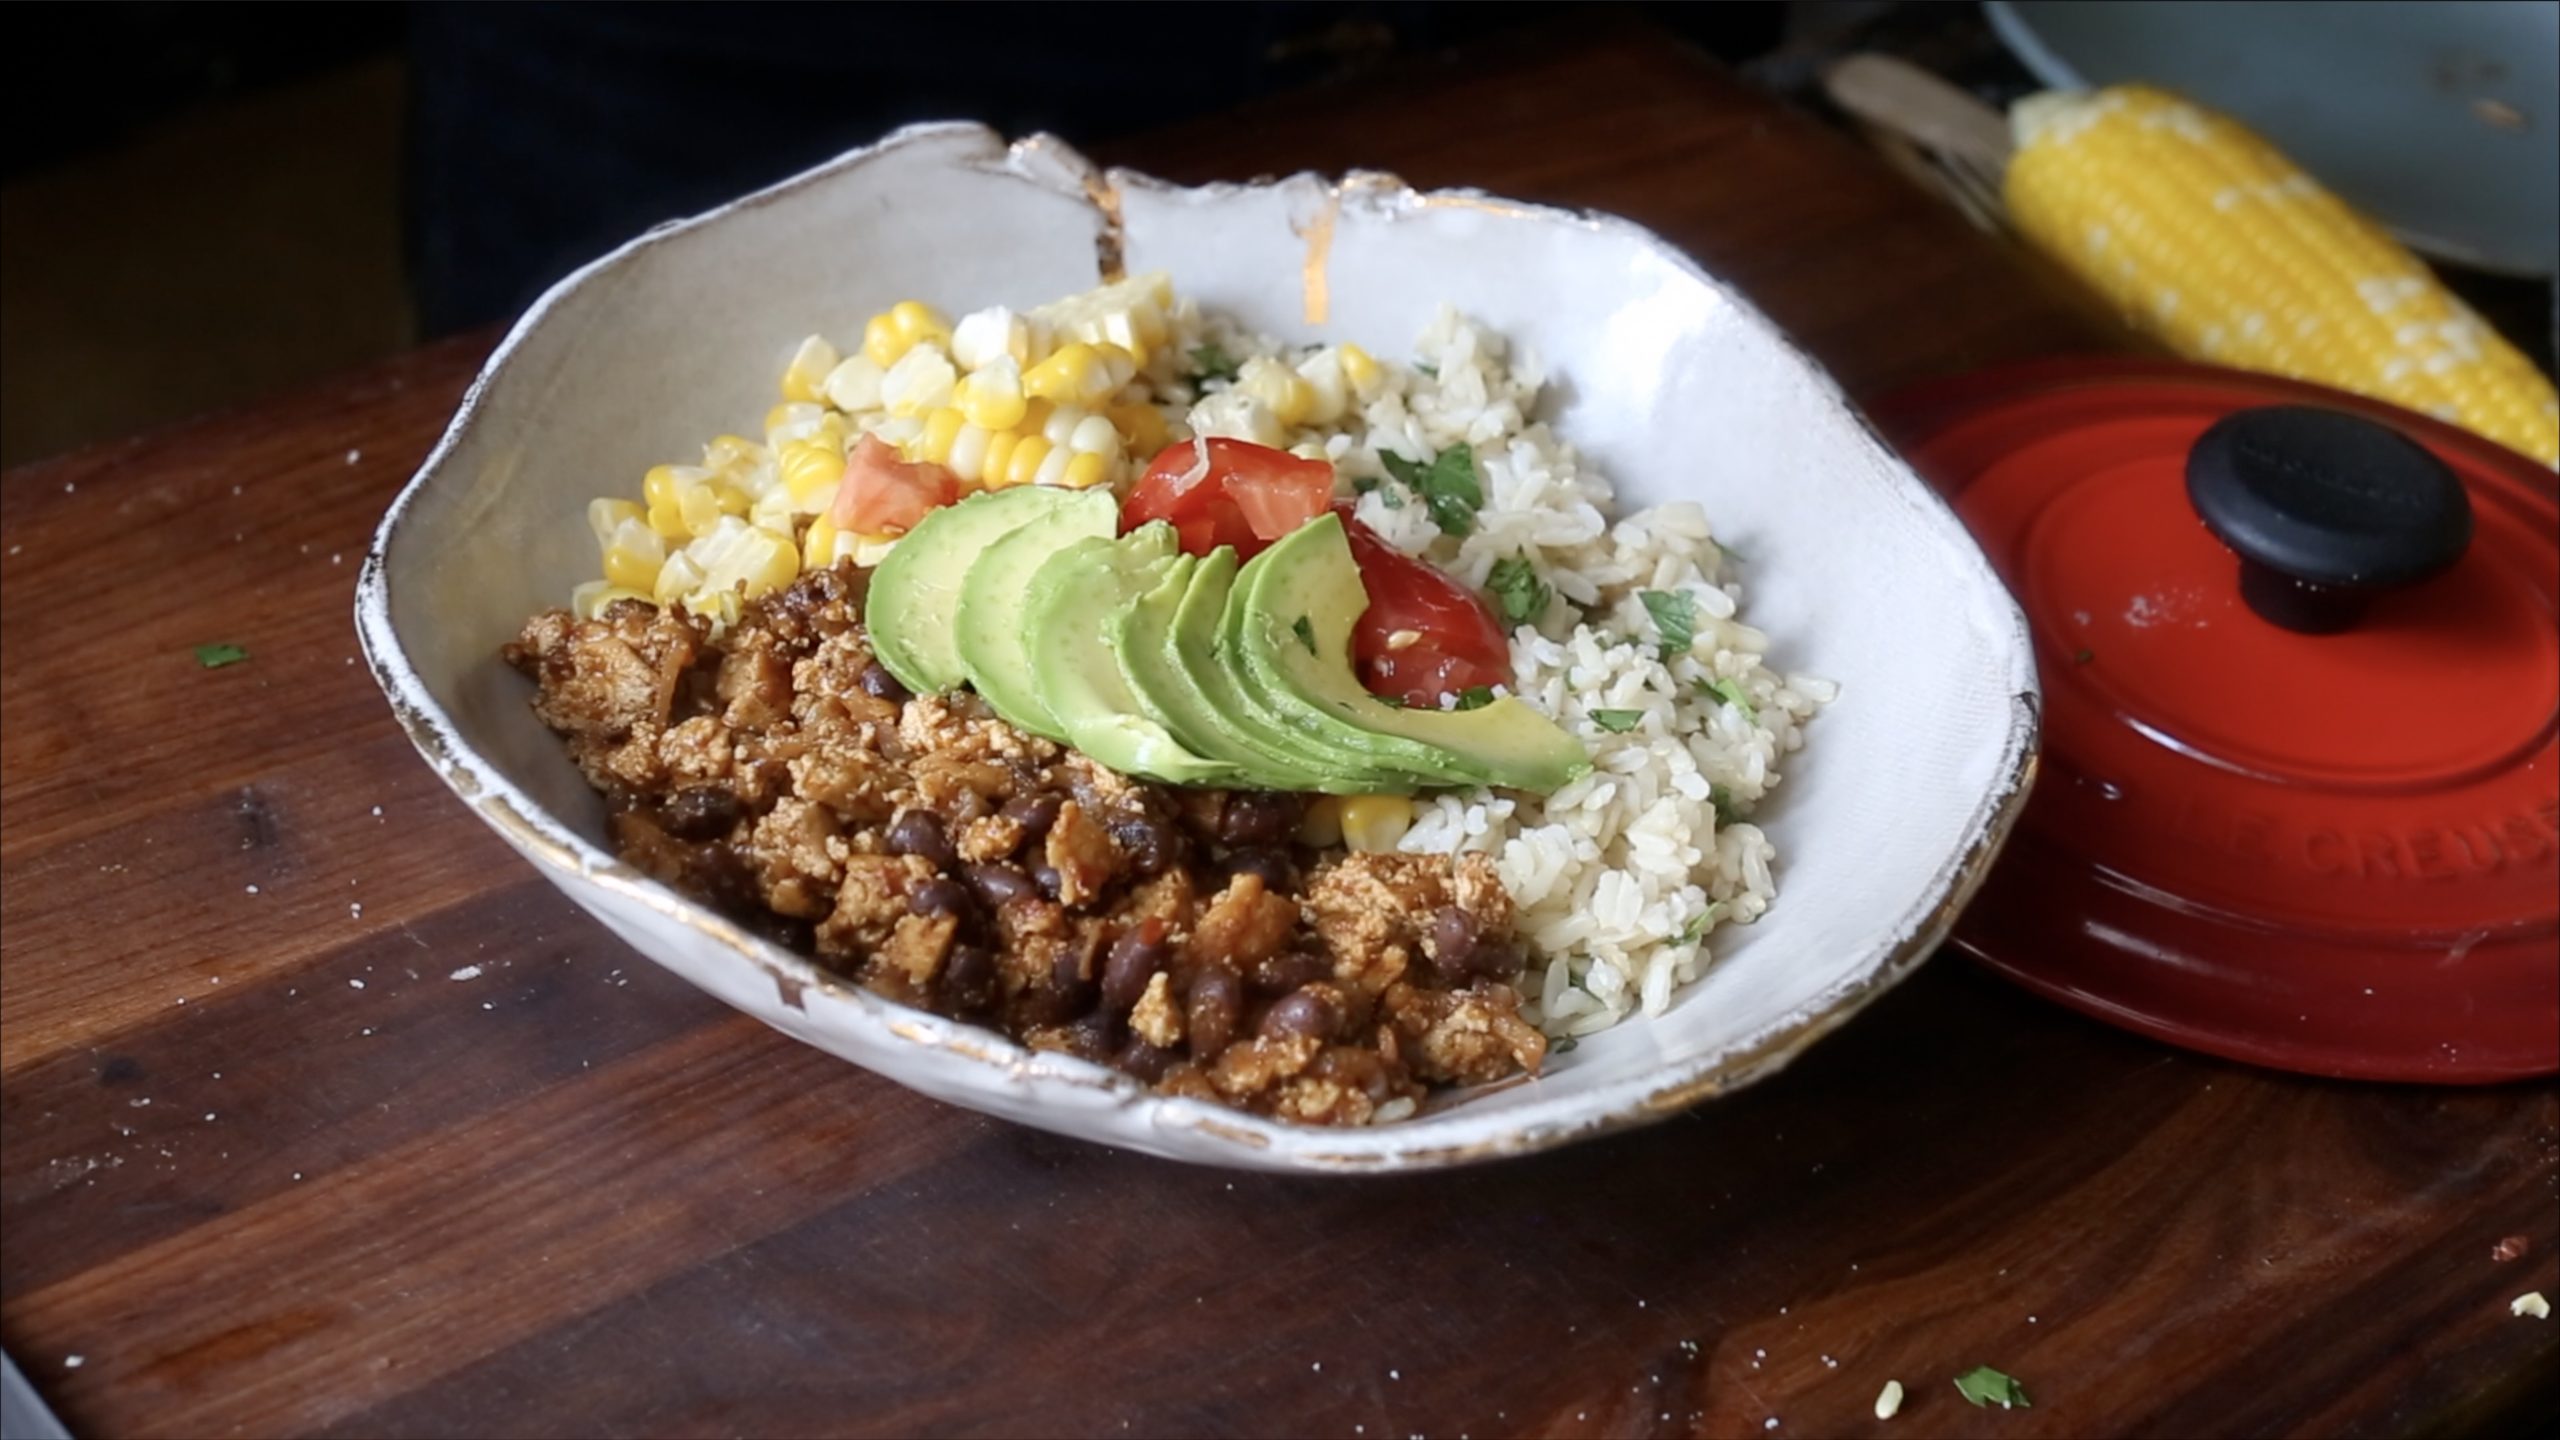
Better Than Chipotle Sofritas Bowl.
-
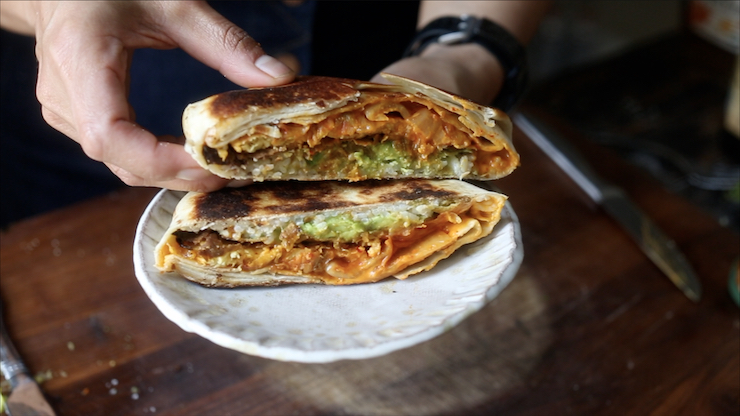
Kimchi Crunchwrap Supreme
-

Potato Onion Donuts
-

Rice Paper Stuffed Tteokbokki
-

Ricepop (Ricepaper) Tofu
-
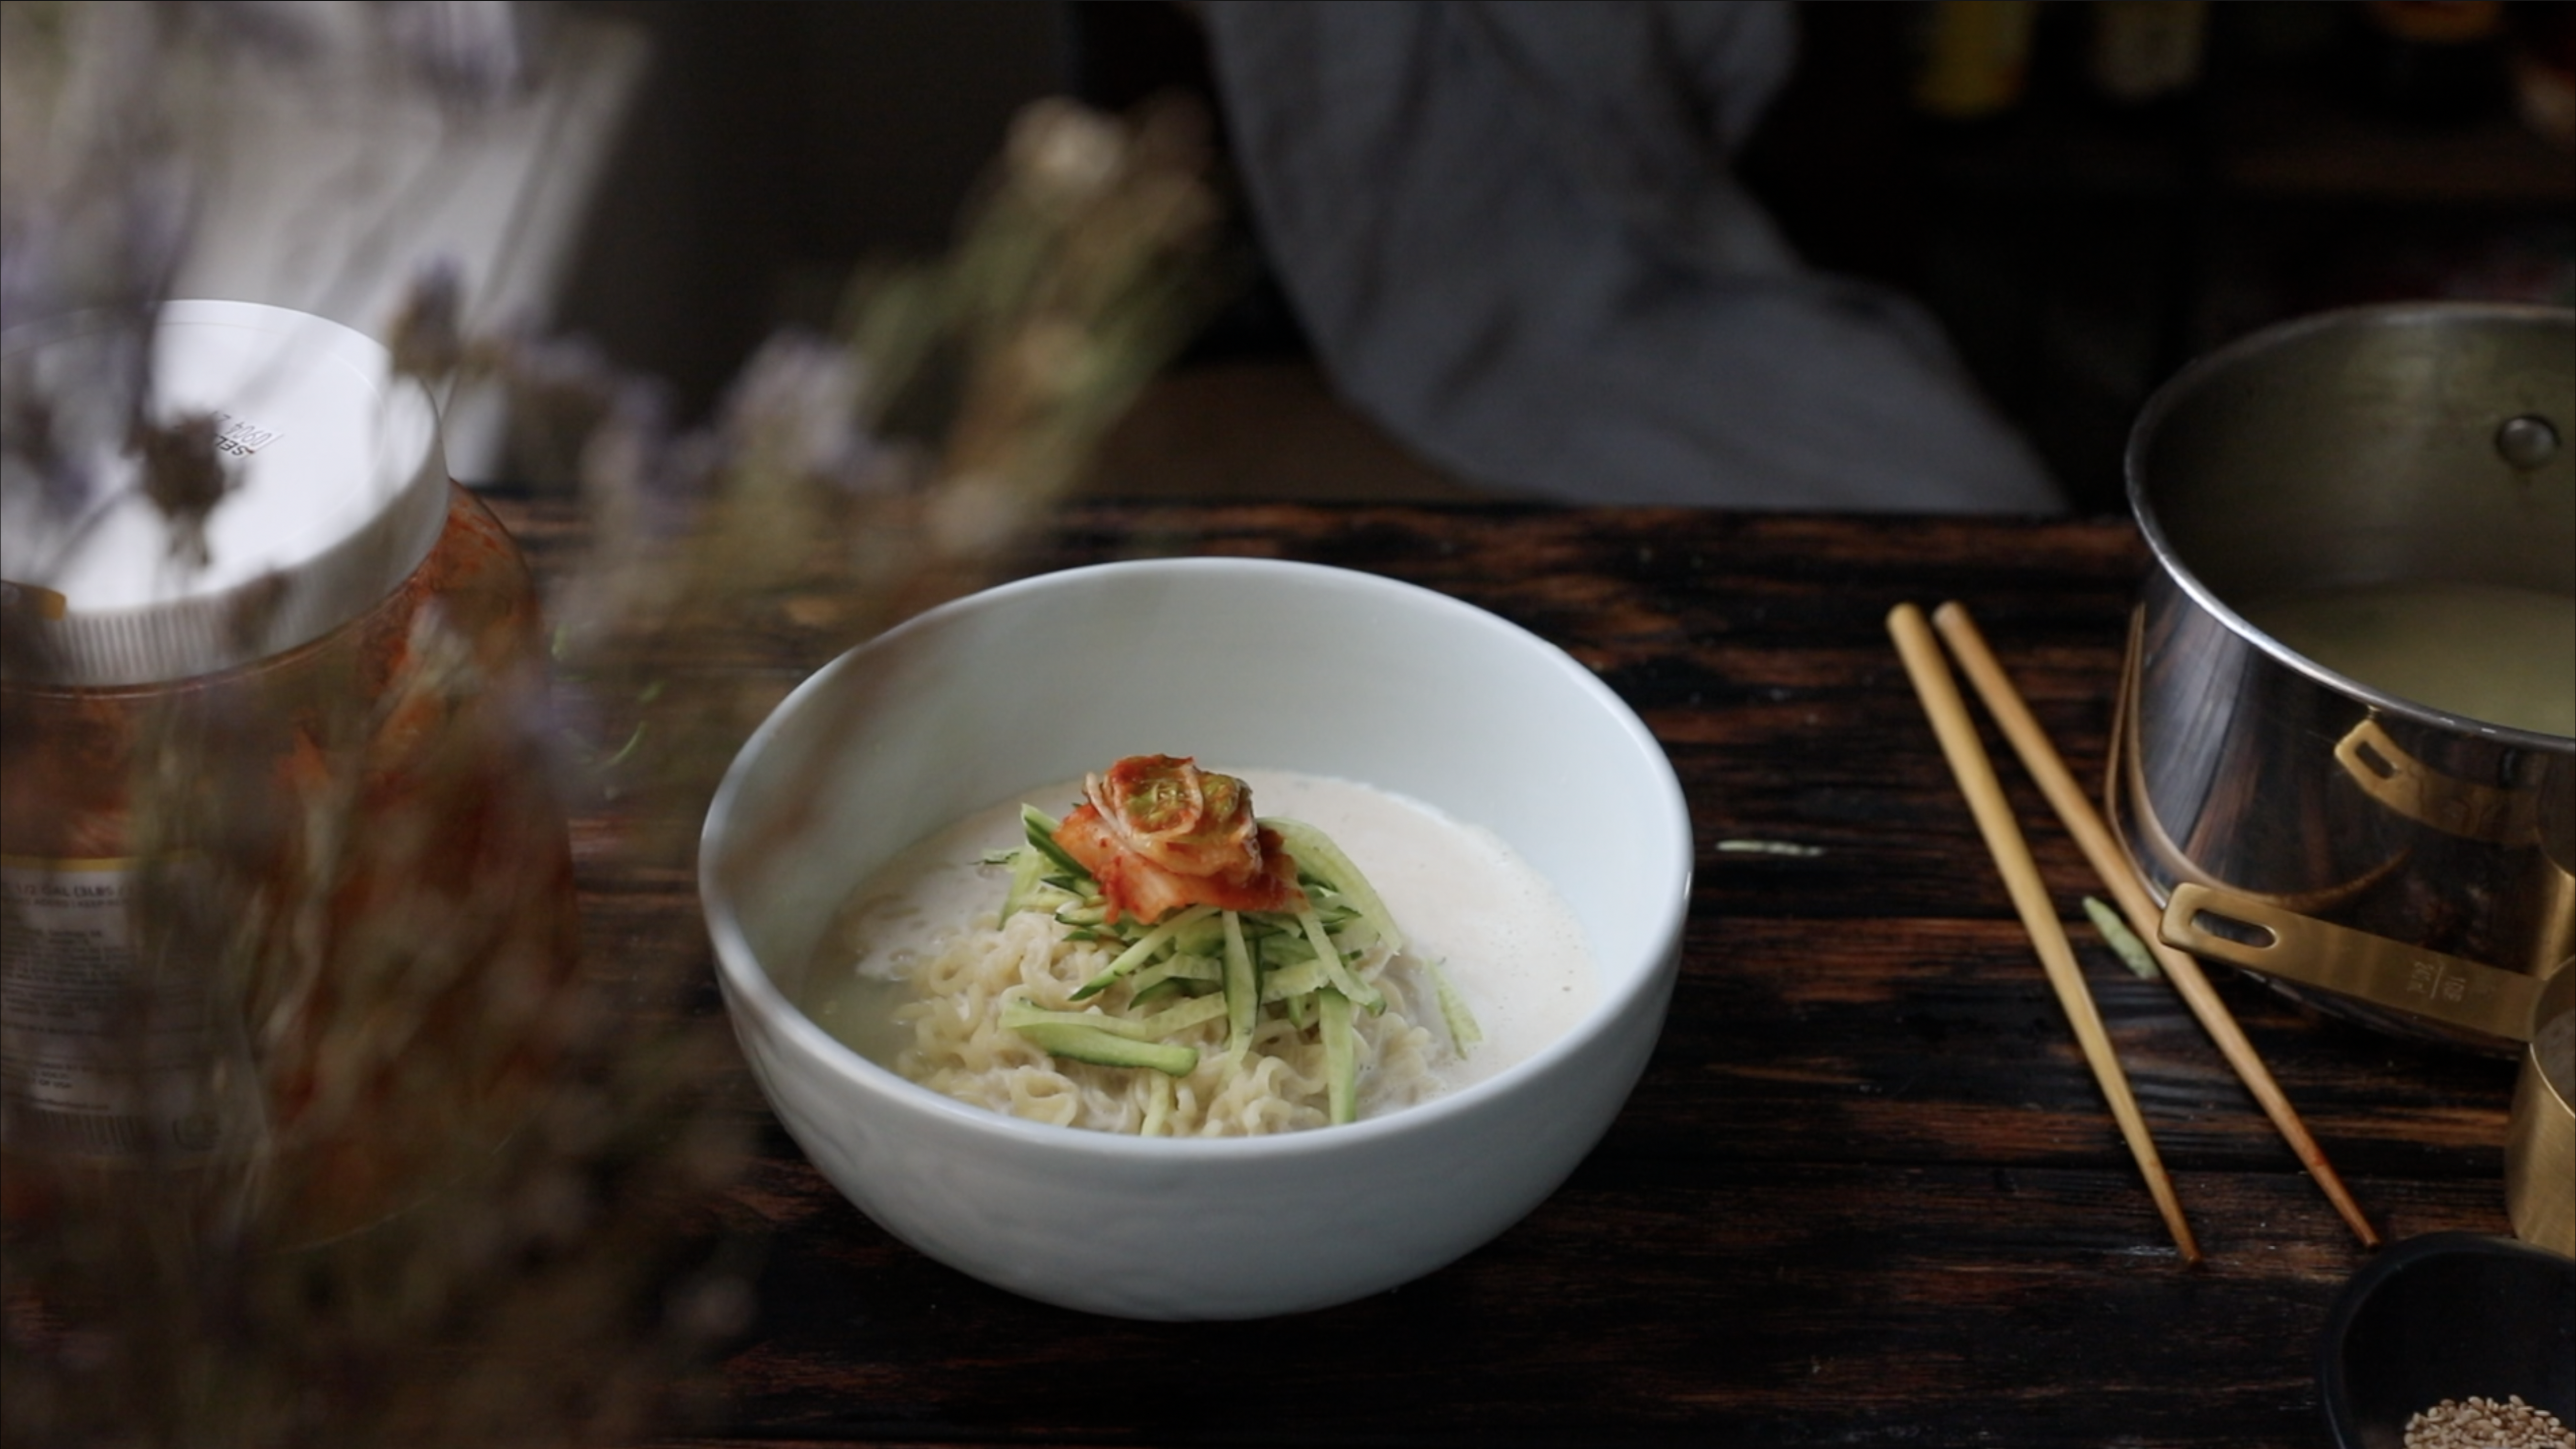
Healthy Ramen Noodles
-

Egg Sushi
-
Crunchy Gochujang Cauliflower
-

Best EVER Black Bean Burger with Slaw.
-
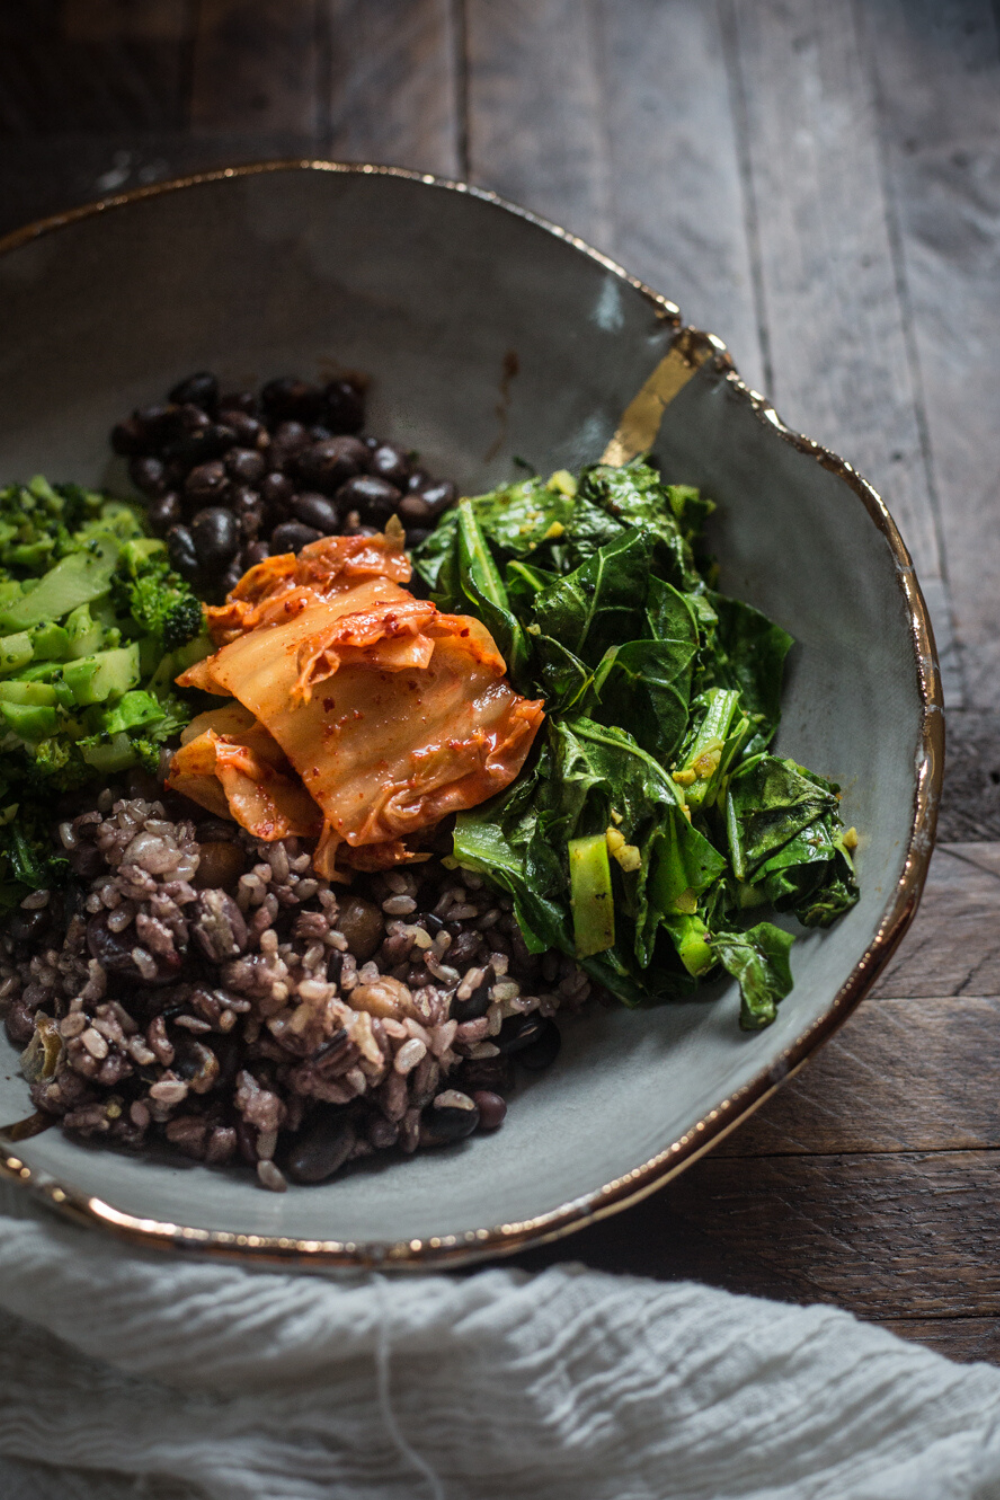
The Notorious “RBG”: Rice, Beans, and Greens
-

Chickpea Salad Sandwich
-

The Best Damn Bean Burger Evar. With Gochujang.
The TKV Podcast
The TKV Cookbook
© 2024 The Korean Vegan • Accessibility Statement • Privacy & Disclosure Policy
© 2024 The Korean Vegan • Accessibility Statement • Privacy Policy