


How to Make Delicious NY Style Bagels – Step by Step Guide.
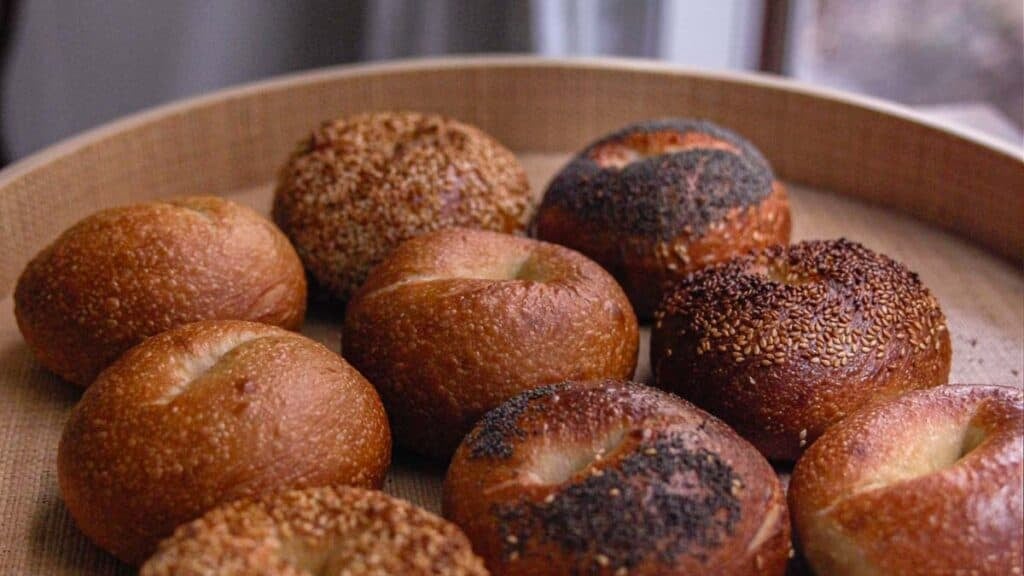
Chewy.
Flavorful.
BLISTERED.
These are the words that come to mind when I think of classic NY style bagels. Unfortunately, I live in the burbs of Los Angeles, where all of the above have eluded me for years. I finally got so annoyed, I decided to just make them my damn self. Thus ensued a three-month journey that involved tears, laughter, lots of bread, and even one case of indirect misogyny. This is a true blog post. It is not SEO’d. This isn’t even my recipe. It’s merely a documentation of everything I’ve learned about bagel-making so that you, too, can enjoy a delicious NY style bagel straight out of your own oven.
Let’s get into it!
Disclaimer: Some of the links in this post may be affiliate links for products I use and love. If you make a purchase after clicking one of those links, I may earn a small affiliate commission, perhaps enough to buy some extra gochujang or gochugaru 🙂
Why you shouldn’t “jump to recipe.”
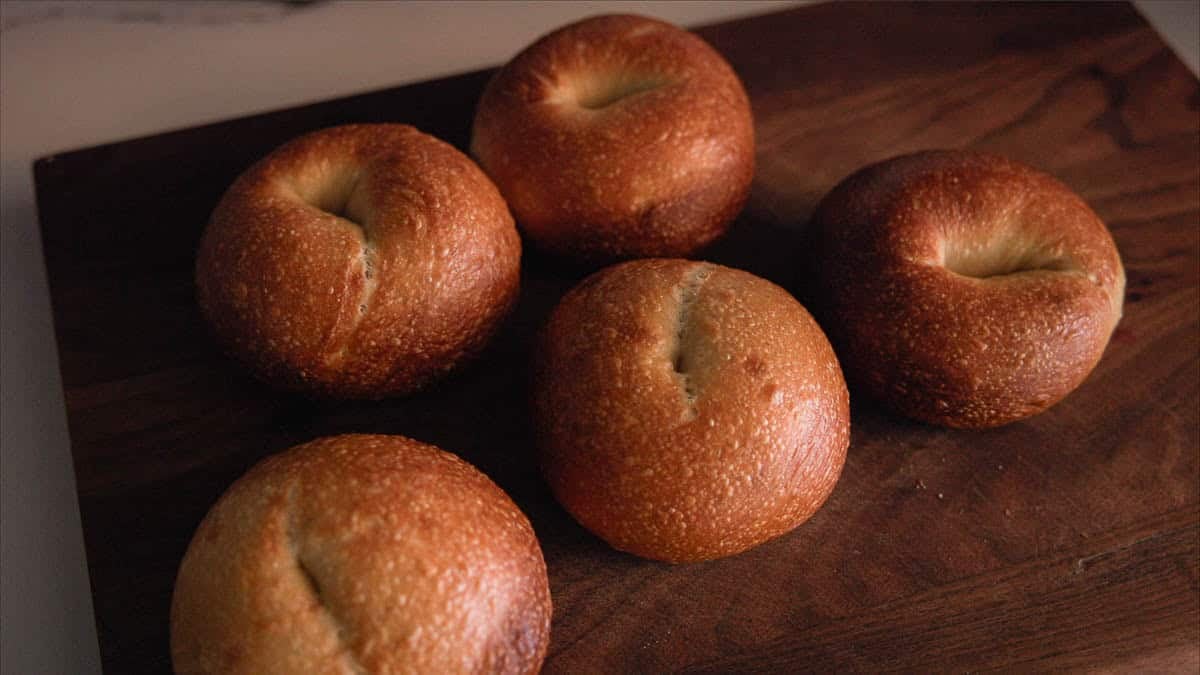
Because you’ll miss something crucial that’ll lead to less than perfect NY style bagels.
Unless you’re an expert bagel maker (which you’re probably not because if you were, you wouldn’t need this blog post), there are going to be all sorts of things in the “recipe” below that probably won’t make sense to you (e.g., “bench proof” v. “bulk proof” v. “cold proof”). Moreover, there are lots of judgment calls I make along the way that you might disagree with or want to challenge (e.g., “why don’t you administer a float test?”).
Finally, I made a MILLION mistakes during my bagel-making journey. I want you to learn from them, not make them. I’ve sprinkled in what I’ve learned throughout this blog post, but most importantly, I list out virtually every mistake I made that I want you to avoid in the FAQ section below. I strongly recommend you read through this section, at a minimum, before starting your own bagel-making journey!
Once Upon a Bagel In New York City…
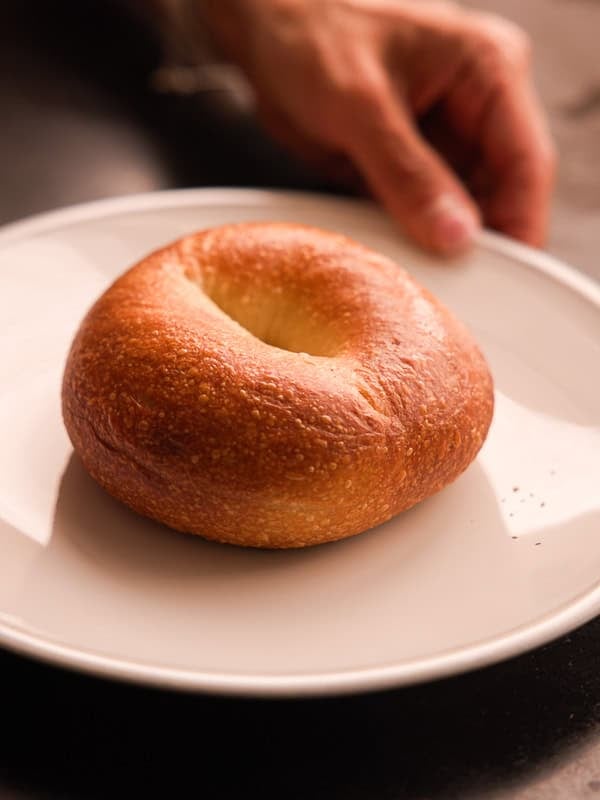
My husband used to live in New York. This was back in his concertizing days, fresh out of college. He was trying to “make it” as a pianist, and naturally, gravitated towards the American epicenter of classical music. One of his favorite breakfasts was a bagel sandwich from a nearby deli. When we went to NY together for the first time, we stopped at a cafe, Isadora’s, so that he could relive a small part of that time in his life.
The sandwich came wrapped in foil. The bagel was small and chewy—not like those monstrously oversized, pillowy things you find at a grocery store. Over the years, I’ve had many many bagels from delis throughout New York City. I soon discovered, though, that outside the upper east coast, it was near impossible to find that exact chew coupled with that perfect shade of amber. I lived in Chicago, and even there, I could not find a single bagel shop that satisfied my specifically developed palate.
The bagel is round and ubiquitous. There are many old civilizations that have enjoyed the stiff, yeasty bread shaped like a ring. Often thought of as a staple of Jewish cuisine, the word “bagel,” itself, was first recorded in 1610, in regulations of the Jewish Council in Krakow on who could send for bagels in celebration of a baby boy’s circumcision. Jewish immigrants brought the ringed bread to New York City, refining and perfecting a craft for the bustling streets of Brooklyn and beyond, in order to provide a chewy morsel for those who longed for home.
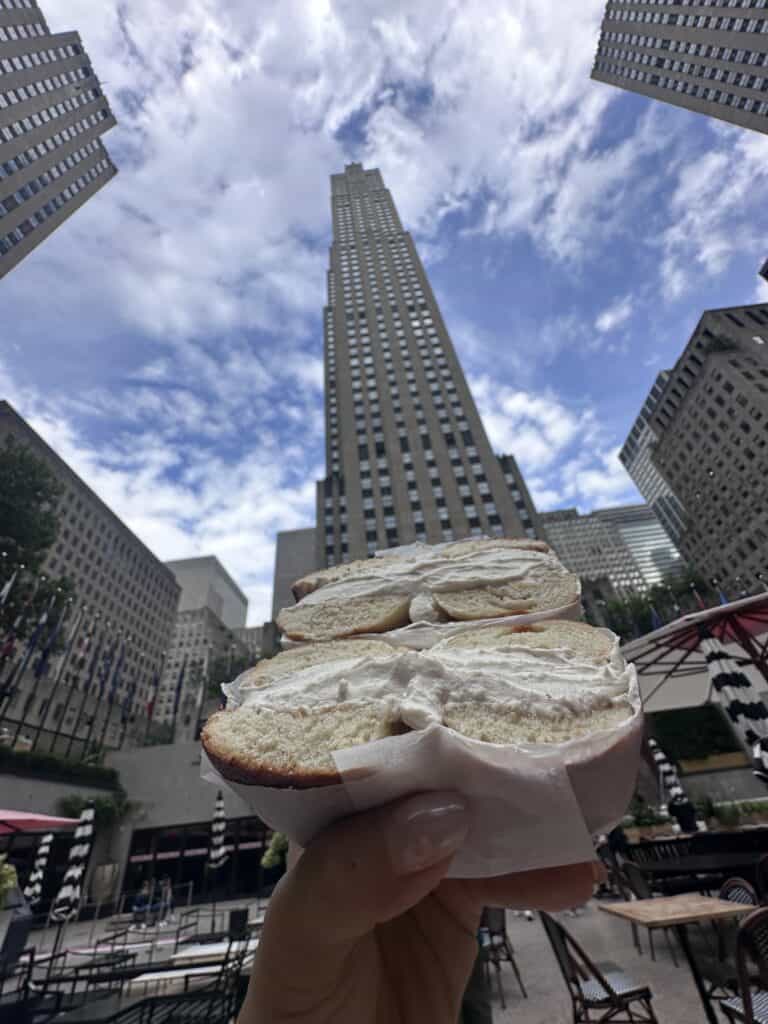
For decades, the craft of New York City bagel making was gatekept by a real life bagel guild: Union Local 338. I’m not making this up! Union Local 338 apportioned bagel bakers across the city to ensure uniform quality and precision, which is, in part, why the New York City bagel is still revered by many as the best bagel. In the 1960s, technology rendered the Union largely obsolete. With the ability to mass-scale bagel making to optimize its commercialization, bagels transformed, once again.
Not for the better, in my humble opinion.
I do not like grocery store bagels. In fact, I don’t really like any bagels but the classic New York style bagel. After moving to Los Angeles (right on the border of Ventura county, to be exact), I tried bagels from just about every bagel shop in my vicinity. They all sucked. Which is why I was determined to make the best replica I could (given the limitations of a home oven without access to local New York ingredients).
What Are The Hallmarks of a New York Style Bagel?
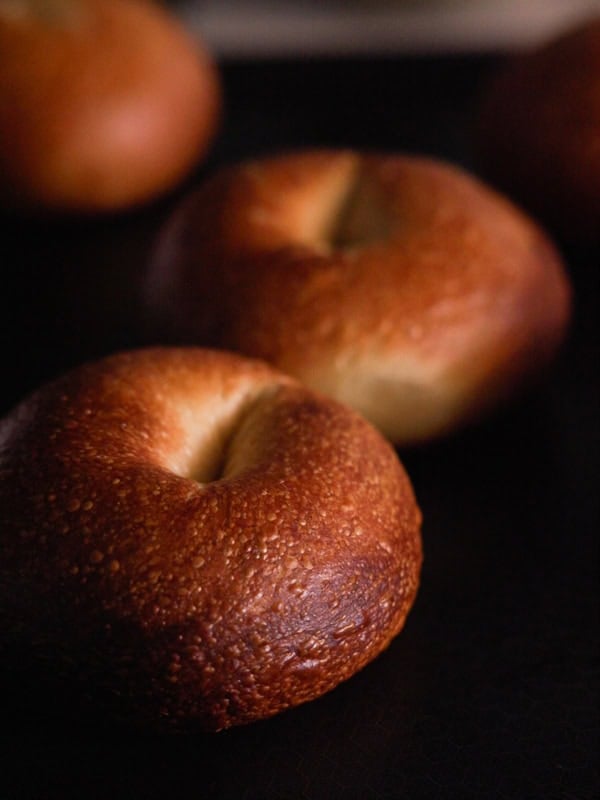
Ok, now that I’ve waxed poetic on NY style bagels, what are the hallmarks of said bagels?
- Brown, blistered, leathery, slightly crispy skin
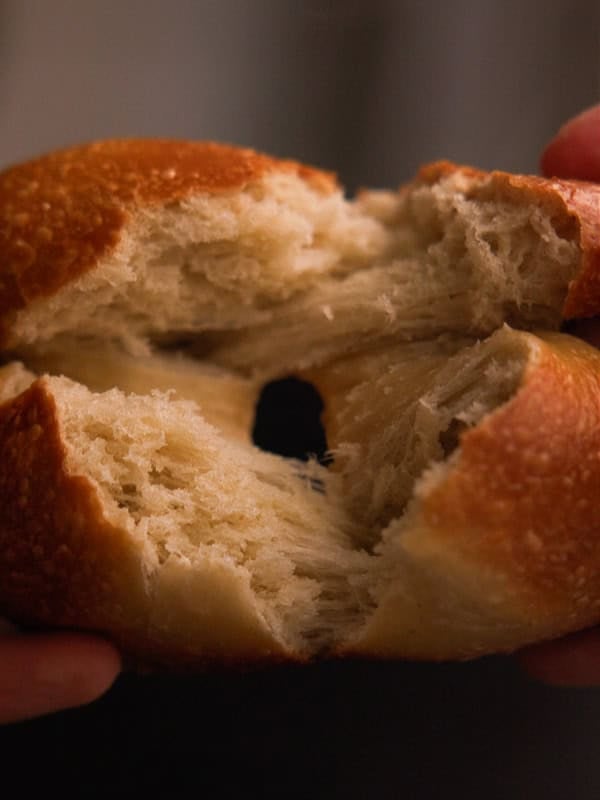
- Chewy, dense, tender inside
- Yeasty, slightly sweet, fermented flavor
There are a handful of universal points to the preparation in order to achieve the perfect NY style bagels:
- Made with yeast, not a starter (like sourdough)
- High protein/gluten flour with malt (in powder or syrup form)
- Cold proofed for extended periods of time (24 to 48 hours)
- Boiled in water treated with barley malt prior to baking
Now, can you make “authentic” NY style bagels without NY water? This is a point of contention between and among NY bagel-makers themselves. Some swear that the unique flavor and texture of NY style bagels hail from the inclusion of New York’s soft water–which, according to them, promotes optimal gluten formation. Others have claimed that this is all crap LOL. You can read a little more about that here.
CARDINAL RULE OF BAGEL MAKING: It is better to underproof than overproof your bagels.
I’m going to repeat that here:
It is better to underproof than overproof your bagels.
Say it again with me:
It is better to underproof than overproof your bagels.
This is THE CARDINAL RULE of bagel making. The biggest and most frequent bagel making error is overproofing your dough. Overproofed bagels are flat, deflated, and taste like cardboard. I do not want this for you. I would like for you to never have to experience this nightmare. I have had more deflated, hockey-puck bagels in my life than I could wish on my worst enemy (ok maybe not that). You may not understand what I mean as you read these words (you will), but repeat them again:
It is better to underproof than overproof your bagels.
If necessary, write this down on a post-it note and stick it on your kitchen counter every time you make these bagels.
Ok, we can now move on to making the actual NY style bagels.
Special Equipment for Making NY Style bagels.
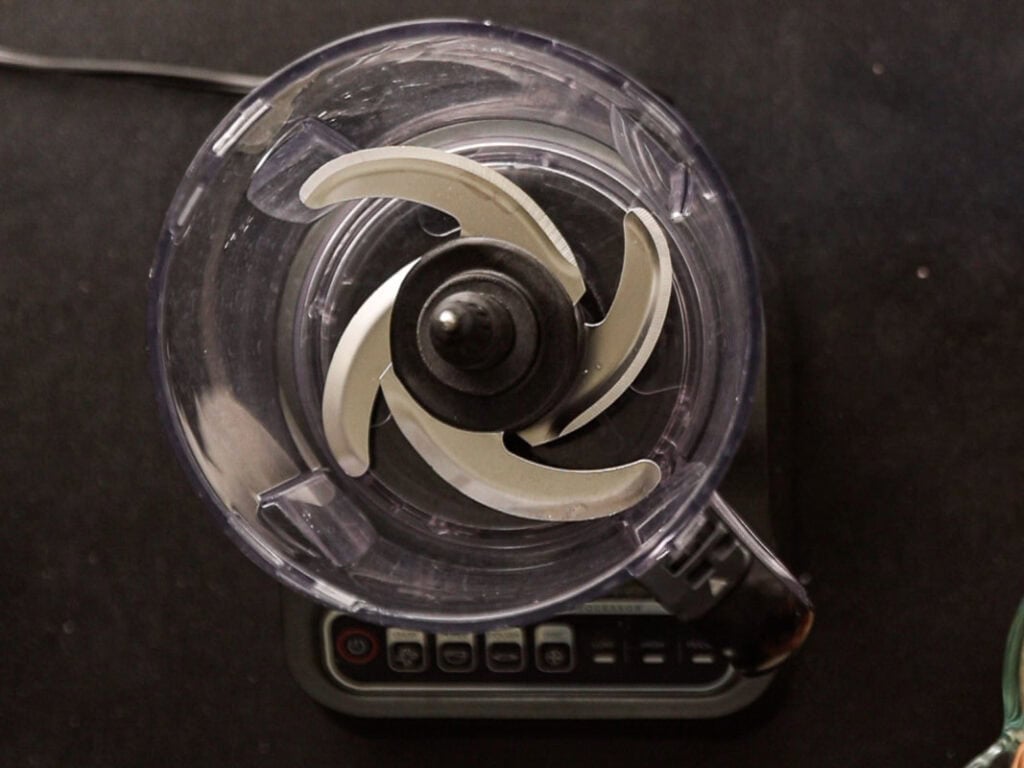
Ok, I usually don’t keep with special equipment, but as is the case with making kimchi, there are a few things that will make your life infinitely easier when making NY style bagels:
Ingredient Scale.
Unless you are a member of Union Local 338 (the bagel making guild), it will be very hard for you to measure out the ingredients and divvy up the bagel dough for your NY style bagels without a scale. Of all the recipes I’ve ever made, this is the most precise. Even ONE GRAM more of yeast, for example, can risk overproofing your bagel dough (see Cardinal Rule of Bagel Making above).
Food Processor.
I know, I know. Most people use stand-mixers. But, I’ve made these NY style bagels with both a stand-mixer (hook attachment) and a food-processor (blades) and the latter has worked out FAR BETTER for me. In fact, my particular food processor (the Ninja Professional Plus Food Processor) has a “dough” option, so there is clearly a precedent for kneading dough using a food processor. Using the food processor yielded much stronger gluten-formation in far less time (only 2 minutes compared to up to 15 minutes in my KitchenAid). The dough was supple and easy to shape, as compared to dough from a stand-mixer.
Why do I use a food processor? Well, I got the idea from Serious Eats (one of my favorite food blogs on the planet). I don’t really like any of the recipe, itself (I wanted to avoid any recipes using a starter), but I was intrigued by the idea that food processed dough enhanced gluten formation. Plus, it takes less time, which means less heat, which means lower dough temperature, which means LESS RISK OF OVERPROOFING (see Cardinal Rule of Bagel Making above).
Can you still use a stand-mixer, or even knead by hand? Yes. It’ll just take a very long time and may even require you to incorporate rests in between (so as to not overheat the dough).
Parchment Paper.
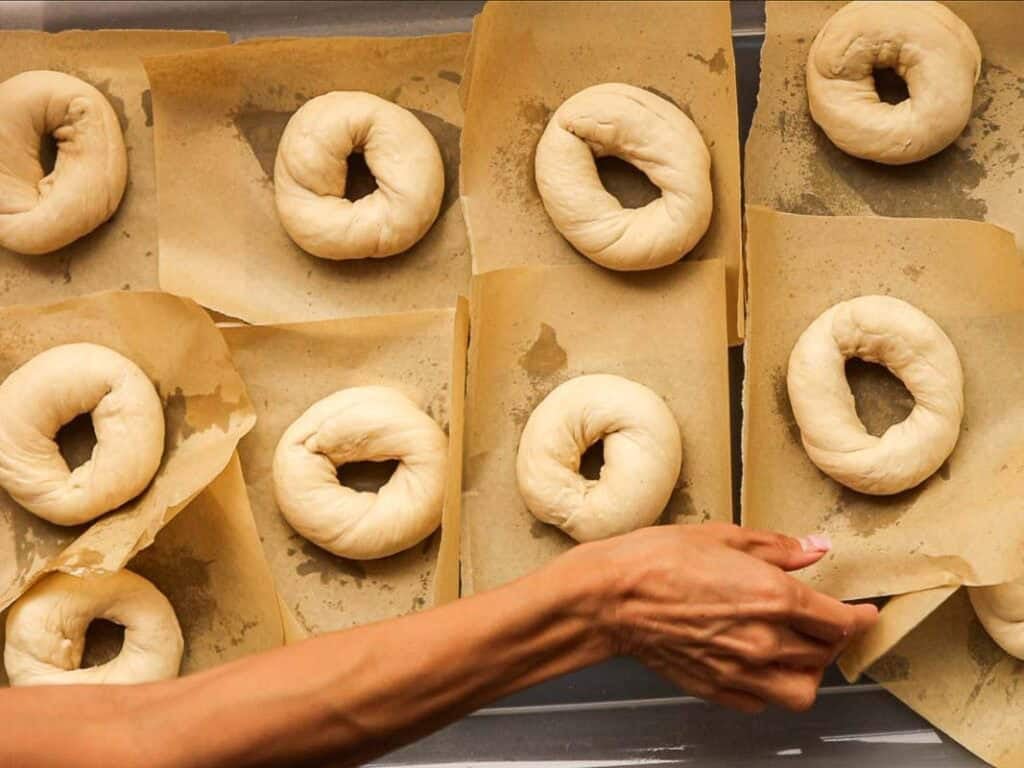
Parchment paper is non-negotiable for these NY style bagels. What you don’t want to do is spend all that time shaping them into perfect rings and then destroy all your hard work by overhandling them when it’s time to boil them! I did this the first few times and yup—I ended up manhandling them and they DEFLATED on me!! Don’t make my mistake, get yourself some parchment paper!
Large Trays with Lids.
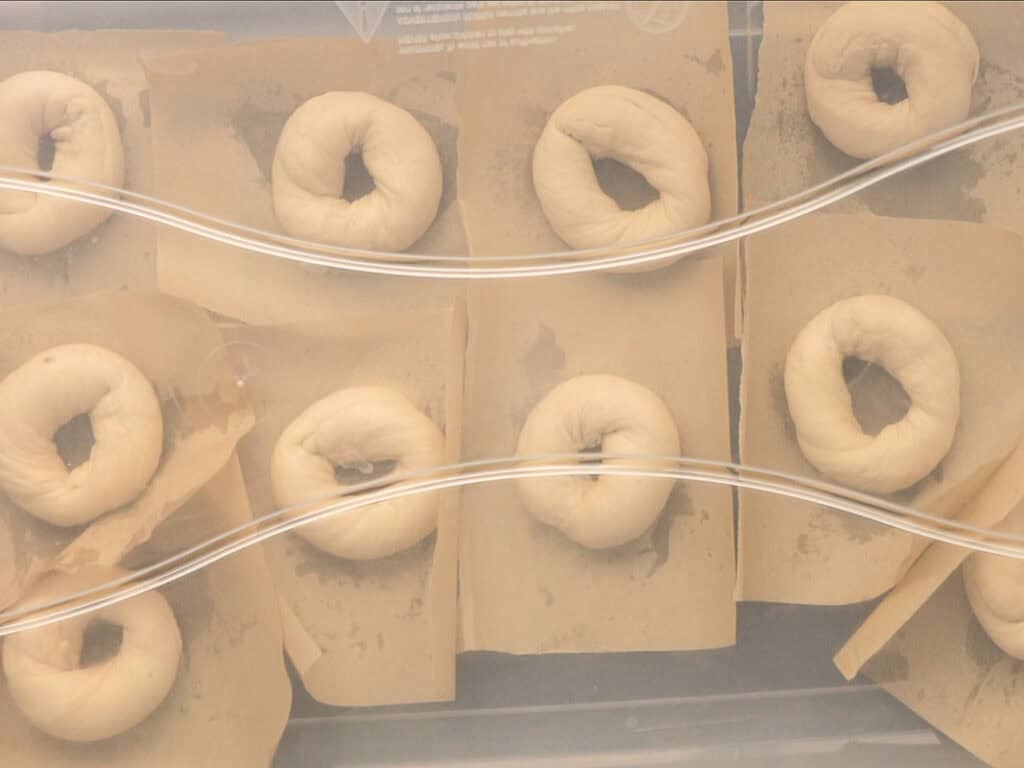
Again, when you overhandle your bagels or they proof too close to each other (and thus rub up against each other), you risk deflation. Again, this was a big mistake I made early on in my bagel making adventures. I thought it would be cute if they proofed right next to each other, but what ended up happening was when it came time to bake them, they ripped each other!!! And then poof–all that beautiful proofing disappeared 😫
Another mistake I made? I tried covering the proofing bagels with plastic wrap, plastic bags, or other covers. These also ripped my beautifully shaped bagels! Even when I sprayed them down with cooking spray!
I didn’t have a large enough baking sheet to comfortably accommodate all ten of my bagels, so I actually got a massive storage bin (like the kind you use for storing winter clothes, lol) and lined that with parchment paper. The added benefit to this was that it had a lid–one that was high enough to accommodate proofing.
Whatever you decide to use, make sure it has plenty of space and that whatever you use to cover your bagels won’t stick to your bagels! Something like this should do the trick (if you get two of them)!
Bagel Boards.
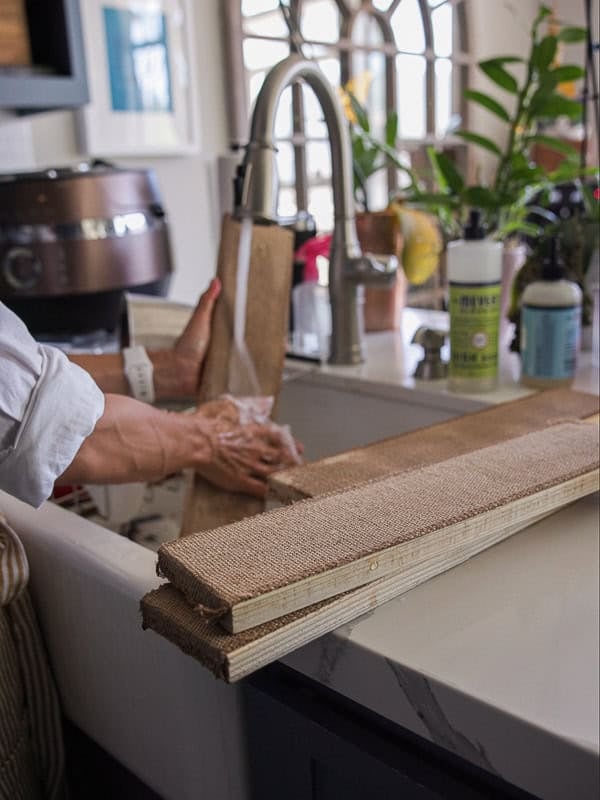
What the heck are bagel boards? That was the question I asked myself the first time I saw this phrase in all my Redditing. Bagel boards, though, are a traditional component of baking NY style bagels. They are planks of solid wood, usually about a foot to a foot-and-a-half long, covered in burlap. Soaked before placing in the oven, they are used to prevent burning the bagels in a scorching oven.
I didn’t think bagel boards would be necessary at first. But in my research, I learned they helped to guard against overcooking your bagels while also trying to maximize their height. The latter is achieved by jacking up the temperature to the hottest levels (500° F), but if the wet dough is subjected to the hot baking surface (I use a pizza pan or sheet pan), it will stick. The soaked bagel boards prevent sticking and offer a gentler alternative, allowing the bagel to get that initial “poof” in the hot oven without the sear. The bagel boards also facilitate the “flip” without handling the bagels themselves (to guard against deflation).
That said, do you absolutely NEED bagel boards? No. You can always line your baking sheet with parchment paper and/or semolina flour and flip them yourself using tongs (though, again, using tongs on your bagels does increase the risk of deflation or otherwise misshapen bagels).
Pizza Pan AND Sheet Pan.
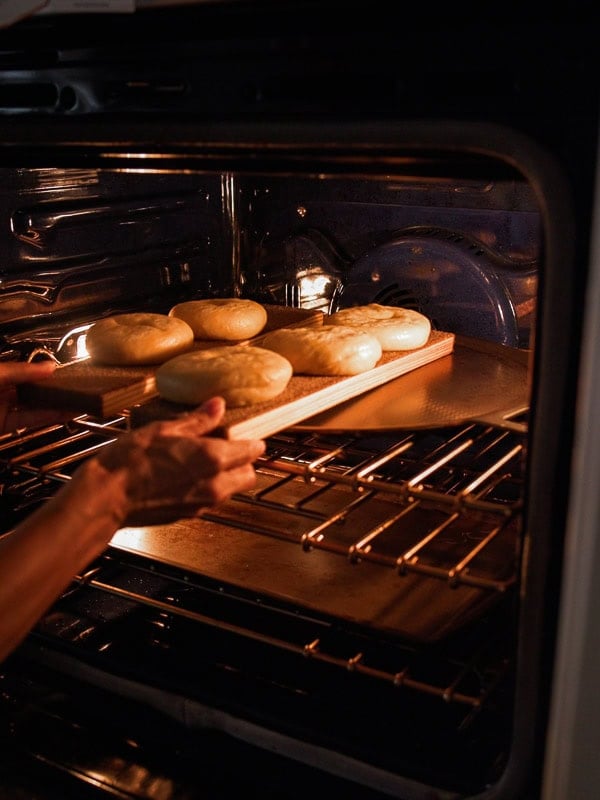
Lots of pros use a stone or steel pizza pan when making NY style bagels. I use a steel pizza pan (this seems to be the preference for most hardcore Bagel Redditors). However, I’ve also used an ordinary steel sheet pan (the kind I roast veggies on) and found little discernible difference. Regardless of which you use, you’ll need one pan to bake your bagels on and another to place on the bottom tray of your oven. This second pan blocks some of the heat wafting up towards your baking pan and prevents the bottoms of your NY style bagels from burning.
How to Read Bagel Recipes.
Most bagel recipes will give you a list of ingredients with percentages next to them:
High-gluten flour + malt powder: 100%
Water: 50%
Yeast: .5%
Salt: 2.5%
Brown sugar: 5%
Neutral oil: 3.0%
The amount of flour will be your base, your 100%. Every other number will be a percentage of that measurement. So, if you have 400 grams of flour, your water will be 200 grams. If you have 800 grams of flour, your water will be 400 grams and so on and so forth.
Why? Mainly for two reasons: First, because many people want to be able to scale the recipe based upon need. Some may need, for example, only 8 bagels. Others might need 80. The idea is that by providing just the ratio of ingredients, in lieu of actual measurements, you can tailor the recipe accordingly. The second reason? Because bread making is largely a question of hydration. How much liquid to dry? Hydration will affect proofing time, gluten formation, and final texture.
For your convenience, I’m basing this recipe on 800 grams of high-gluten flour + malt powder (I’ll explain below).
KEY INGREDIENTS AND NOTES ON SUBSTITUTIONs For NY Style Bagels.
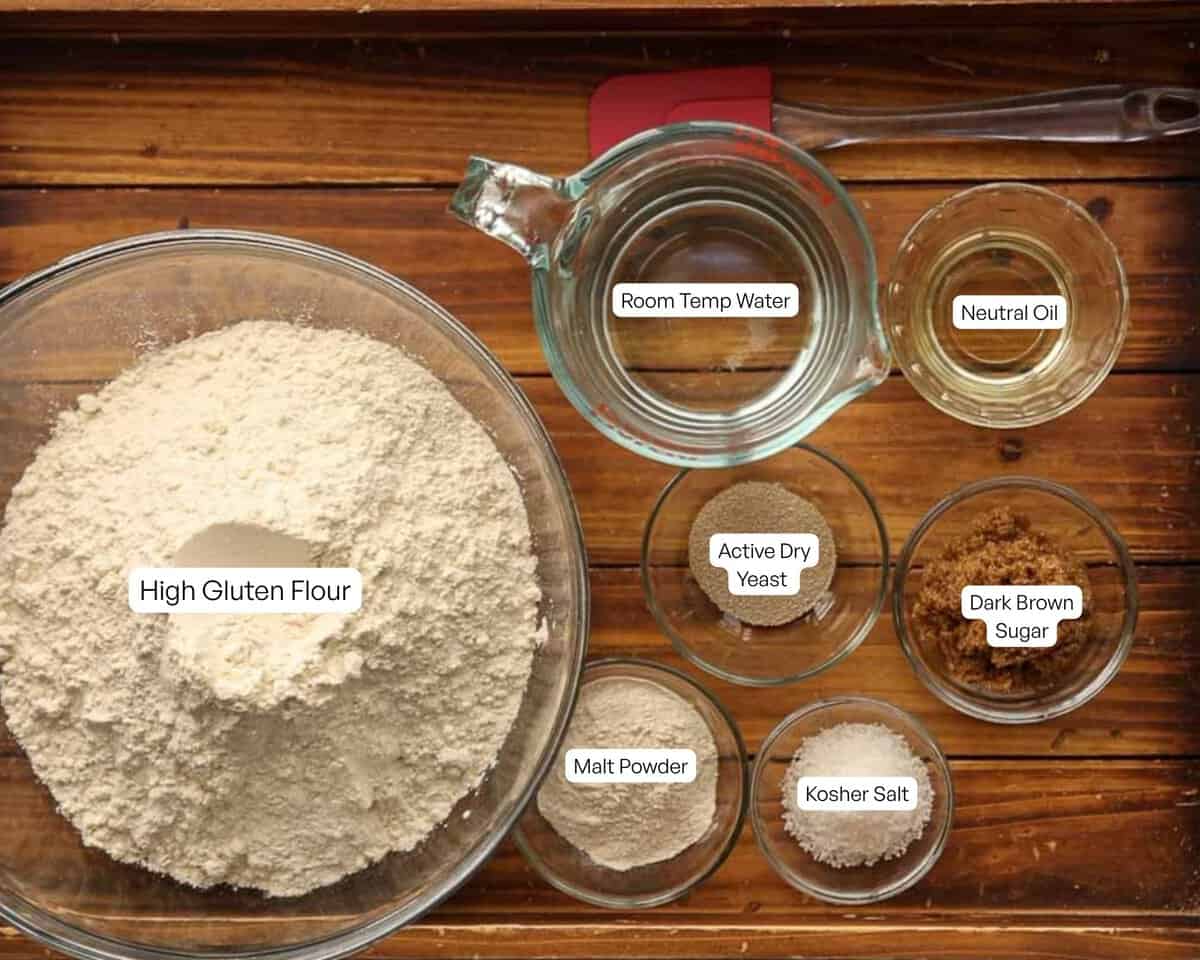
The following list of ingredients for these NY style bagels come directly from this recipe I found on Reddit. I tweaked the methodology, but the ingredient list and portions are exactly the same, with one exception:
Active Dry Yeast.
I have seen multiple successful recipes for NY style bagels using either active dry or instant (rapid rise) yeast, including the one I just linked to (which uses instant). But I’ll be totally transparent–every time I’ve used instant yeast, my bagels overproofed (see Cardinal Rule of Bagel Making above). The reason for this is pretty clear–instant yeast activates “instantly,” and thus your dough will begin proofing immediately. Active dry yeast provides for a slower fermentation, which I found much easier to deal with for making bagels–especially since you’ll be placing them in the fridge for at least 24 hours.
If all you have is instant yeast, I would (a) shave off a gram, (b) stick them in the fridge right after shaping (no bench proof), and (c) cold proof for no more than 24 hours.
Room Temp Water.
Usually, when I’m making a bread recipe, I advise people to use water at a specific temperature range (around 110° F). For these NY style bagels, I recommend using room temp water (or even slightly colder). Again, the idea is to provide for a longer fermentation period without overproofing your dough. The longer you can delay the over-activation of your yeast, the better. Using cooler water will help with that.
High-Gluten Flour.
Sorry, gluten-free friends! You cannot make NY style bagels without gluten—at least not in the way the Bagel Guild did! Now what is a high-gluten flour? High-gluten flour, also known as high protein flour, is a wheat flour milled from hard red spring wheat and typically contains anywhere from 13.5% to 15.5% protein. For point of reference, your typical bread flour contains about 12% to 13 % protein. The higher protein content is what’s going to facilitate that dense, chewy texture—one of the hallmarks of NY style bagels.
King Arthur makes a great high-gluten flour that’s perfect for making bagels. Other reliable brands for bagel making include Ardent Mills Kyrol and General Mills All Trumps. If all you have is bread flour, you can make this recipe using that. You will not achieve the same texture, though it’ll still taste really good!
Diastastic Malt Powder.
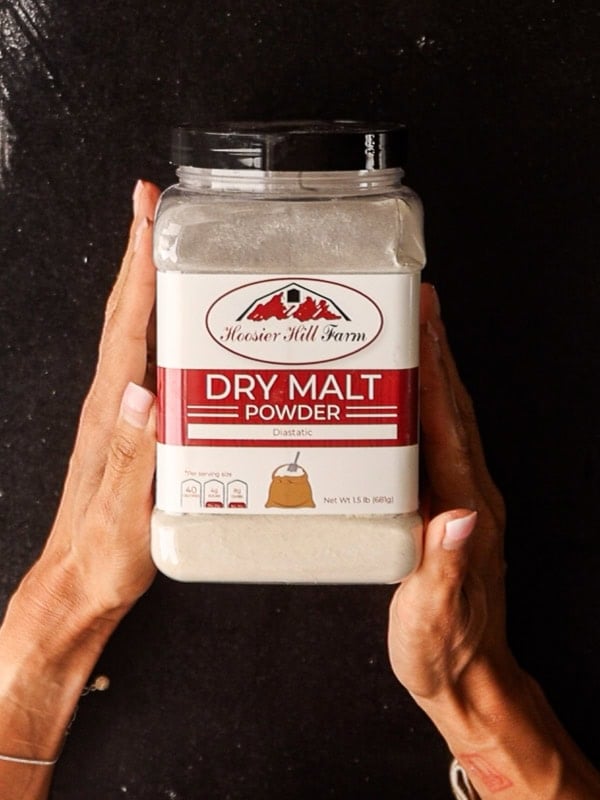
You cannot make NY style bagels without malt powder. The malt powder will help break down the starches in your flour, which will feed your mix throughout the long fermentation process. It’ll also give your bagels that lovely brown color on the inside, as well as caramel-y notes on the outside. Finally, it’ll furnish you with the slightly malty flavor that is among the trademarks of NY style bagels. As the recipe developer linked above notes, some high protein flours come with malt powder included. Mine did not. Make sure to check and account for it in your measurements (if yours already includes malt powder, just measure out 800 grams of flour).
Kosher Salt and Brown Sugar.
For flavor, this NY style bagels recipe also calls for kosher salt and dark brown sugar. I tried using barley malt syrup in lieu of brown sugar and it was a total disaster. It ended up over-hydrating my dough and guess what? IT OVERPROOFED. It produced among the WORST bagels I ever made. Don’t worry, you’ll be using barley malt syrup when you boil the bagels—just not when you make the dough. If you want to use barley malt syrup in lieu of brown sugar for your dough, I cannot help you LOL! Sorry!
Neutral Oil.
As we will discuss, this recipe for NY style bagels yields a very stiff dough—one that is on the lower scale of hydration. The recipe developer (noted above) accounts for this by adding just a little oil—to grease the wheels, so to speak. I found the addition of oil to enhance the mouth feel of the bagels, giving them just a bit more tenderness. But if you want to keep this recipe oil free (other than the cooking spray you will NEED to avoid manhandling your bagels), you can sub this with water.
Barley Malt Syrup.
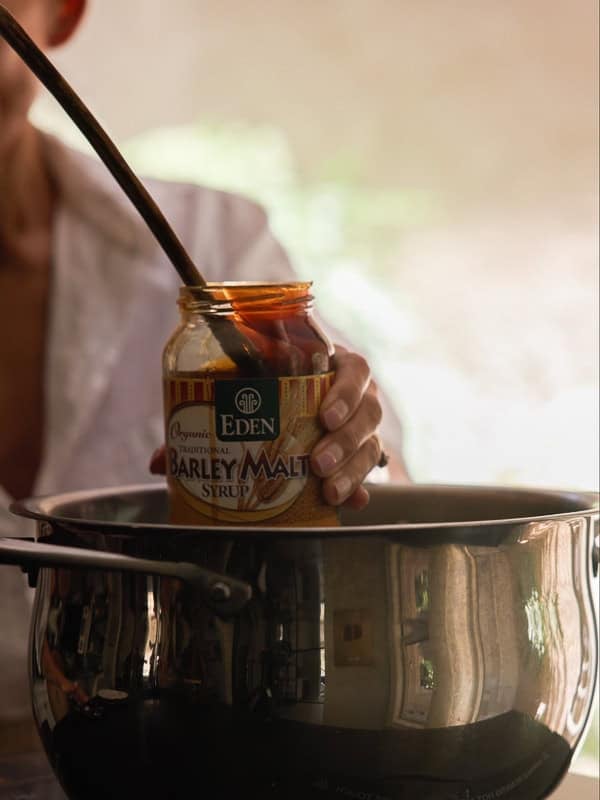
Barley malt syrup is added to the water that NY style bagels are boiled in. This comes straight out of the NY style bagels handbook, even if the recipe developer linked above didn’t count it as essential. In the beginning, I used brown rice syrup (which I always have on hand–it’s a staple of the Korean pantry); but, since switching to barley malt syrup, I highly recommend getting your hands on some. The flavor is deeper and more complex. The color you achieve is gorgeous. That said, if all you have is brown rice syrup or even brown sugar, you’ll still get a pretty decent color and flavor, if not the lovely shine you get from barley malt syrup.
Step-by-Step Instructions For Making NY Style Bagels.
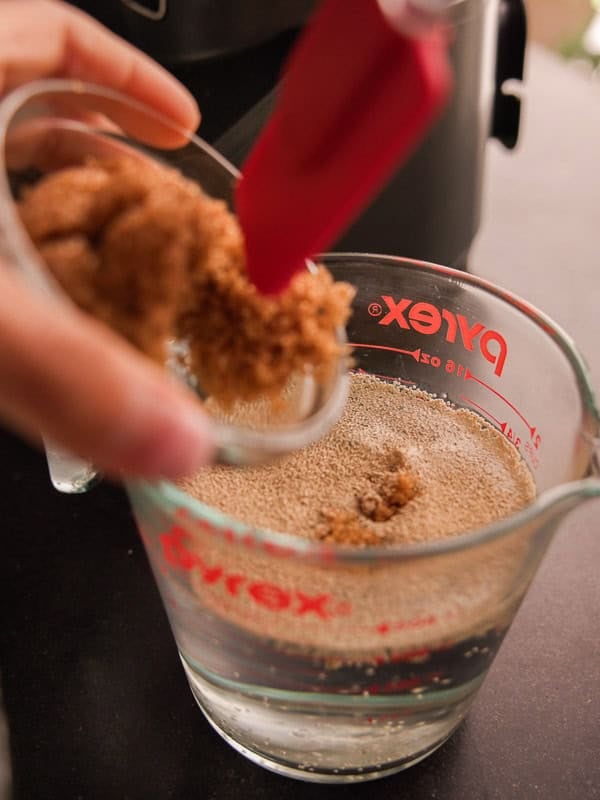
Step 1: Activate your active dry yeast.
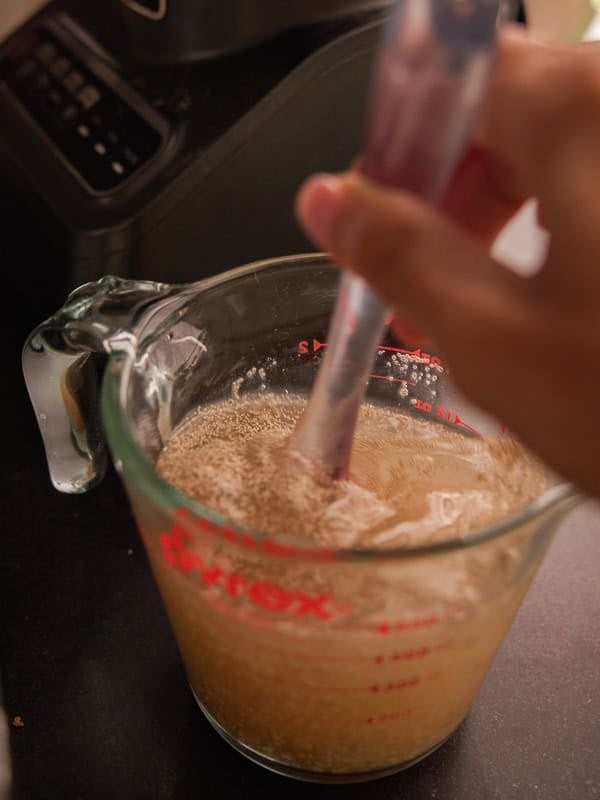
Unlike instant yeast, you do need to activate your active dry yeast. Add your yeast and brown sugar to your water and stir. Set that aside for 10 minutes, until your yeast mixture foams. It doesn’t have to overflow with foam–even a small foamy film is enough.
*For why I use active dry instead of instant, see Yeast in Key Ingredients and Substitutions section.
Step 2: Make Your Dough for NY Style Bagels.
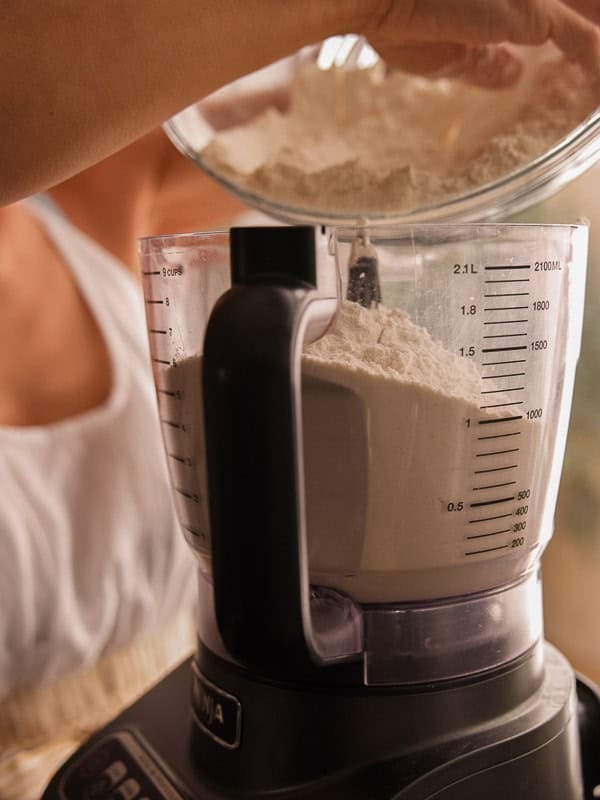
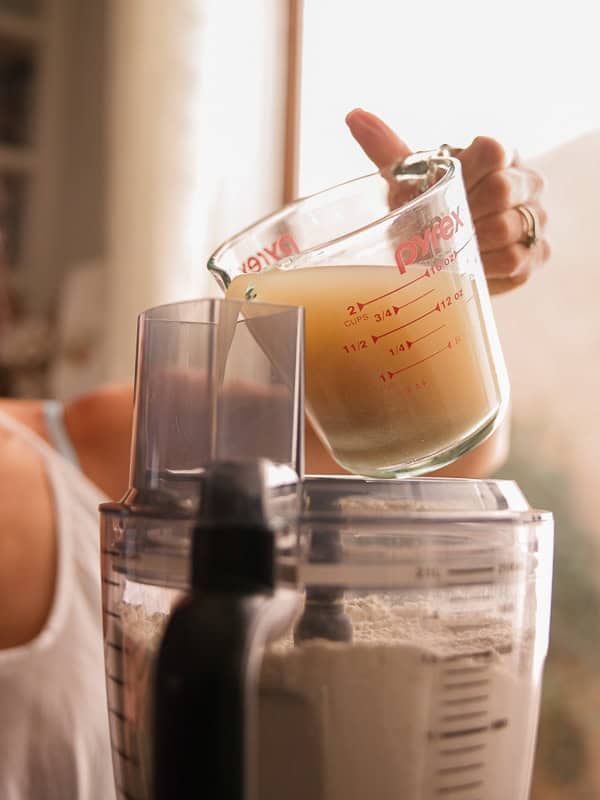
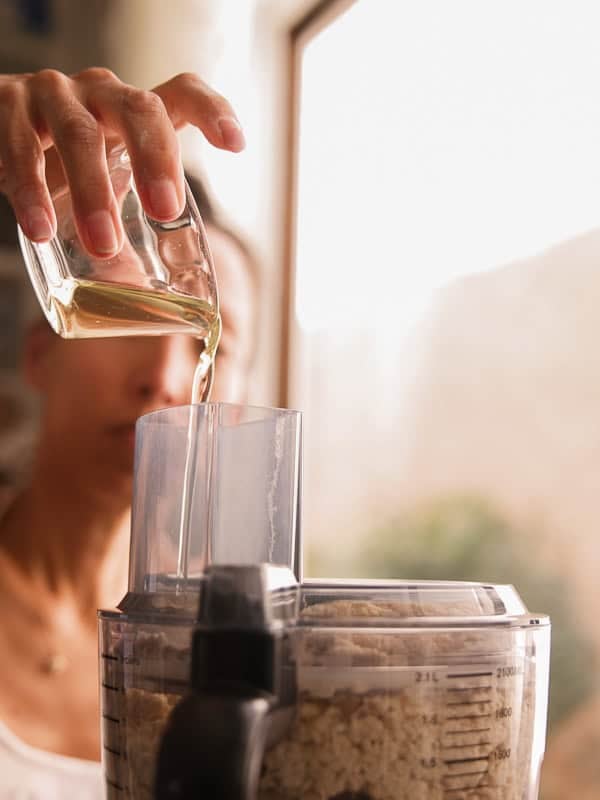
Next, add your flour, diastatic malt, and salt to the food processor. Mix on low (or use the “dough” function) for about 5 seconds. Then, slowly pour in your entire yeast mixture (use a rubber spatula to scrape up any sugar or yeast sticking to the bottom of your container). Then, add your oil. Knead on low for four 30-second increments, for a total of 2 minutes (my food processor will knead for only 30 seconds before stopping on its own). This will guard against overheating. When done, your dough will be very stiff and dimply. Don’t worry.
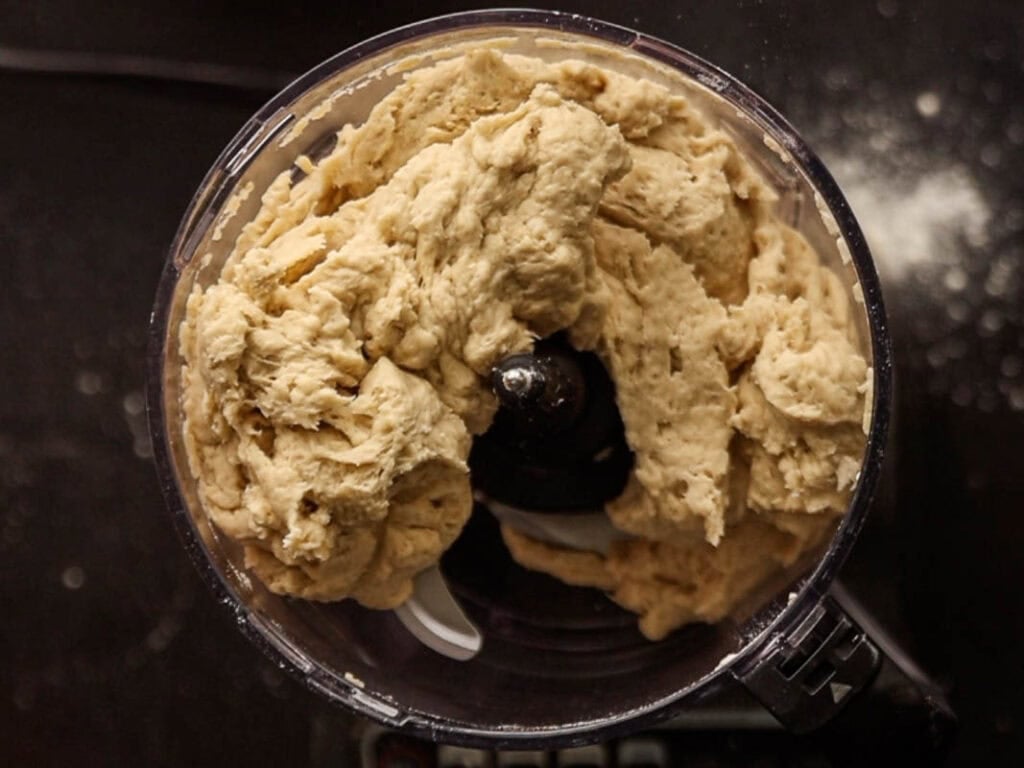
If using a stand-mixer, knead on low (2 on KitchenAid) for 4 minutes. Then, move to medium-low (4 on KitchenAid) for 8 to 12 minutes, until your dough feels stiff and firm. For more on why I prefer a food process over a stand-mixer, see Food Processor in Special Equipment Section above.
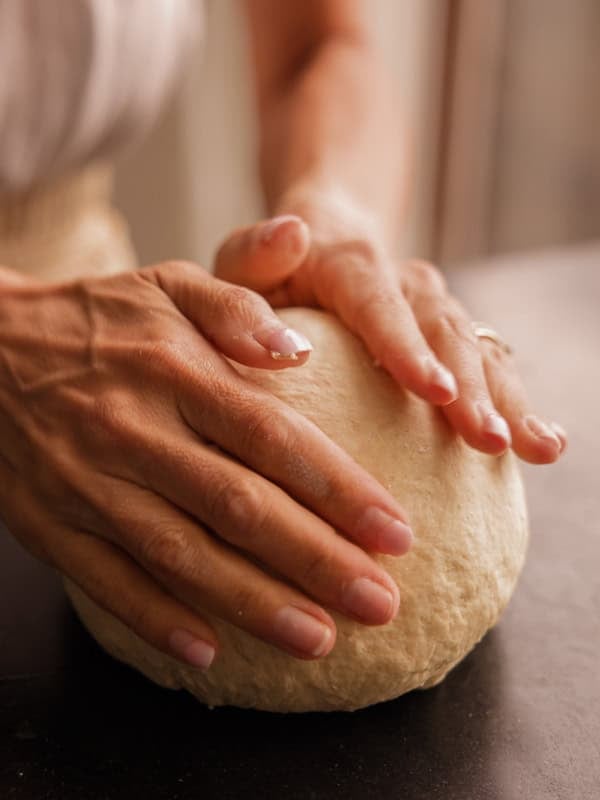
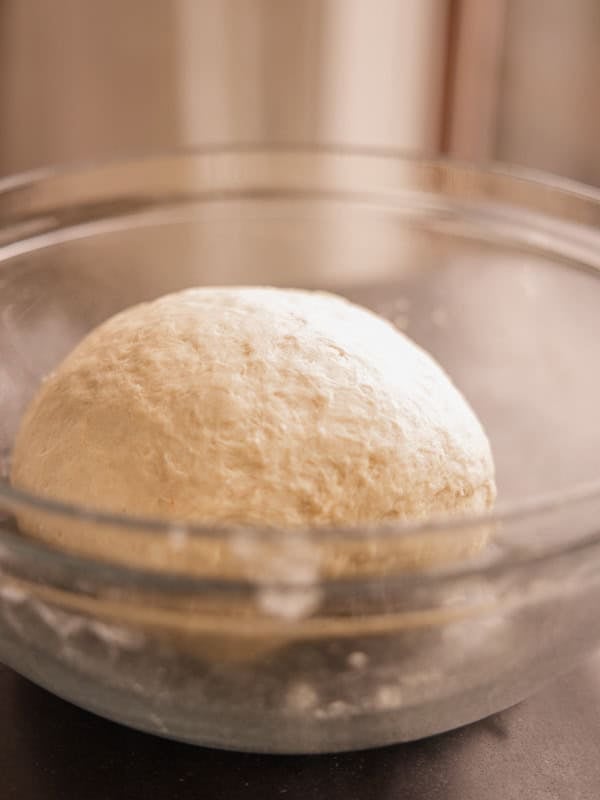
Carefully remove the dough from your food processor. Knead it by hand for about 15 seconds and shape it into a ball. Place your dough in a lightly greased bowl, cover it, and let it rest for 15 minutes.
Step 3: Prepare parchment paper squares
While your dough is resting, cut out parchment paper squares. Make them much larger than you think you’ll need to. I make mine 6″ x 6″. Why? Because I’ve made them too small in the past, the bagels proofed beyond the parchment, they stuck to the bottom of my tray, and deflated when I tried removing them from said tray to boil them. 🙁 Don’t make my mistake. Plus, if you make them nice and large, they can also prevent the sides of the bagels from touching each other in case you have a smaller tray.
Step 4: Pre-shape your NY style bagels.
*For more on why I skip a “bulk proof” (i.e., let the dough rise for longer than 15 minutes before shaping), see FAQ below.
(a) Weigh your dough.
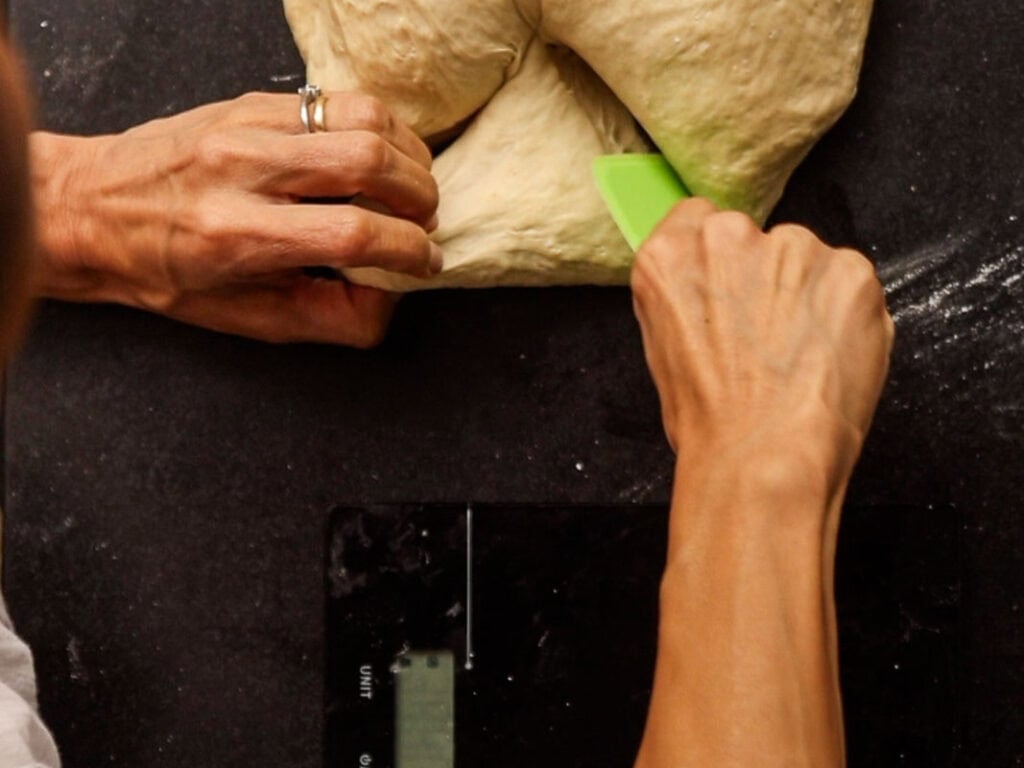
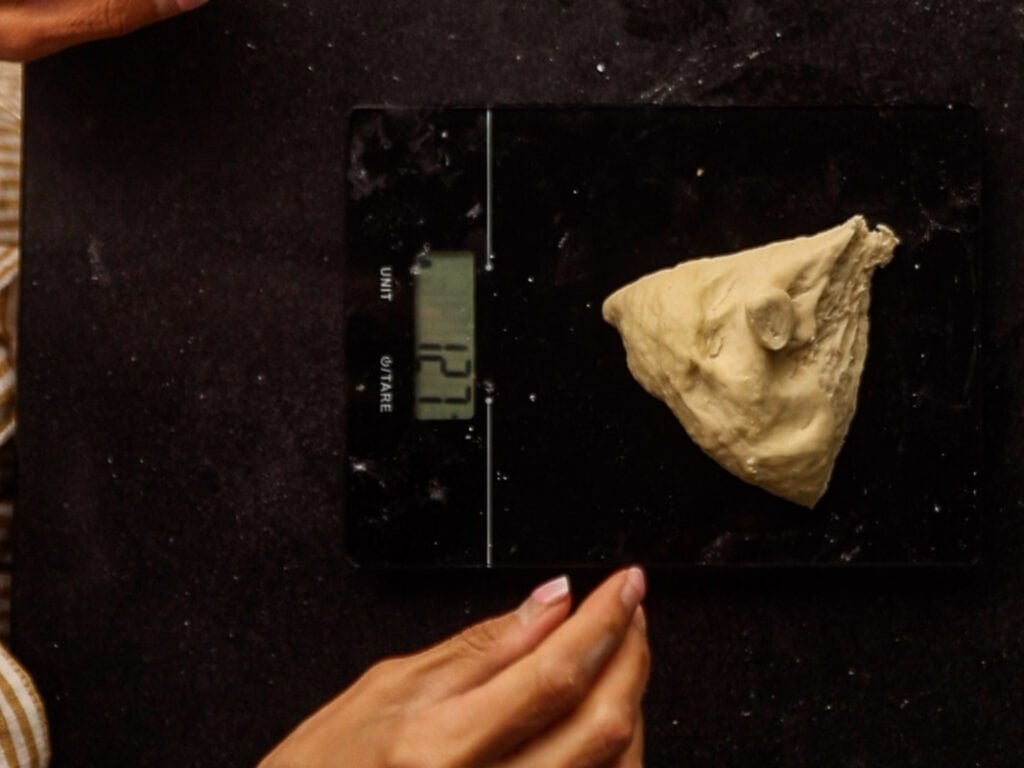
After about 15 minutes, your dough ball will still look mottled, but once you start handling it, you’ll find it supple and easily shapeable—kind of like Play-Doh. Remove it from the bowl and weigh it (mine is usually between 1,260 to 1,300 grams). Divide this number by 10 to figure out the weight of each bagel (mine usually range from 126 to 130 grams). Then, using a sharp knife or bench scraper, pull off enough dough for one bagel, weighing it to make sure. Place the rest of your dough underneath a plastic bag or kitchen towel to prevent drying out.
(b) Pre-shape your bagels.
Your dough hunk will usually look like a vague sort of triangle (mine usually does). Pull the top half of your dough hunk and fold it over, into the middle of your hunk. Press it in with the heel of your hand. Roll the top half down again, so that the bottom “flap” is covered and, once more, use the heel of your hand to press down and seal the dough. Then, cup your hands over the top of the dough and gently roll back and forth, until you have a very stubby, short log (around 4 inches long).
 Fold the top into the middle.
- Use the heel of your hand to press it into the middle.
- Press the heel of your hand down into the seam.
- Roll it all the way down…
- …to cover the bottom half.
- Once more…
- …press down with heel of your hand to seal.
- Cup and gently roll back and forth.
- Work your way out to the ends.
- Create a short stubby log.
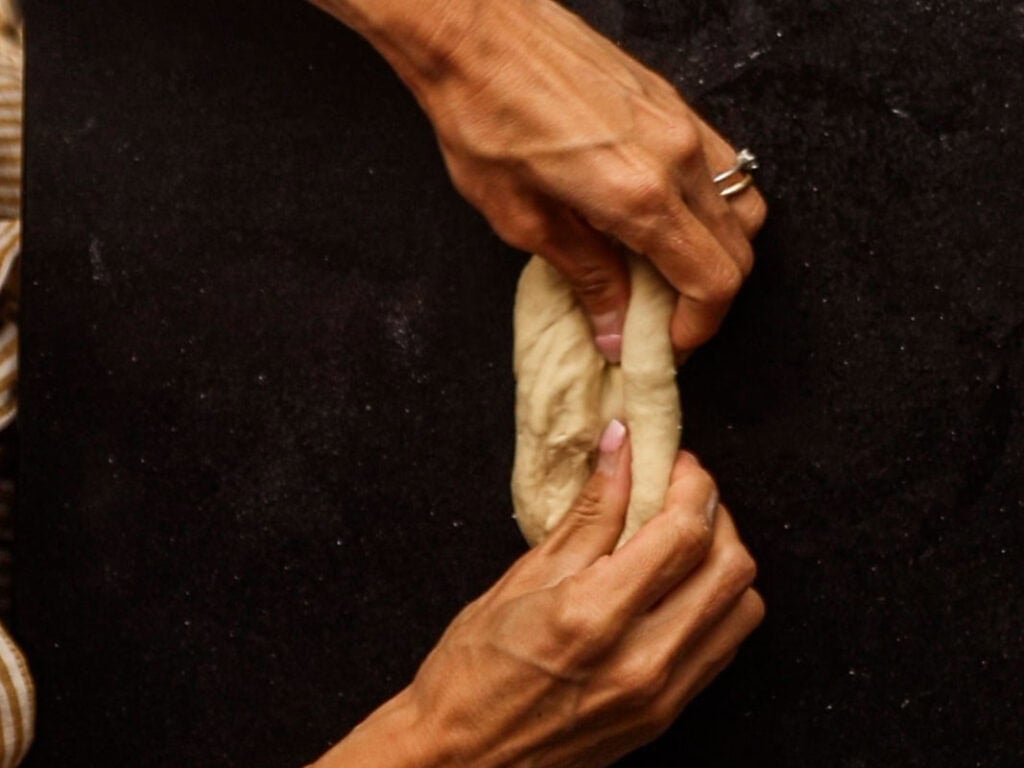
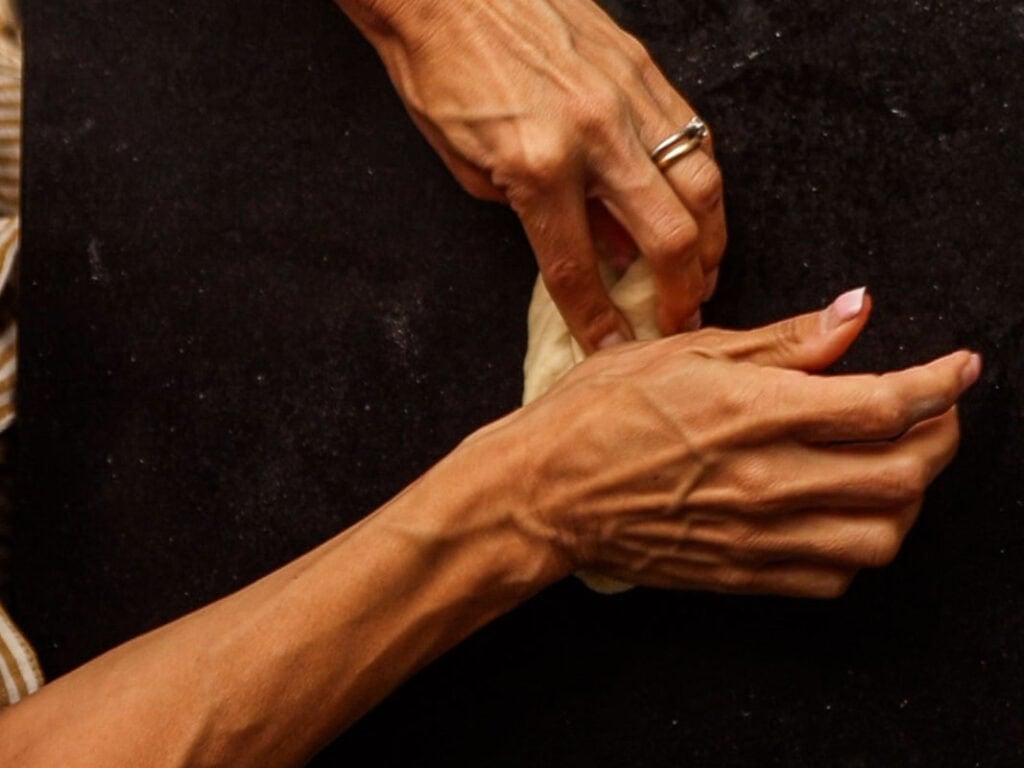
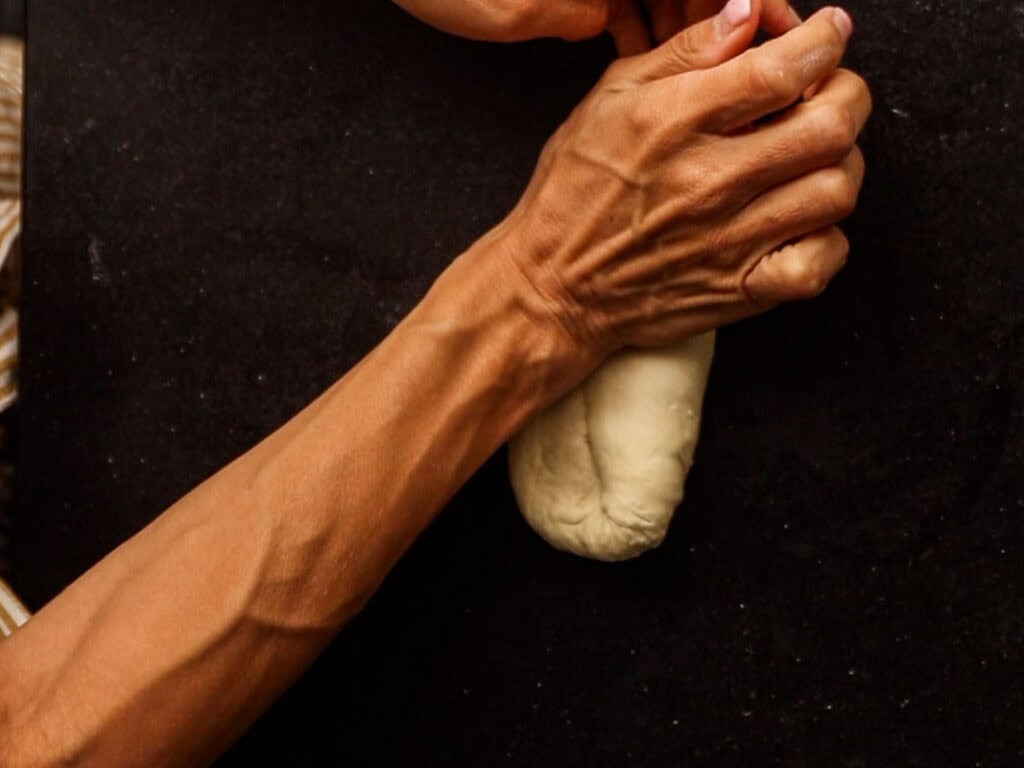
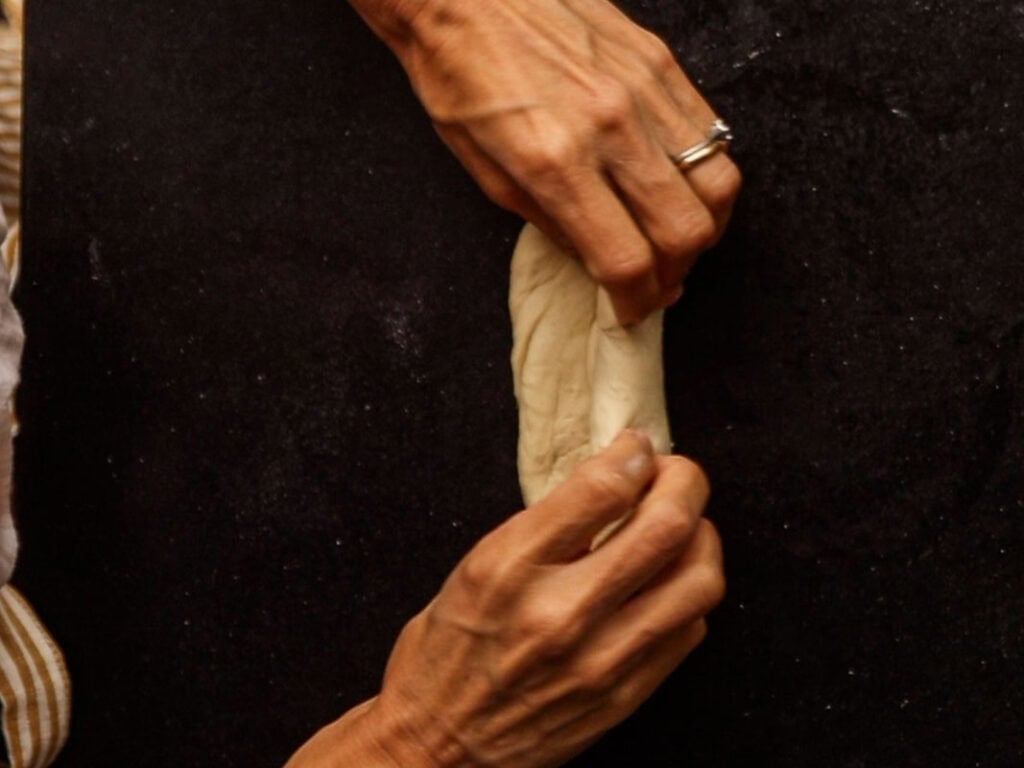
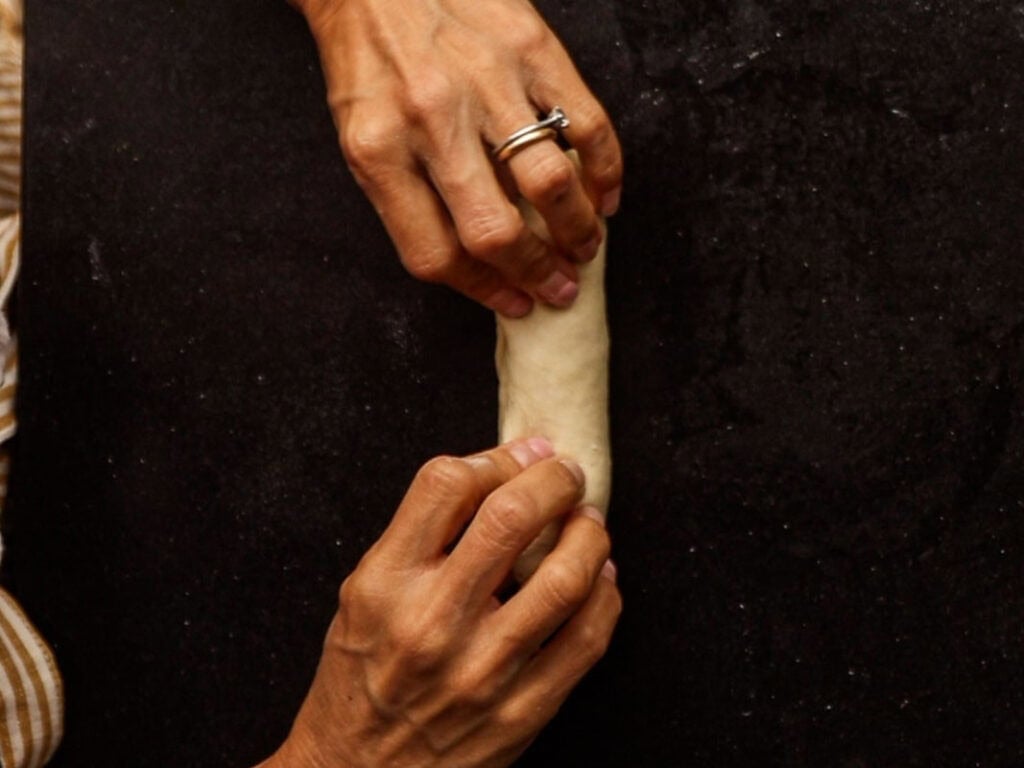
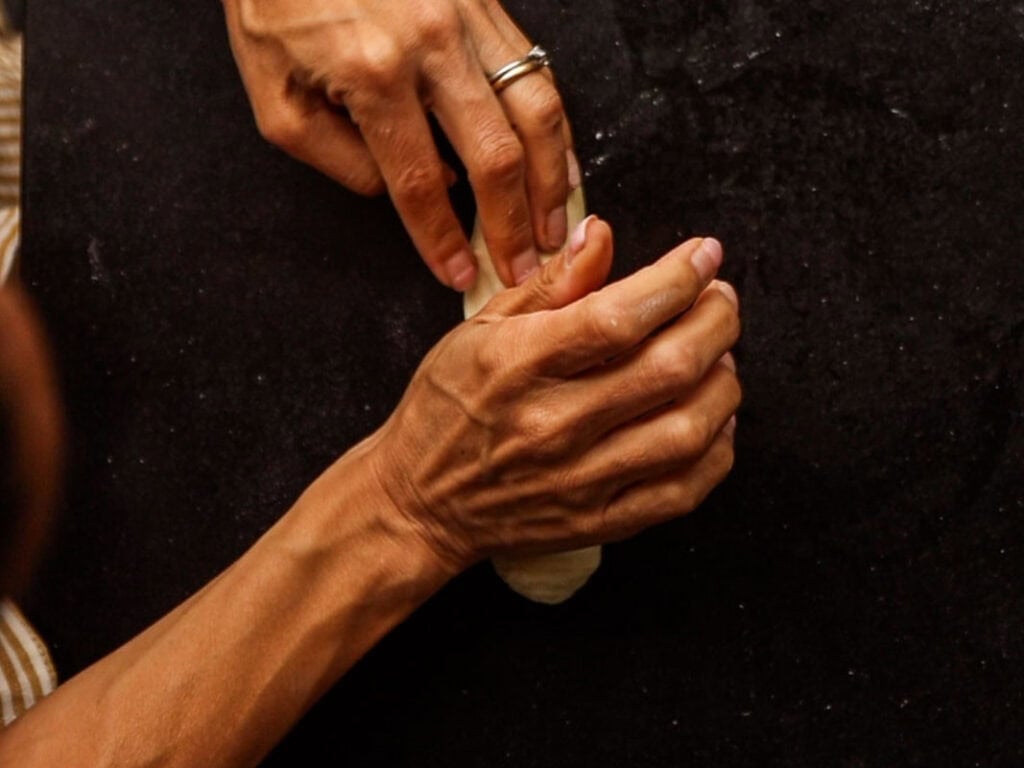
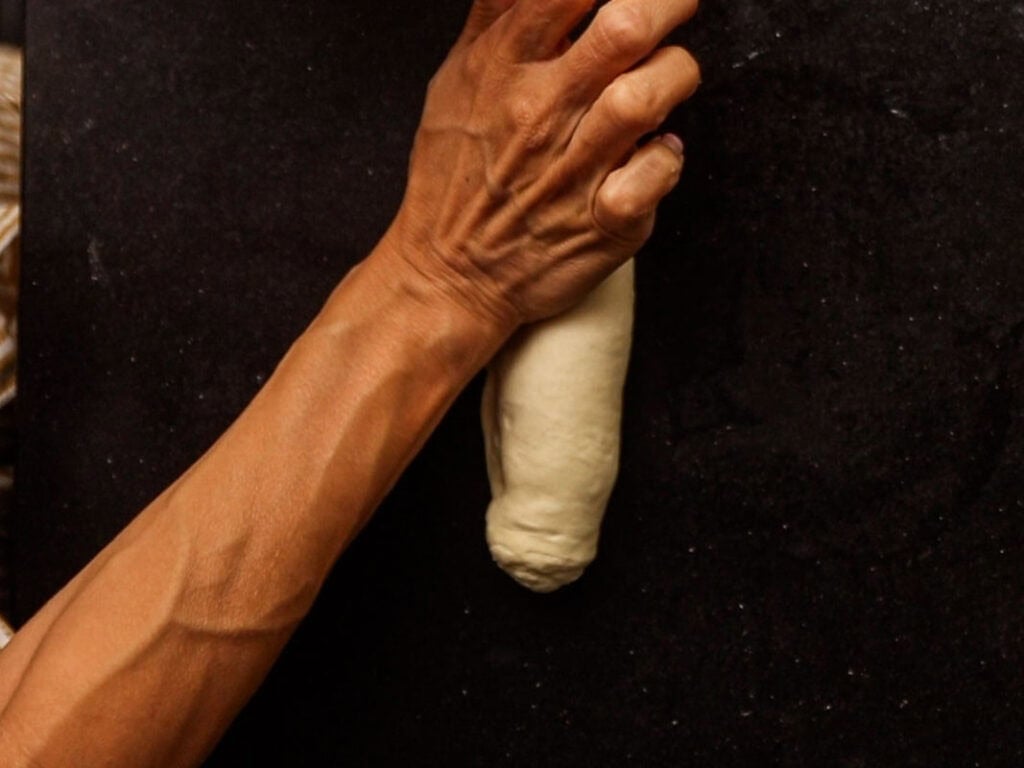
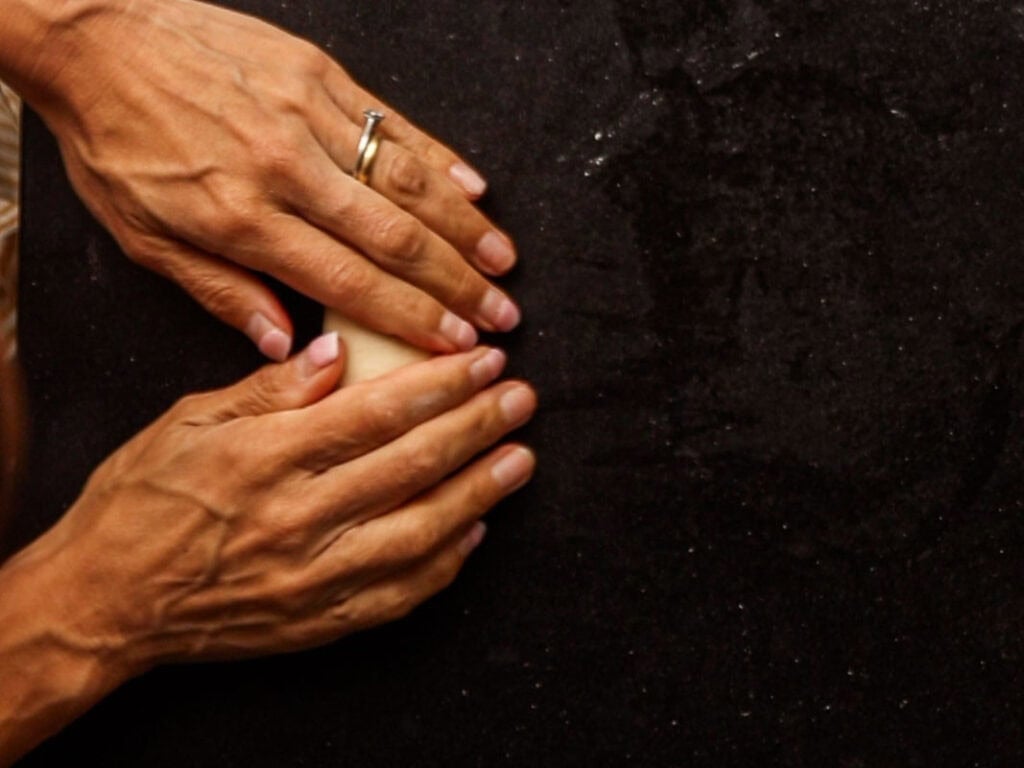
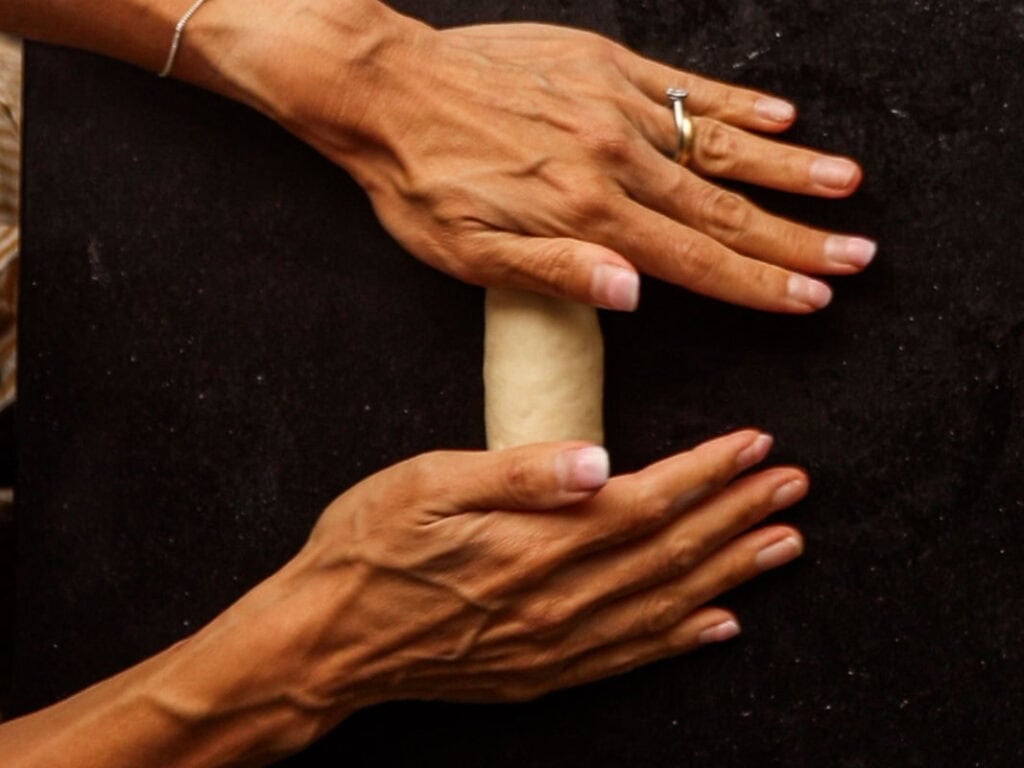
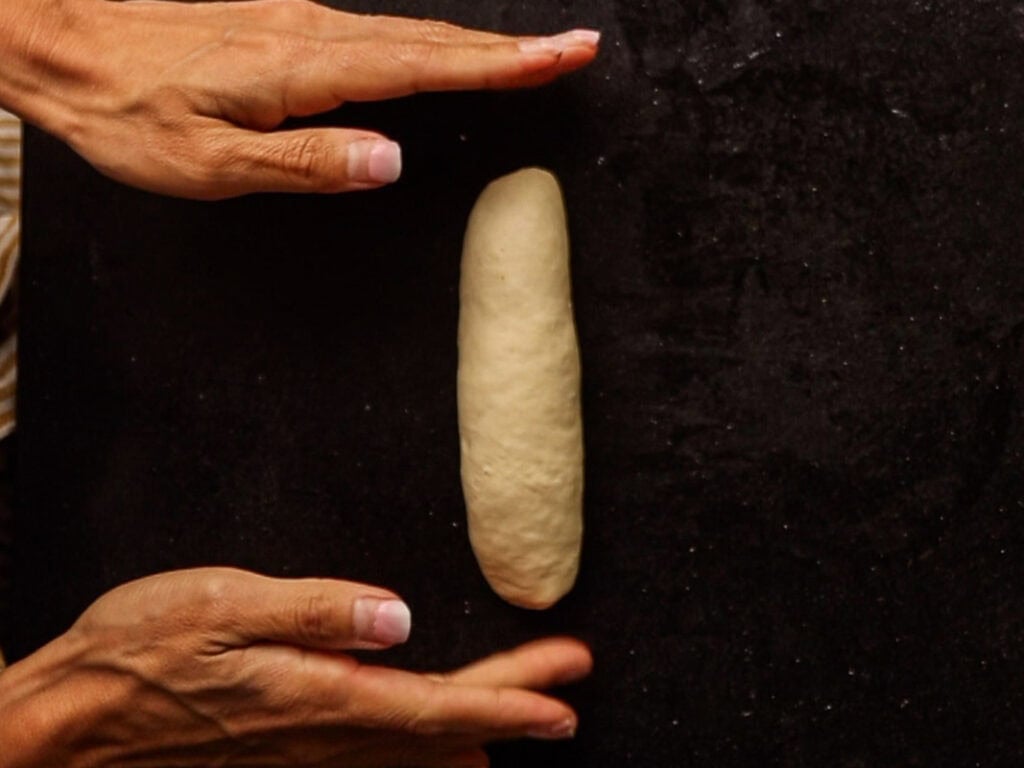
Set aside under your plastic baggie and repeat with remaining dough, until you have a total of 10 stubby logs before moving onto final shaping.
Step 5: Shape your NY style bagels.
(a) Lengthen the log.
Once you’ve pre-shaped all your dough, move onto finally shaping your NY style bagels. Roll the short log, starting from the middle out towards the ends, so that it’s just a bit longer (around 6 to 8 inches). Do not make the logs too long, as this will prevent dough tension, yielding a flatter, wider bagel.
(b) Make a ring.
Then, twist the log by rolling up with your right hand and rolling down with your left hand. Grab the right end with your right hand and wrap the log around your knuckles, bringing the two ends together, usually somewhere around your right thumb. Pressing the ends together with your thumb, bring your right hand down to your working surface (with the log still wrapped around your knuckles) and roll up and down and from side to side, while exerting pressure on the section where the two ends meet. Then gently roll your right hand down all the way through until it exits the hole completely.
This should seal the seam, but if you feel nervous they’ll come apart, you can pinch the seam together using your fingers, as well.
- Start rolling the preshaped dough from the middle.
- Work outwards, lengthening the log to around 6 inches.
- Twist the log by rolling up with your right hand and down with your left hand.
- Lift the right end with your right hand…
- …bring the twisted rope around your knuckles…
 …until the two ends meet, around your thumb.
- Press down gently with your thumb.
- Bring the ring down to your working surface and begin rolling, exerting pressure.
- Roll up and down…
- …while moving right to left.
- Then, begin pulling your hand out of the ring…
- …slowly rolling the dough beneath your hand…
- …until your hand has completely…
- …exited the ring.
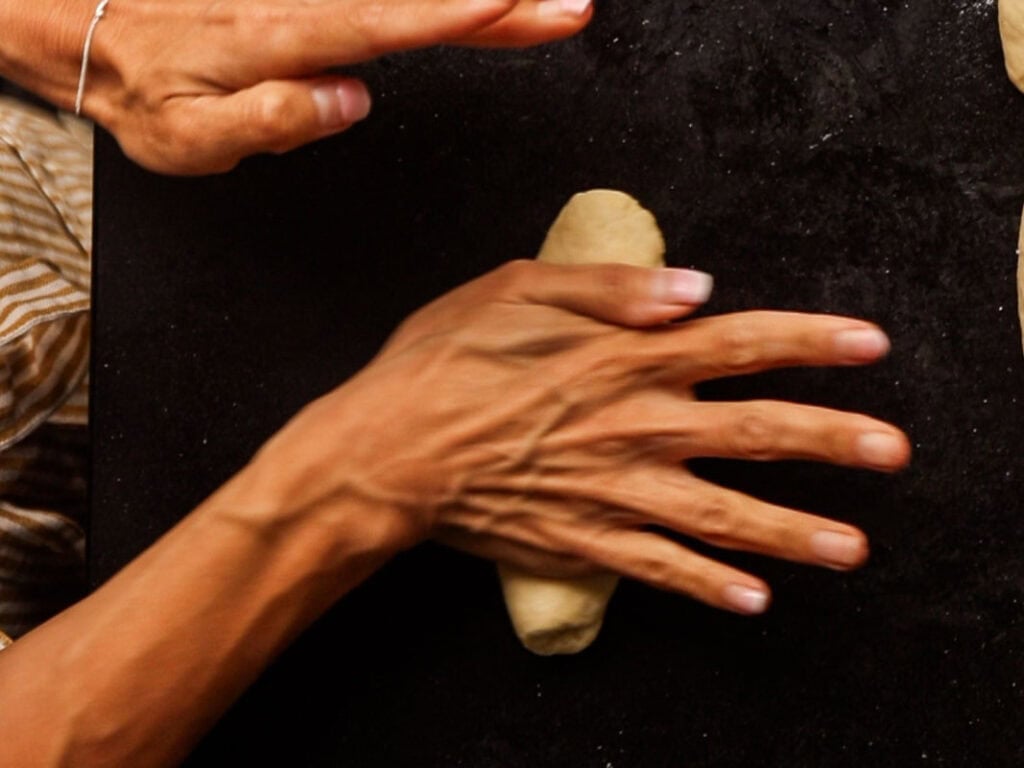
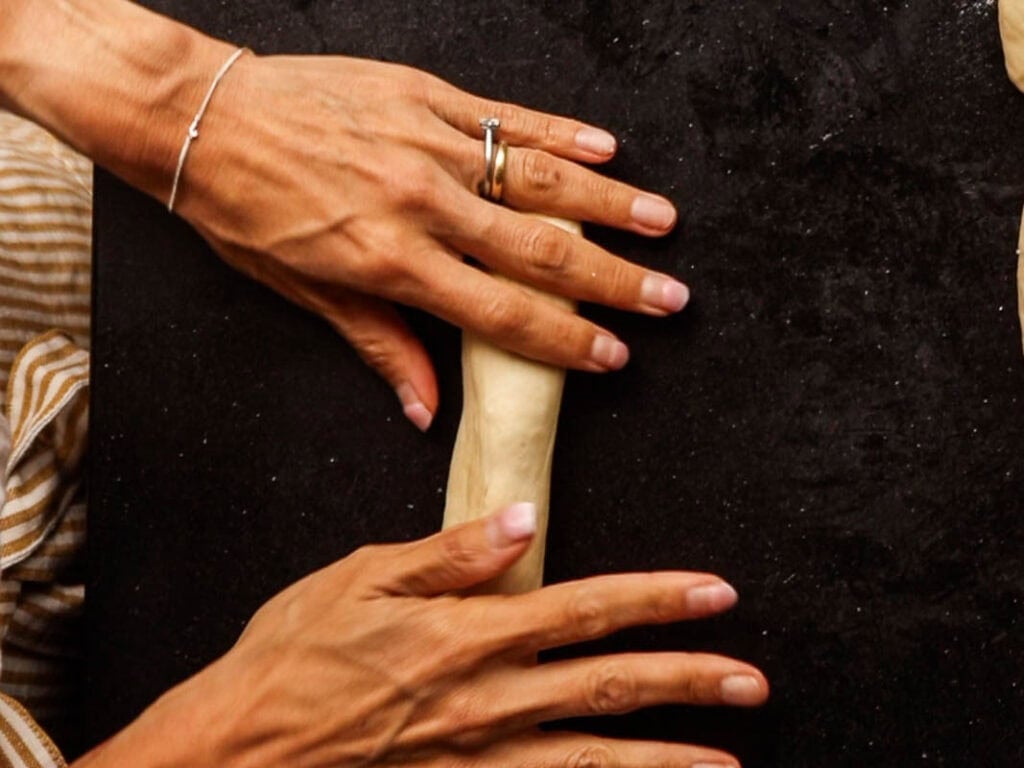
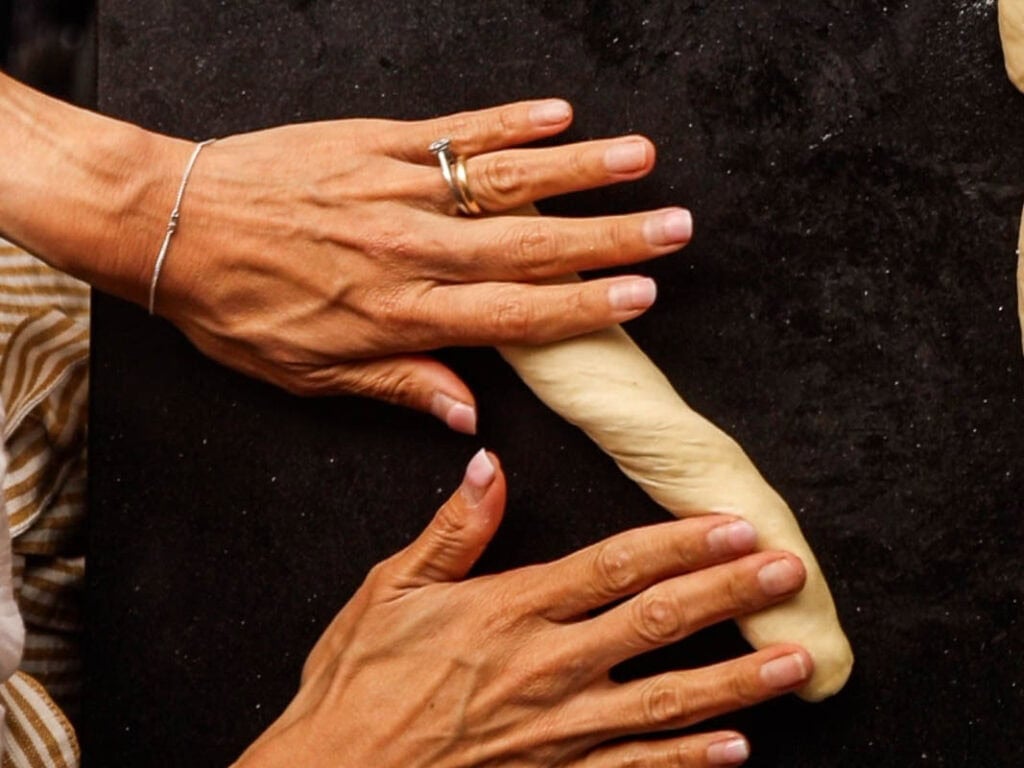
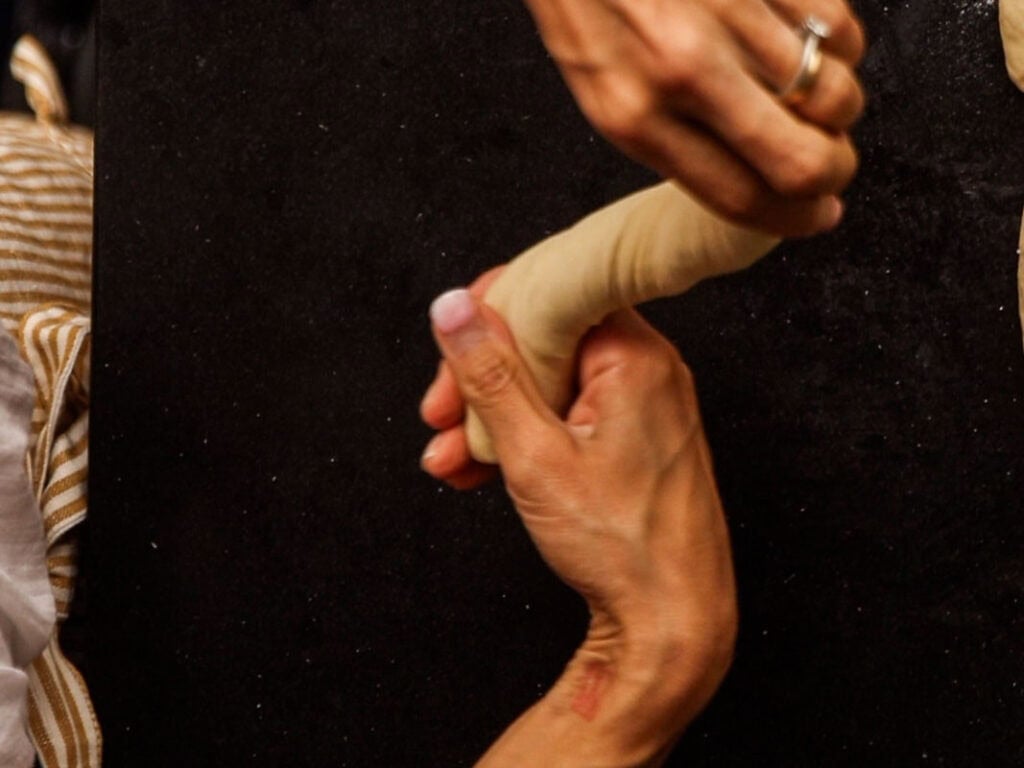
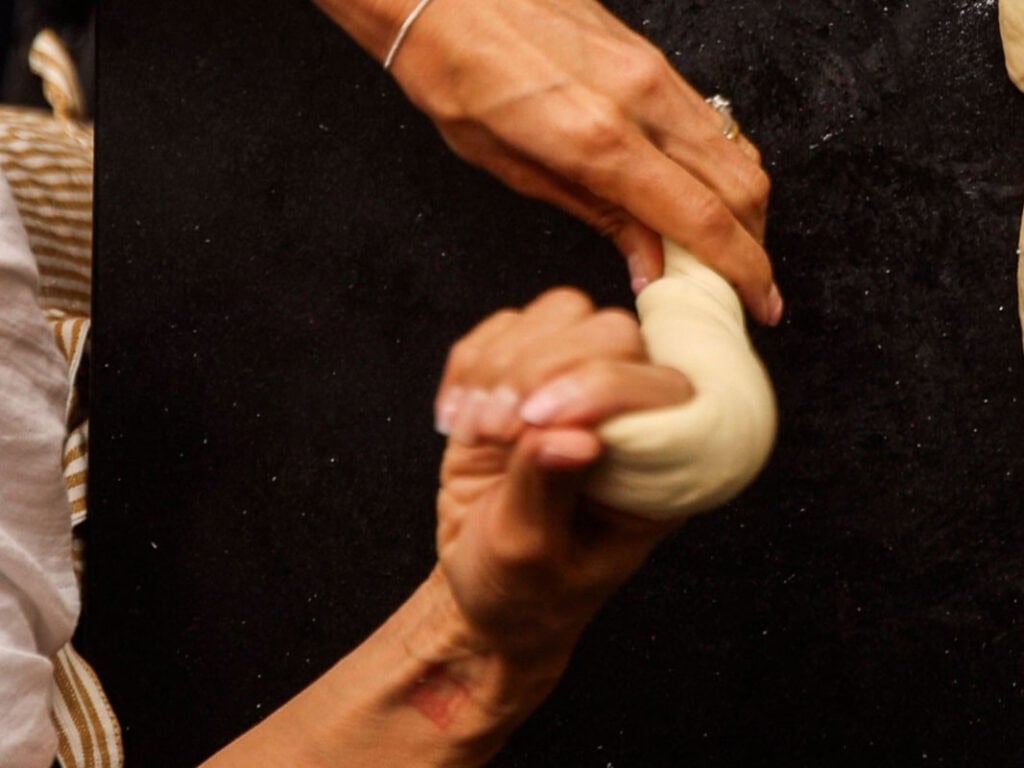
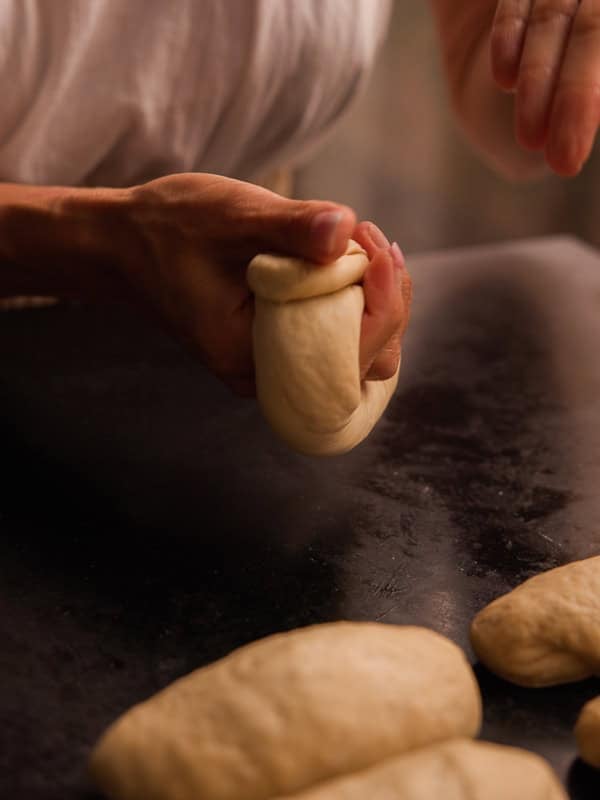
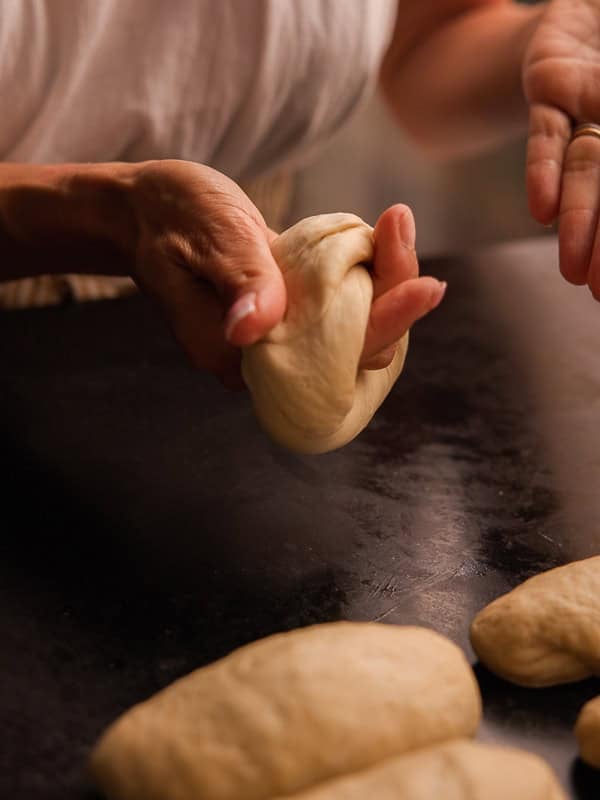
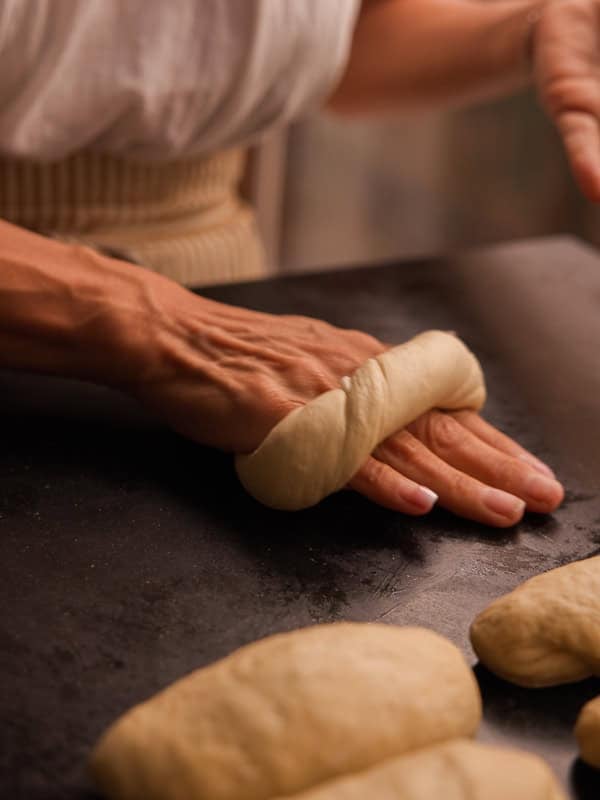
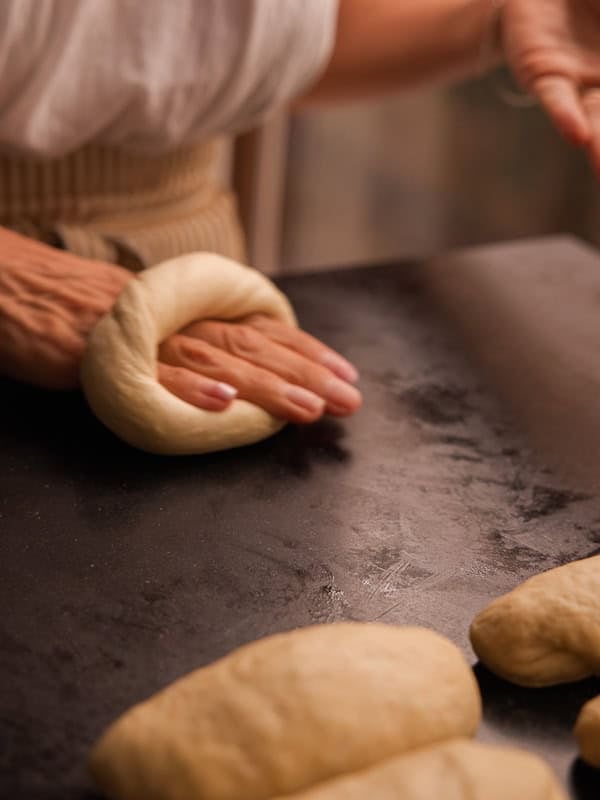
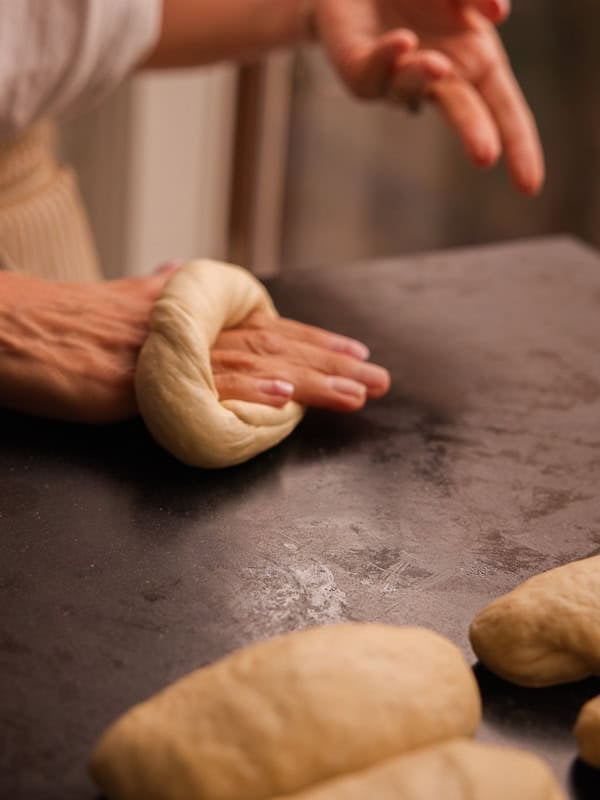
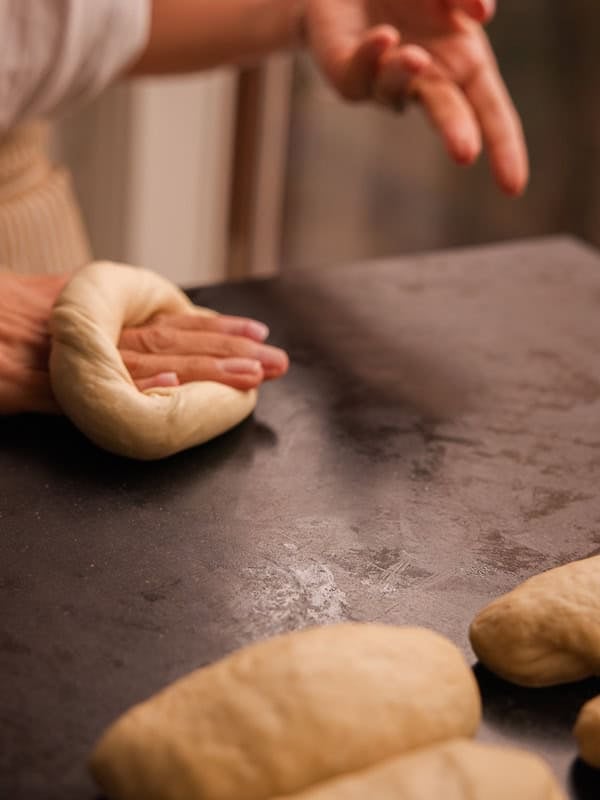
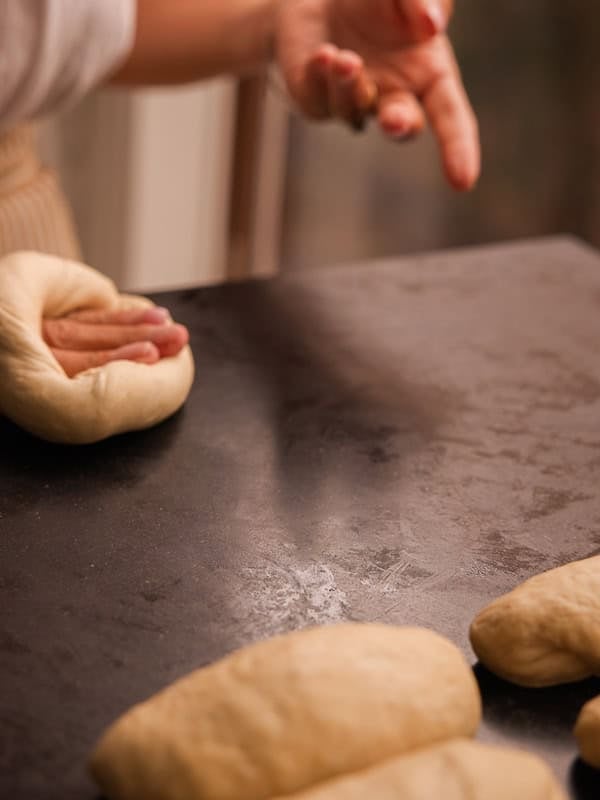
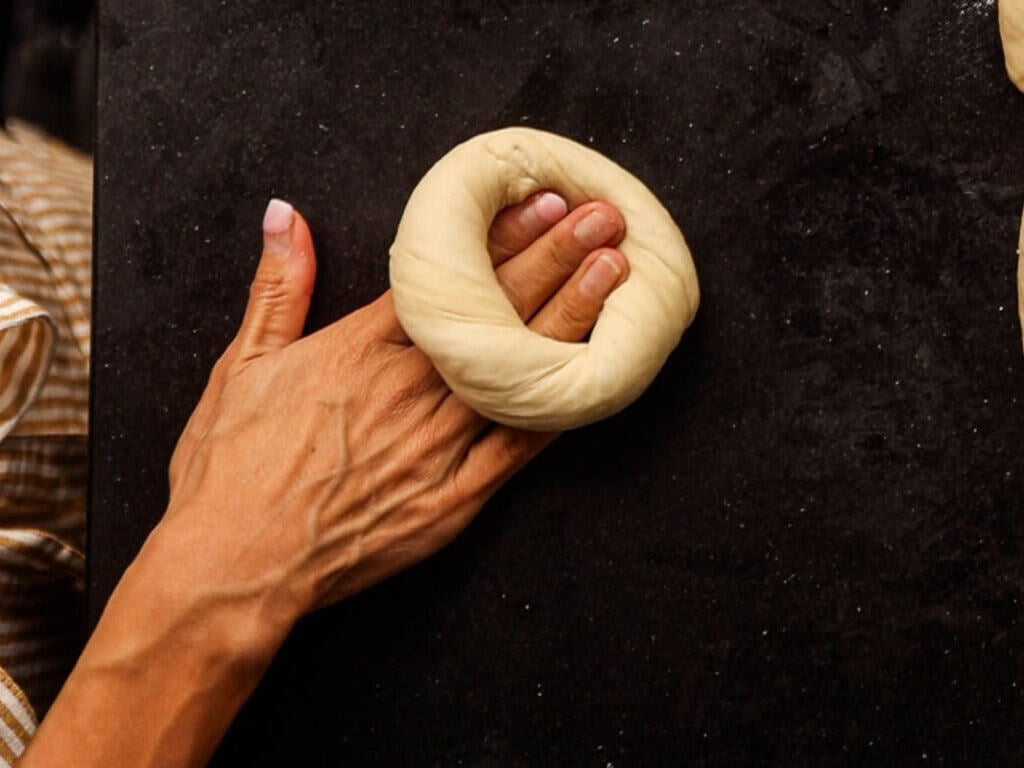
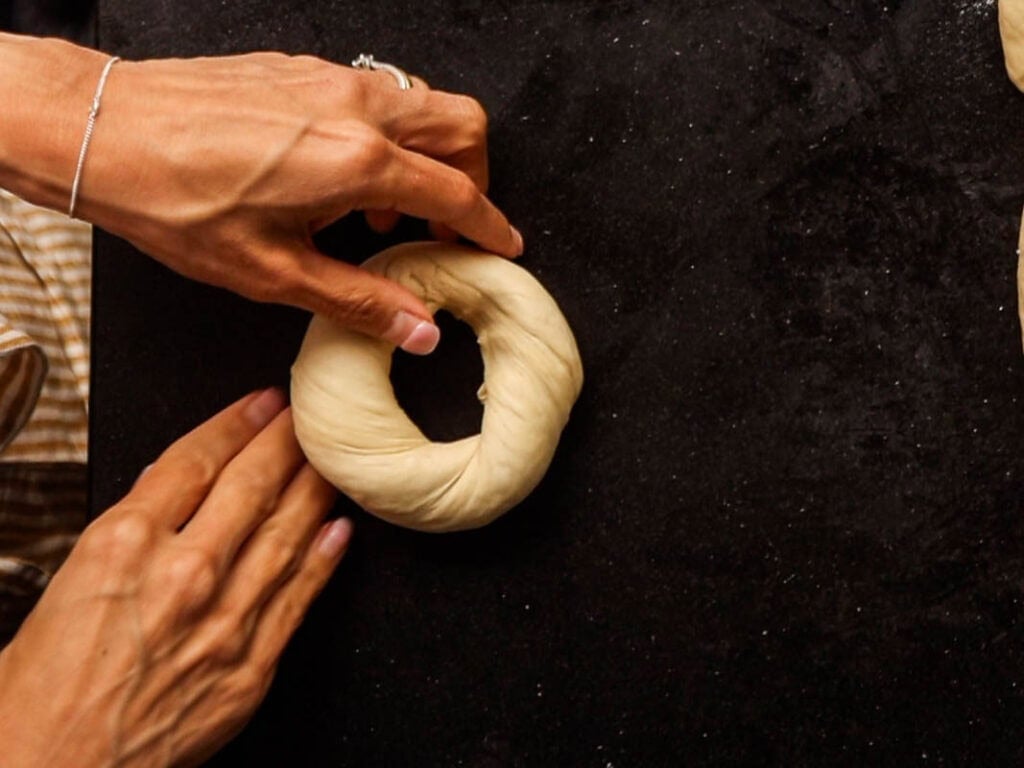
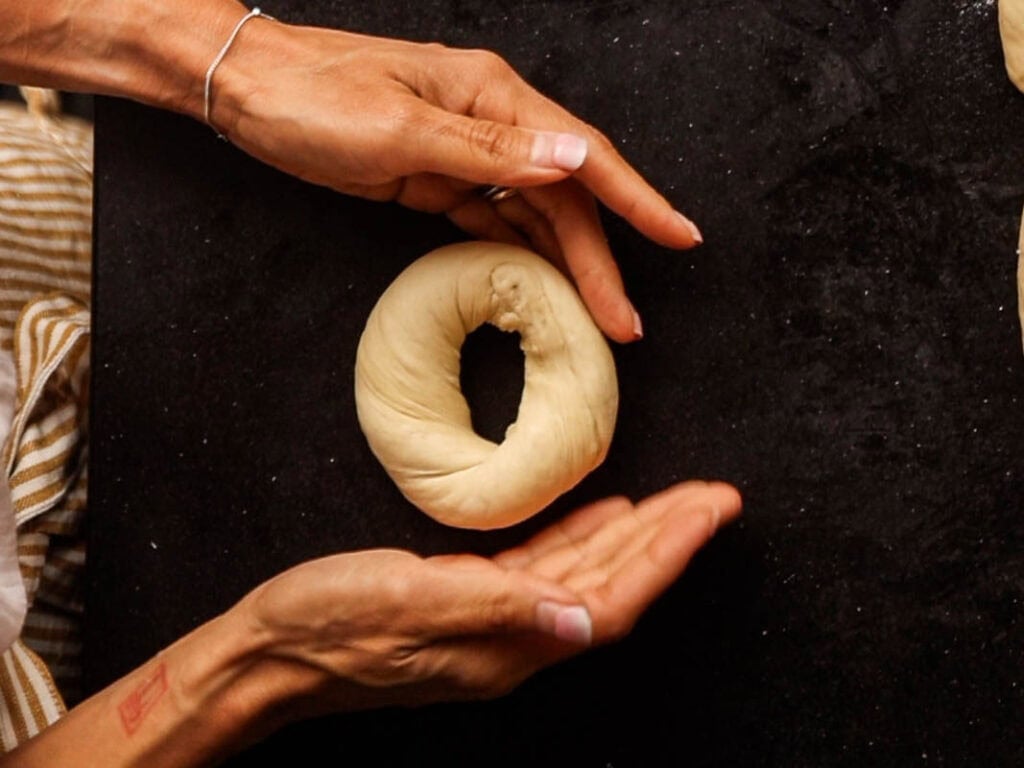
*For more on why I prefer the roll method (as opposed to the poke method) for shaping my bagels, see FAQ below.
Step 6: Bench proof your shaped bagels.
Spray a tiny bit of cooking spray onto the bottom of your parchment square. Place your shaped bagel on top and carefully transfer to your large baking tray (see Large Trays with Lids in Special Equipment Section above). Repeat with remaining dough. Cover your tray and let it proof for about 30 minutes.
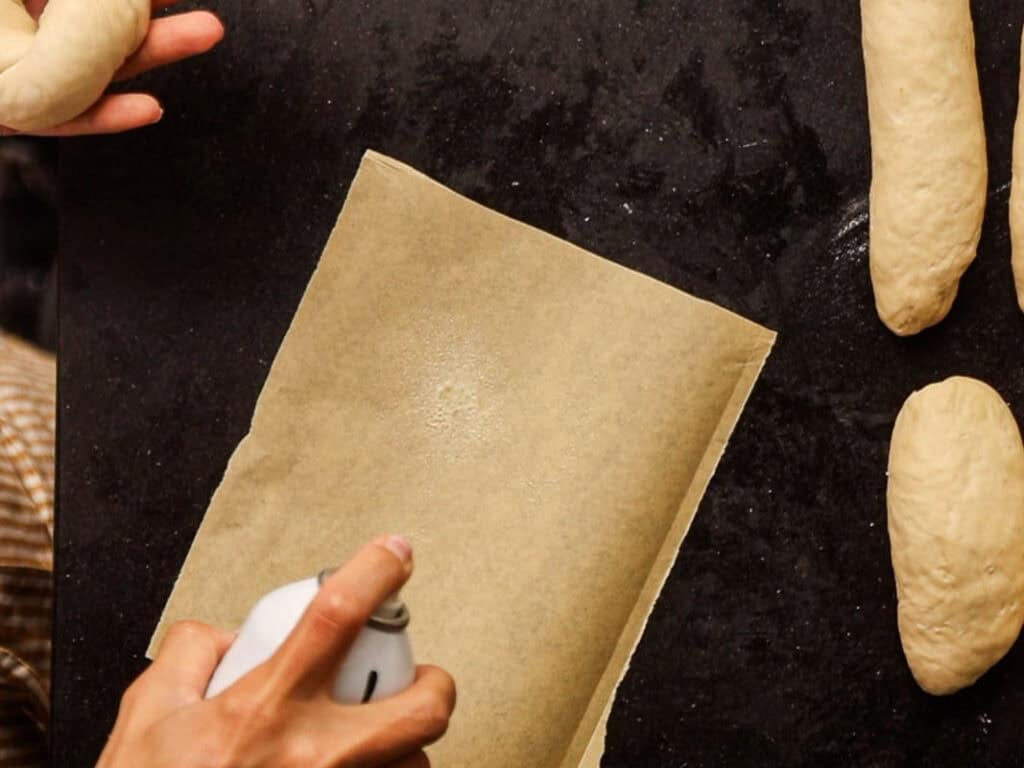
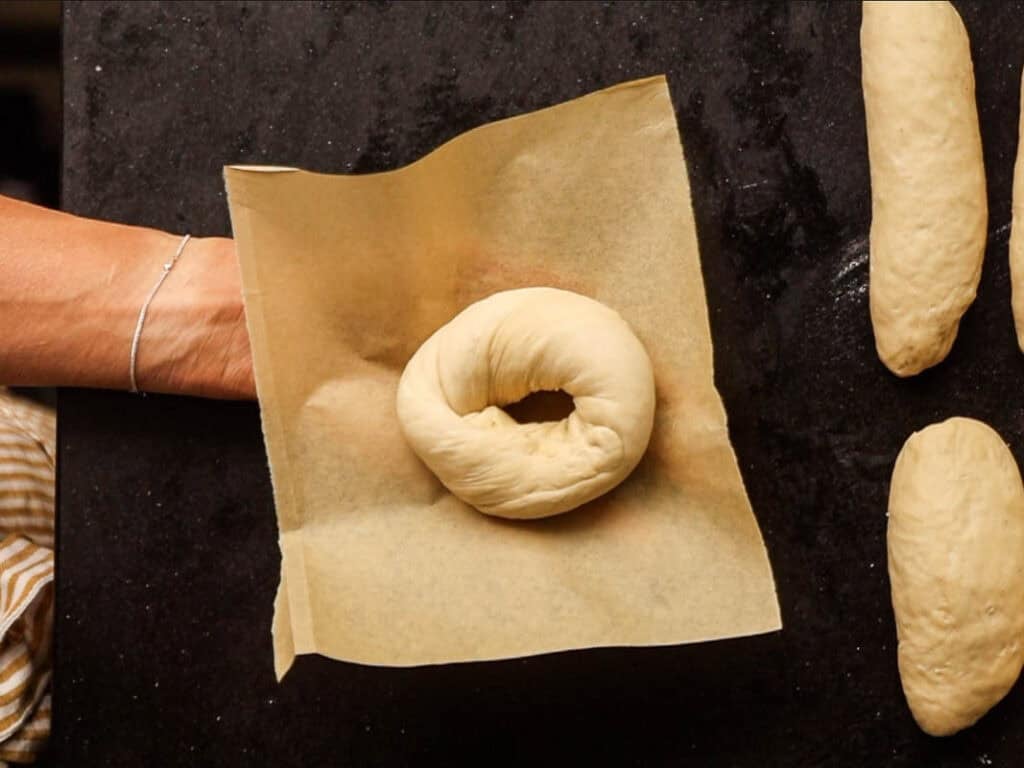
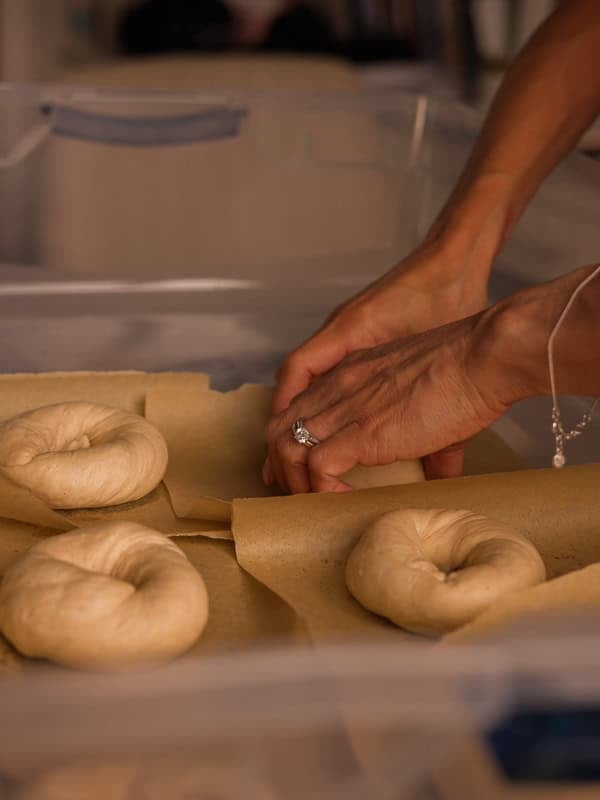
*For more on the purpose of this “bench proof” (i.e., letting the dough rise after shaping) and whether you need to administer a “float test,” see FAQ below.
Step 7: Cold proof your NY style bagels.
Place your shaped bagels, covered, in the refrigerator for at least 24 hours and up to 40 hours. Do not proof for longer than 40 hours, as doing so will likely yield overproofed bagels (see Cardinal Rule of Bagel Making).
*For more on why you should cold proof your bagels and for how long, see FAQ below.
Step 8: Prepare to boil and bake your NY style bagels.
(a) Preheat your oven.
Arrange the racks in your oven so that the uppermost one is set in the middle. Place your baking surface (I use a steel pizza pan–for more on this, see Pizza Pan and Sheet Pan in Special Equipment section above) on that top rack. Place a sheet pan on the bottom rack (this will prevent the bottoms of your bagels from burning). Preheat your oven to 500° F.
*For more on baking temperature, see FAQ below.
(b) Prepare boiling water.
Add 2 quarts of water to your pot and bring it to a gentle boil. When the water is getting hot (but before it boils), add barley malt syrup (the warm water will make it dissolve better).
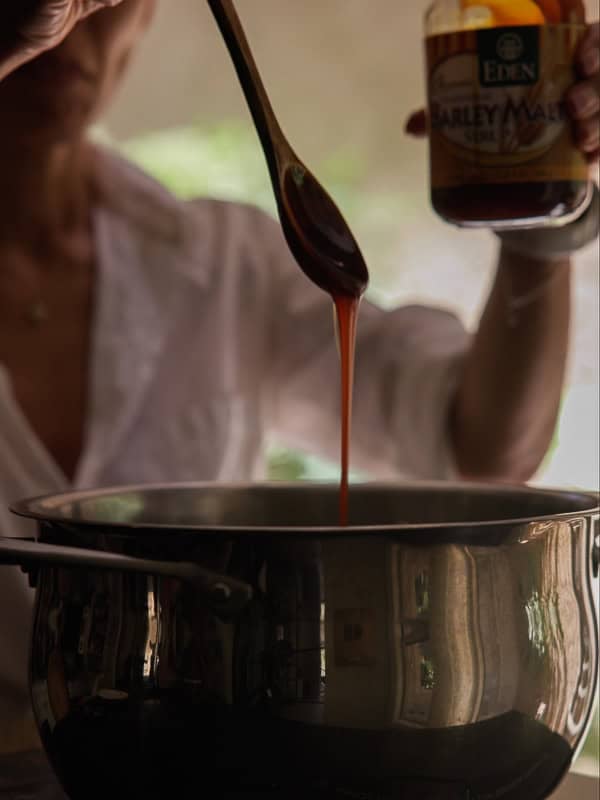
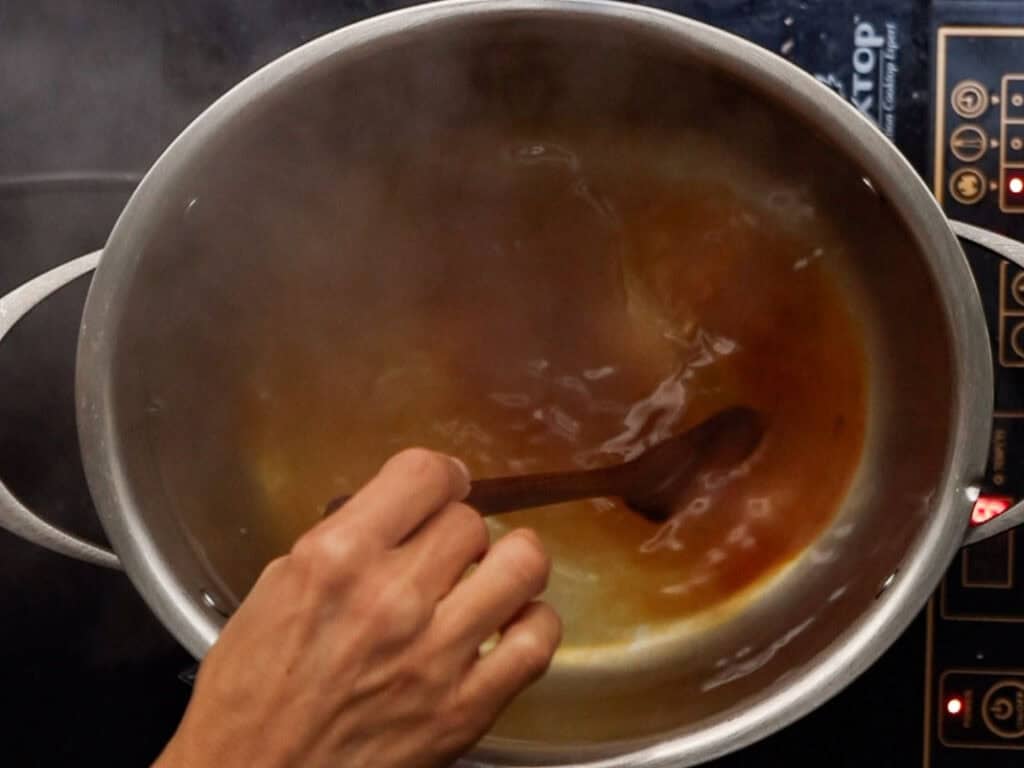
*For potential substitutions, see Barley Malt Syrup in Key Ingredients and Substitutions section above.
(c) Soak your bagel boards.
While your oven is preheating and your water is coming to a boil, soak your bagels boards (I use 4 total bagel boards—you don’t want to crowd them) by running both sides beneath your faucet for a few seconds. Place your soaked bagel boards near your stovetop (i.e., where your water is boiling).
*For more on bagel boards, see Bagel Boards in Special Equipment Section above.
(d) Prepare your toppings.
Measure out whatever toppings you plan on using (e.g., 2 tbsp sesame seeds, 2 tbsp poppy seeds, 2 tbsp Everything Bagel Seasoning) into shallow bowls and place them near your stovetop (i.e., where your water is boiling).
*For more on how best to add toppings to your bagels, see FAQ below.
Step 9: Boil your NY style bagels.
Do not bring your cold-proofing bagels out of the fridge for even one second before you’re ready to boil them, as doing so will risk overproofing them—especially if they’re hanging out by a warm stove.
When your water (treated with barley malt syrup) is at a gentle boil (not a riotous boil, as this will risk deflating your bagels!), gently deposit one or two of your bagels, parchment paper side down, into the water. Count to 10. Using tongs, gently remove the parchment paper from the bottoms and using a slotted spoon, gently flip the bagels over. Count to 20. Flip them over again. Count to 10. Flip them over once more and then remove each bagel from the water, draining as much water as you can, and gently place them, top side down, on either the soaked bagel boards (for plain bagels) or the bowl with the topping of your choice.
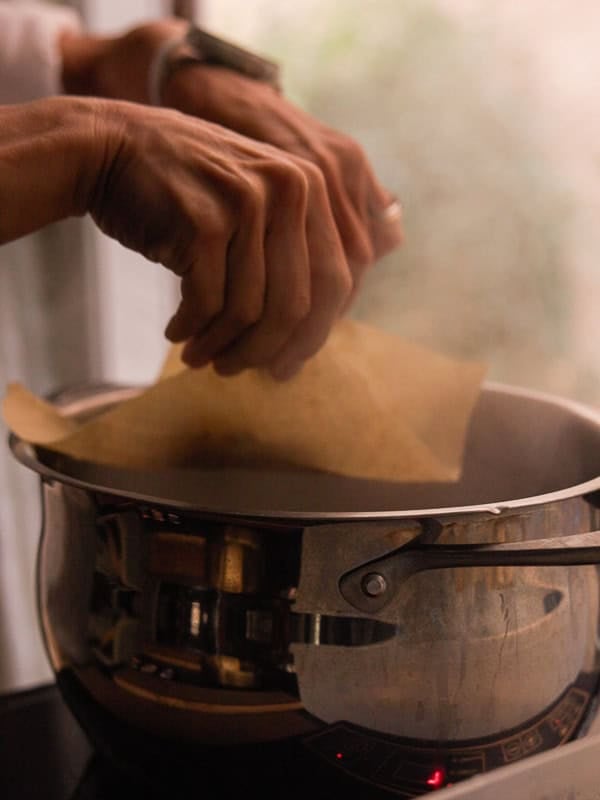
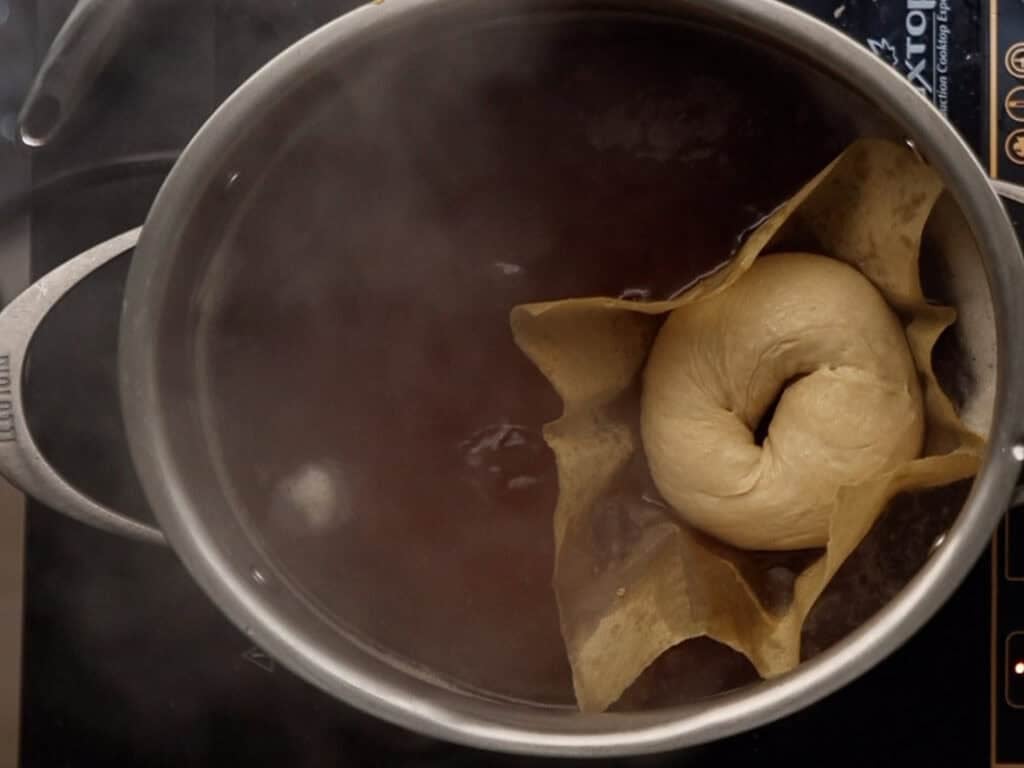
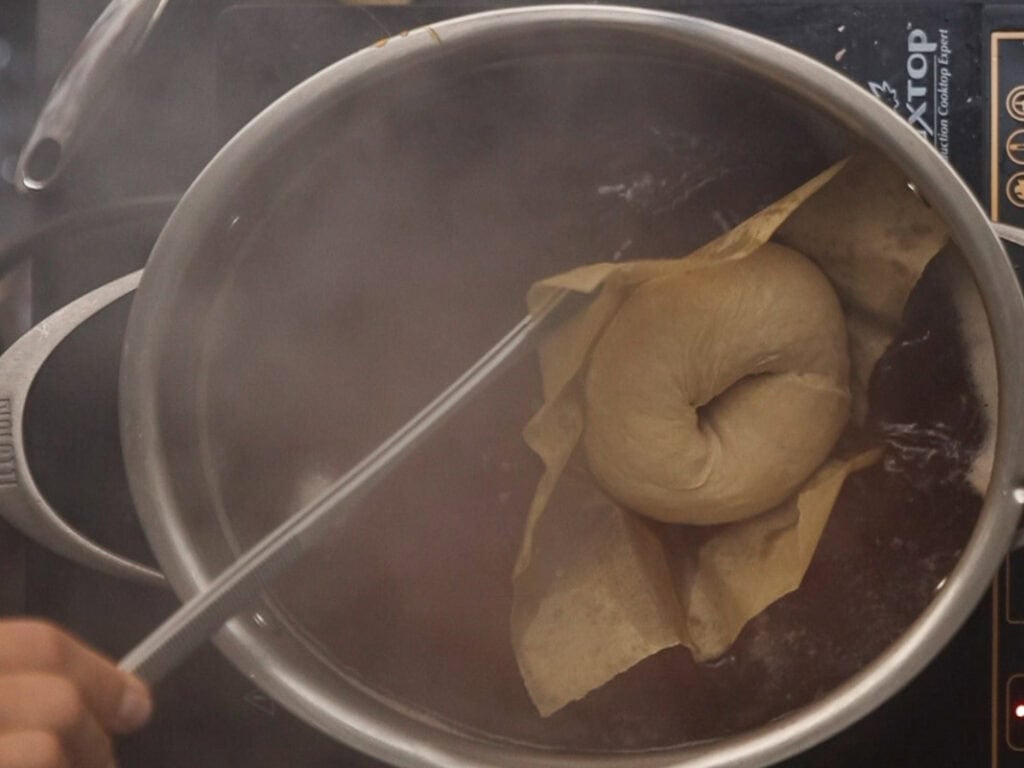
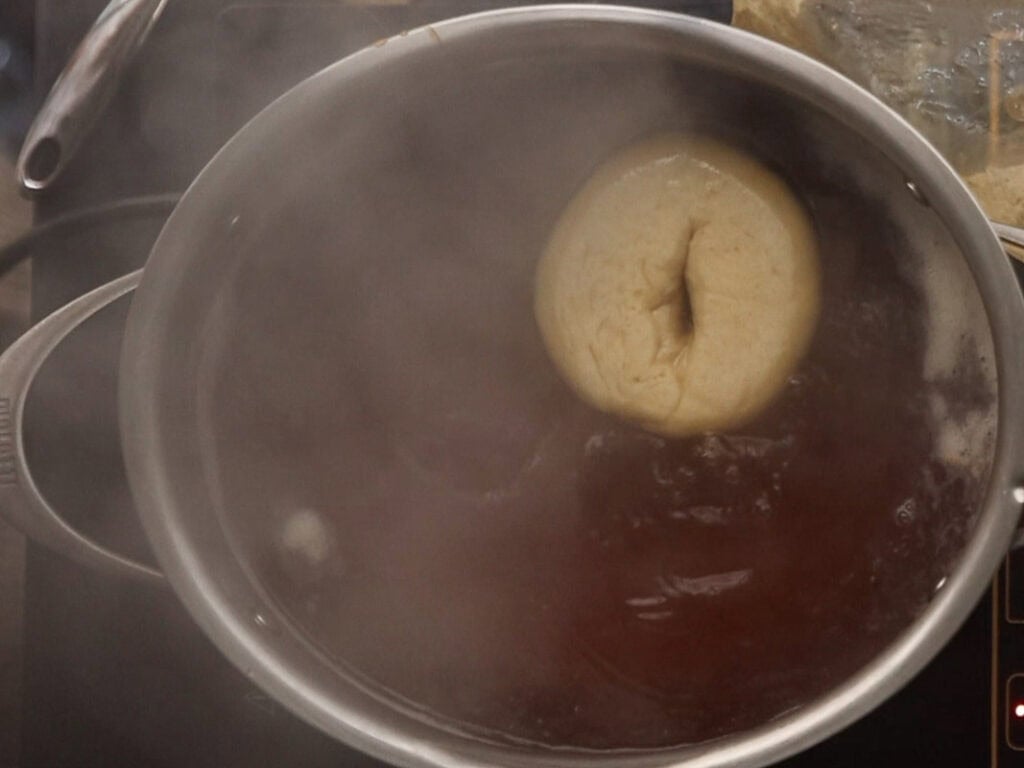
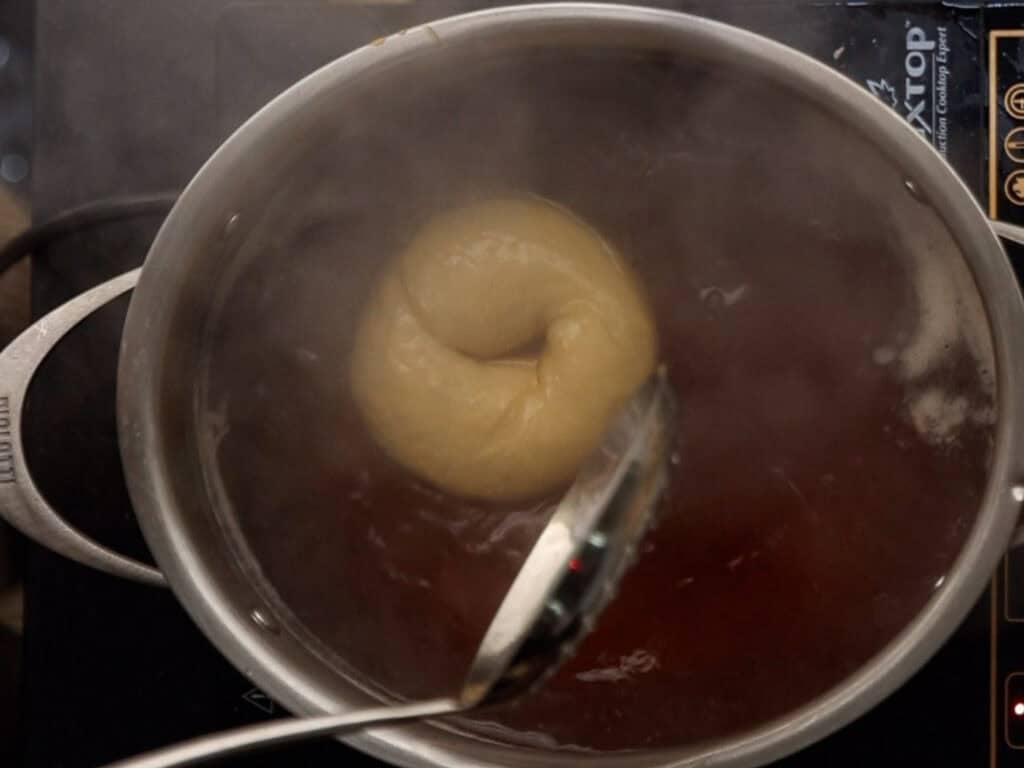
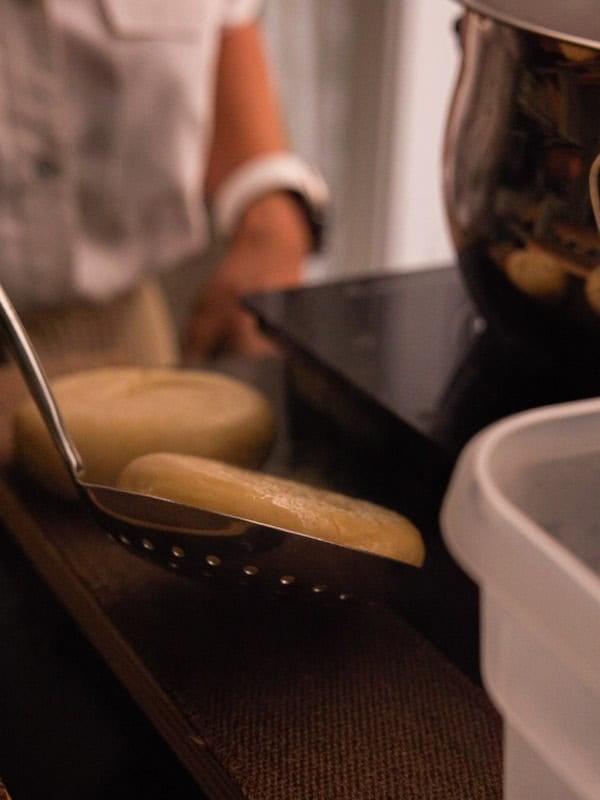
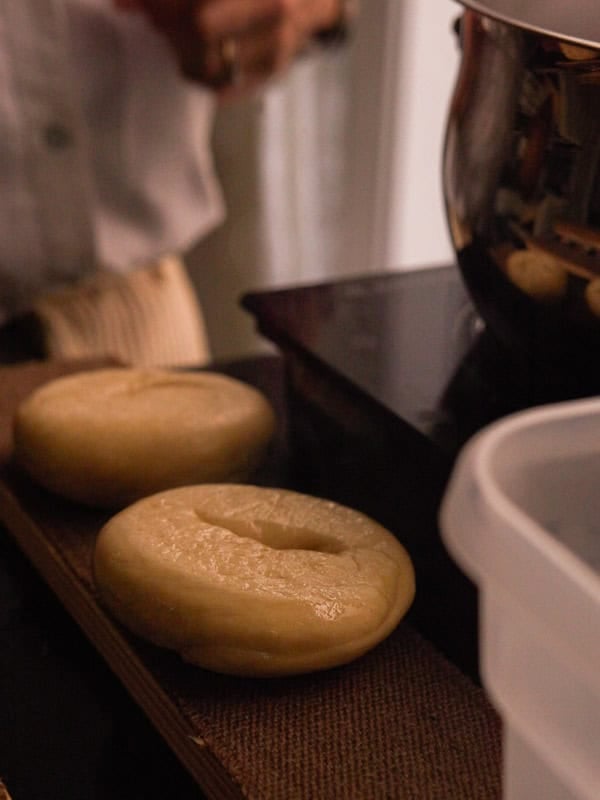
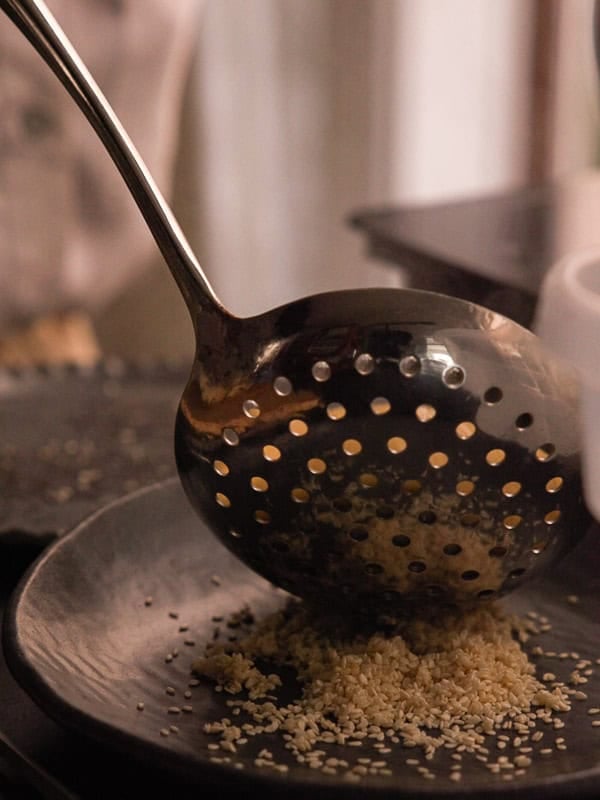
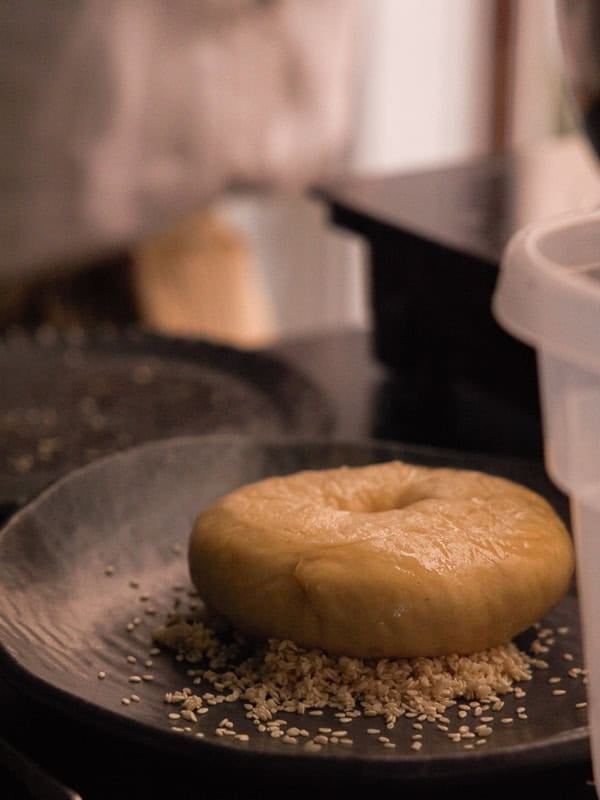
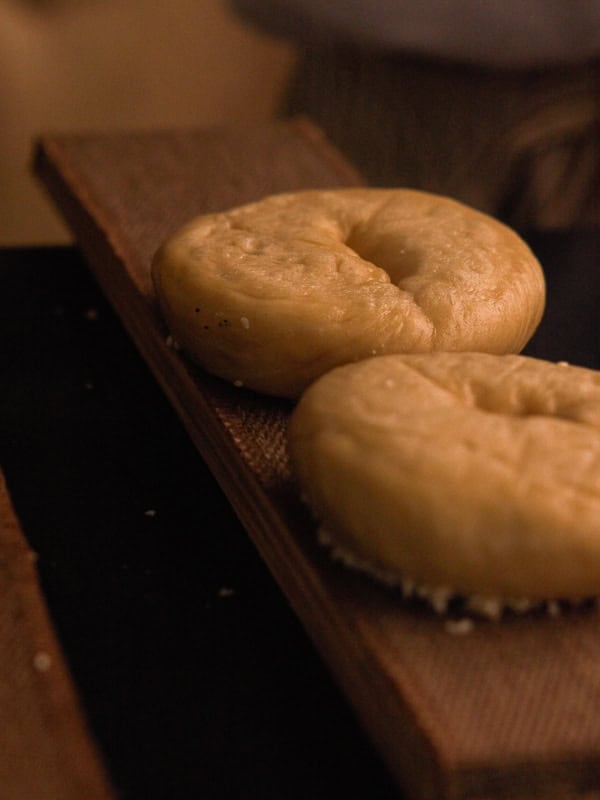
Using your hands, carefully transfer any bagels treated with toppings to the soaked bagels boards, leaving them top side down. Each bagel board is loaded with no more than three bagels. My pizza pan is only large enough to comfortably accommodate 5 bagels at a time, so I bake in batches.
Each side of your bagels should get a total of 20 seconds of boil time before they are transferred to either a bagel board or topping bowl. The hot water will inevitably deflate your bagels a little bit; however, they should still maintain most of their shape. If they deflate completely (they start to look like flat tires), they were overproofed. They will get some shape and bounce back in the oven and retain incredible flavor, but will not have the height you’re looking for. That’s ok, though! Because practice makes perfect!!
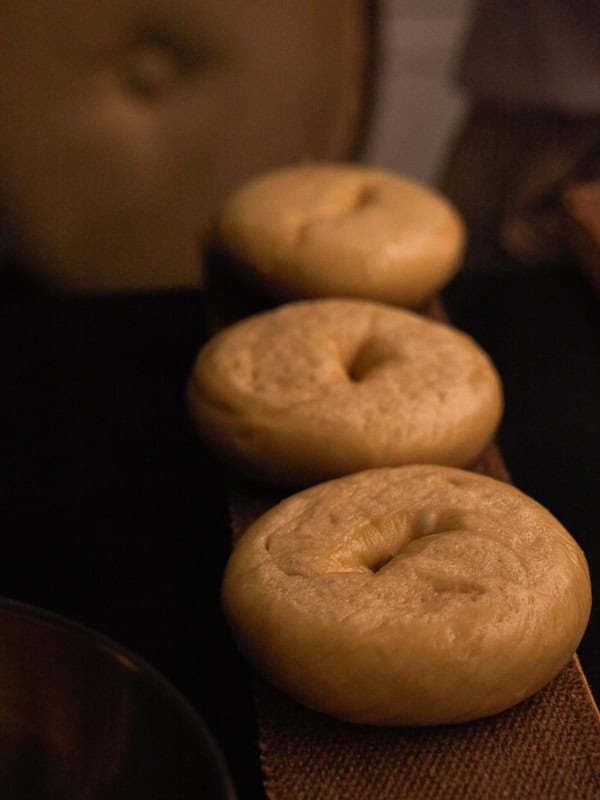
Step 10: Bake your NY style bagels.
Place two bagel boards directly on top of your baking surface. Bake for 5 minutes. Then, carefully flip the bagel boards so that the bagels are now baking top side up. This will take practice. If you miss or your bagels don’t flip but slide off onto your pan, don’t worry. Use tongs to flip and position them onto your pan (I did this the other day and they still turned out great). Bake for an additional 5 minutes. Rotate your pan and bake for an additional 5 minutes, until your NY style bagels are blistered and brown and have risen to the upper echelons of bagel glory.
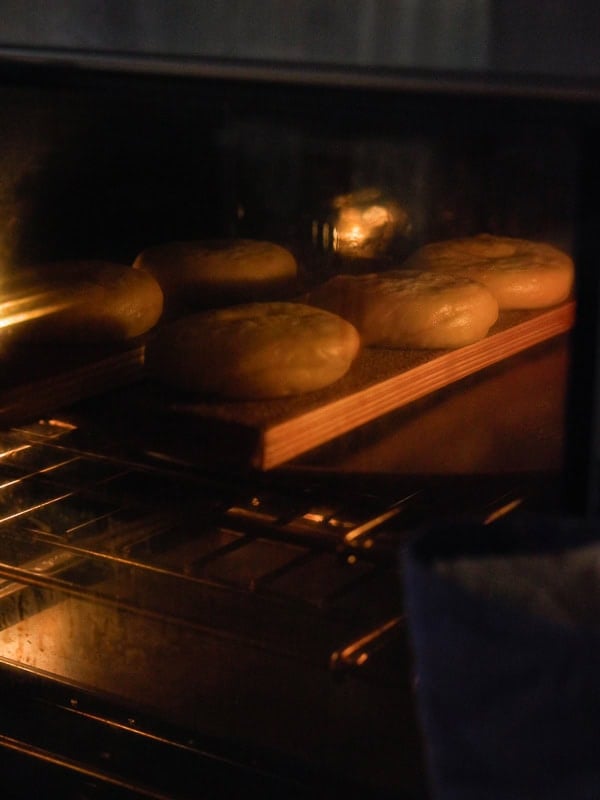
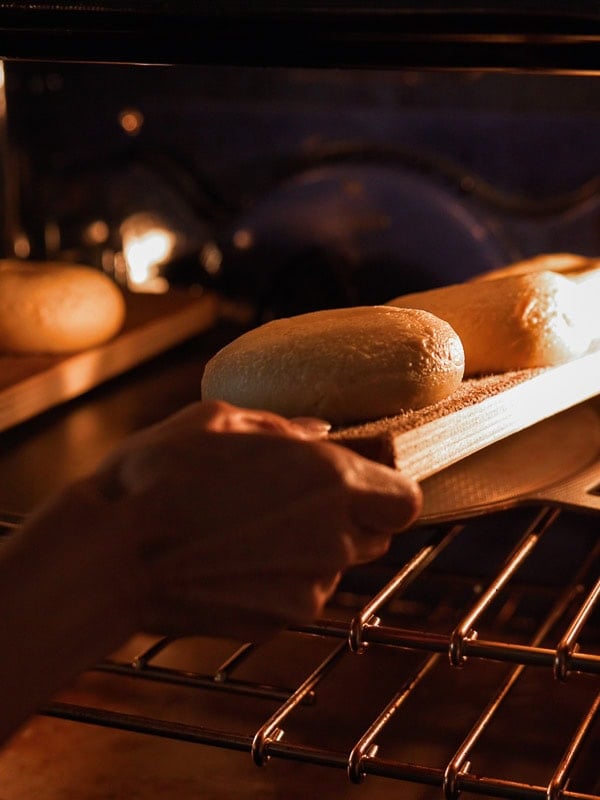
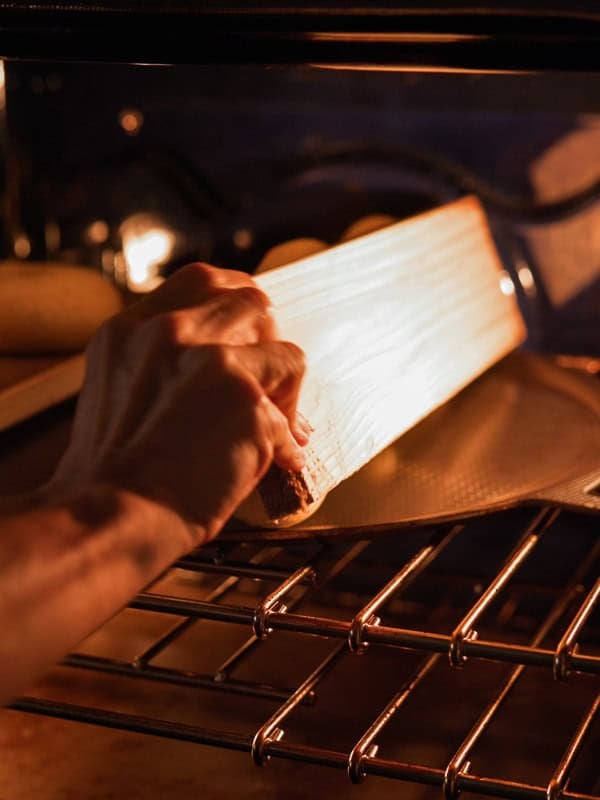
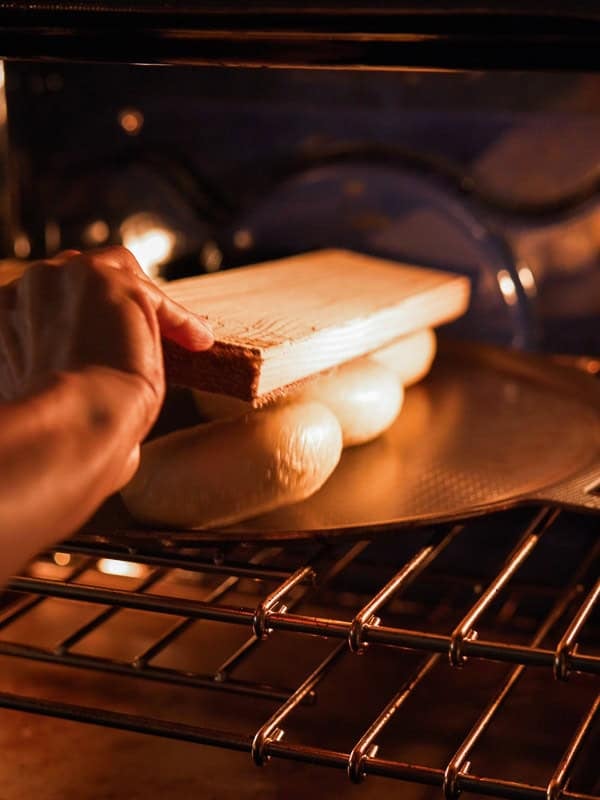
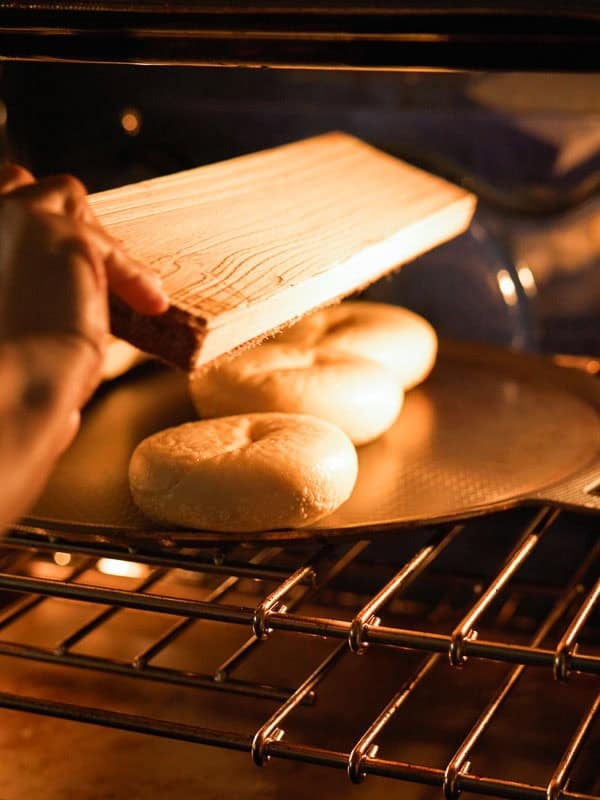
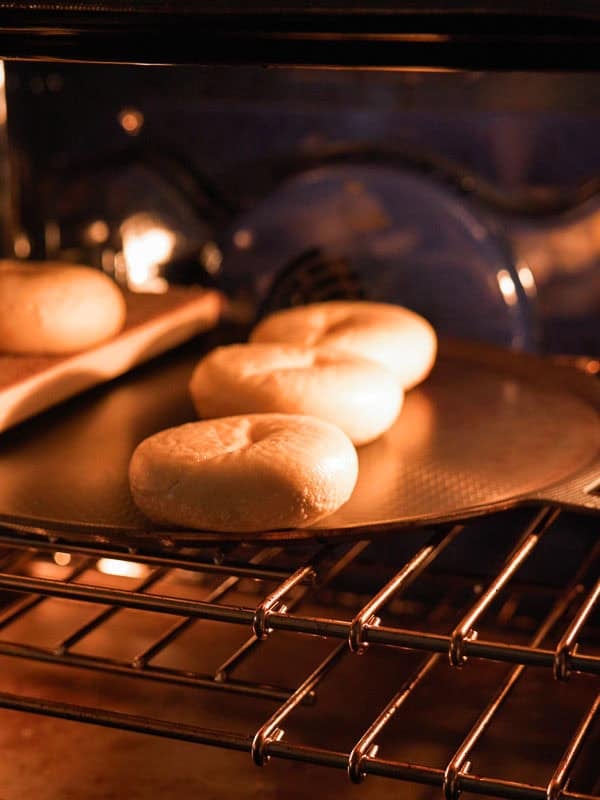
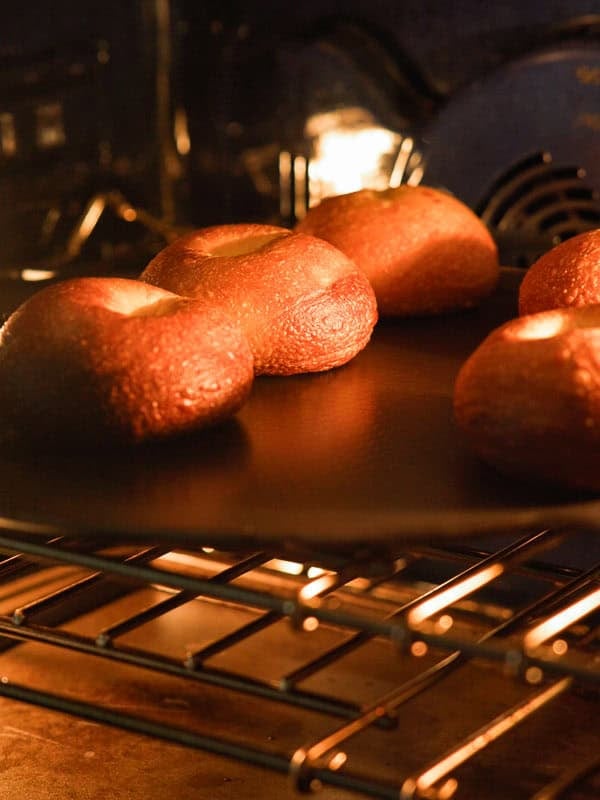
Using tongs, remove the bagels from your baking surface (mine come right off without sticking—that’s the magic of bagel boards) and place them on a wire rack or wooden surface to cool. Bake the remaining bagels using the same method as described above.
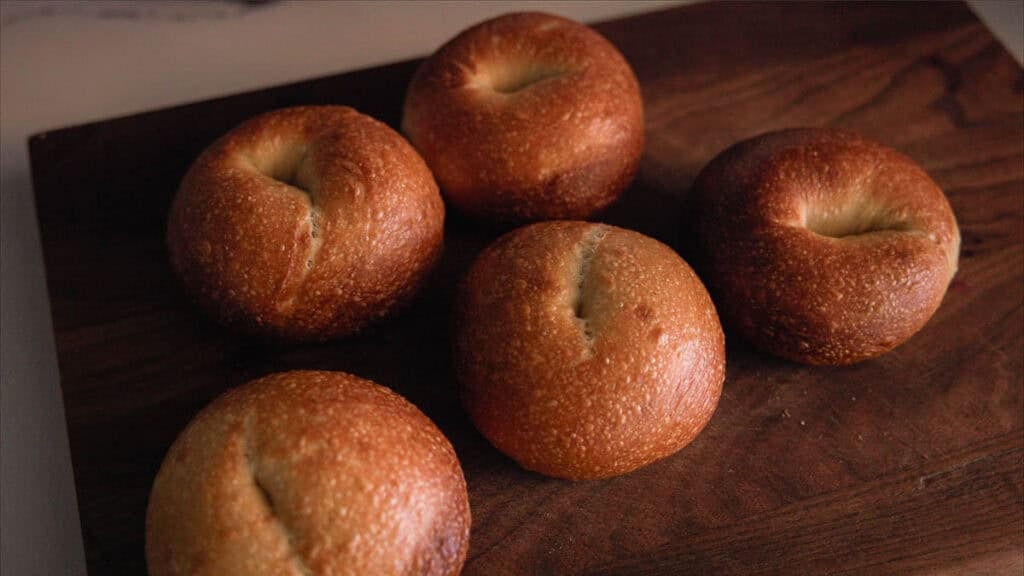
Final Results: NY Style BageLs at Different Stages of cold-proofing.
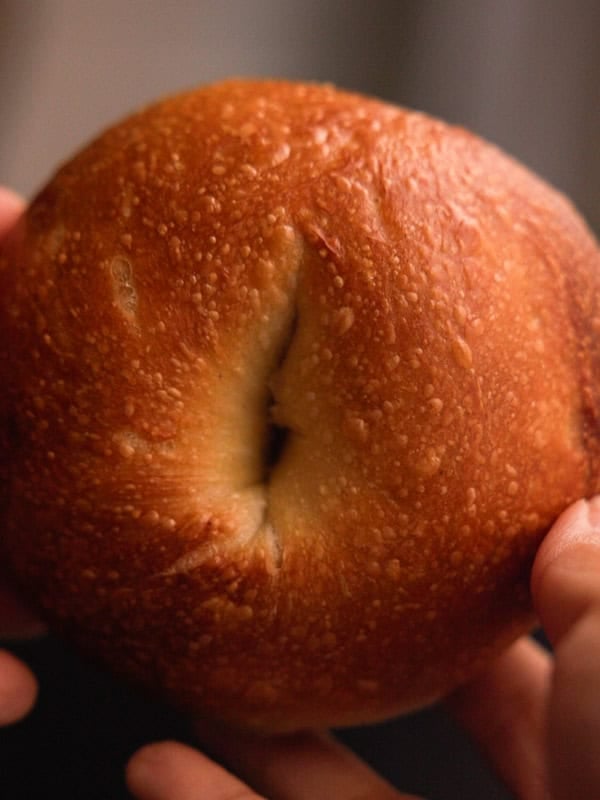
The following are what the bagels looked like after the following lengths of cold-proofing: (a) 24 hours, (b) 36 hours, and (c) 48 hours.
The 24-Hour Proof Bagel.
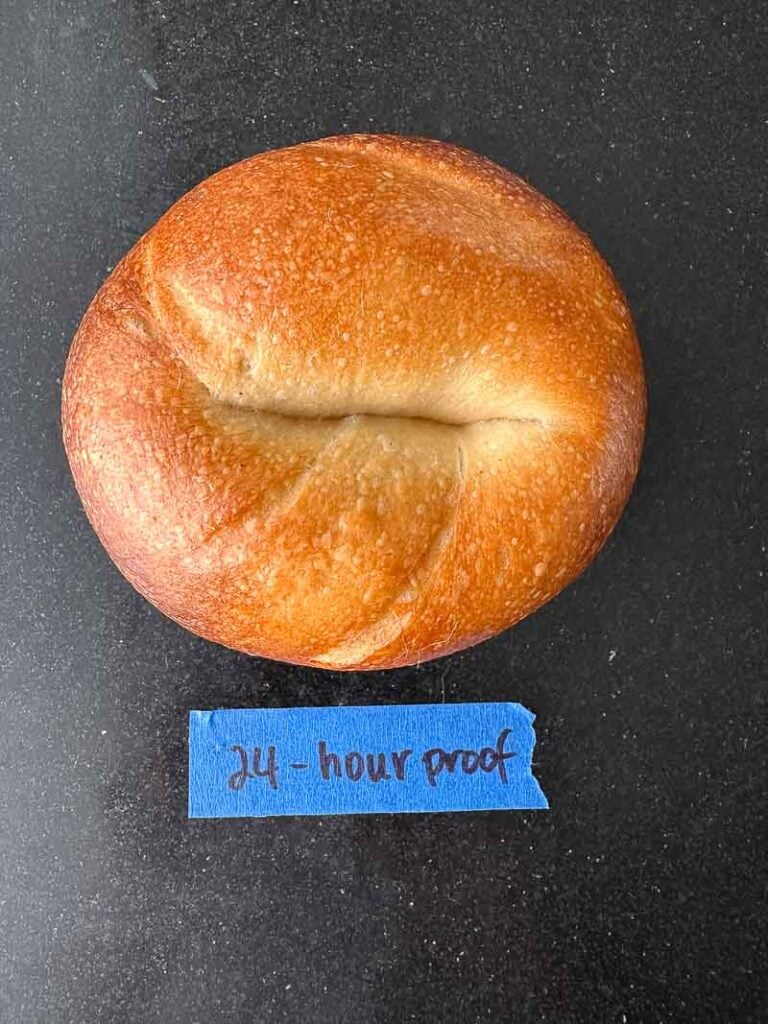
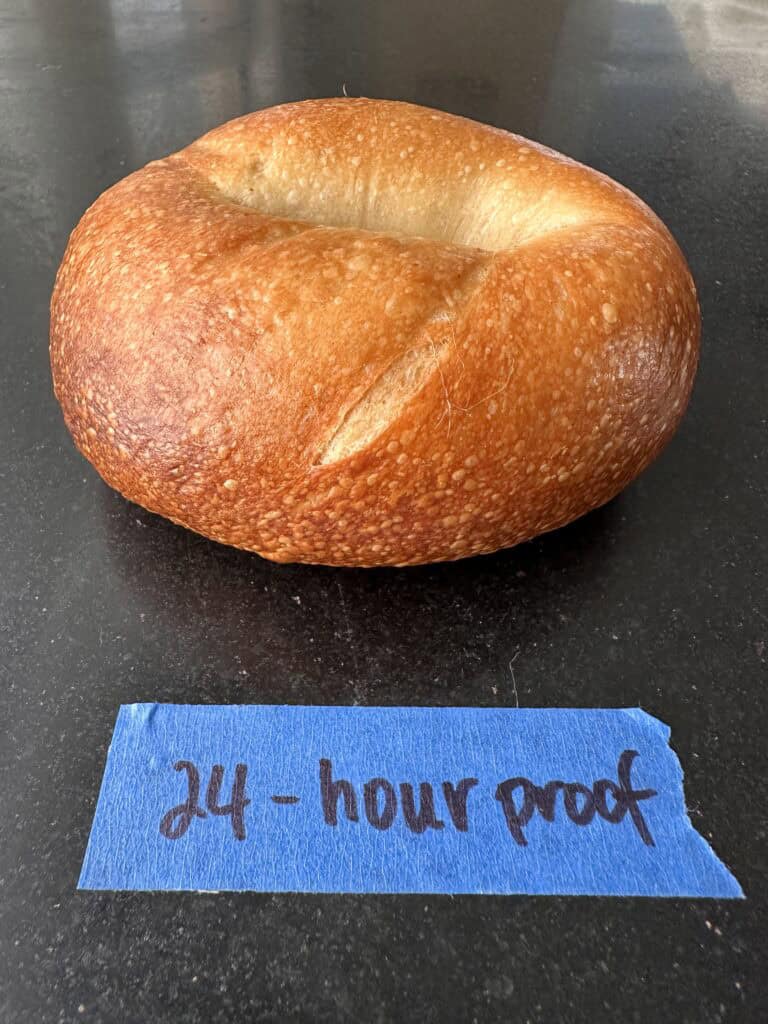
After 24 hours, I was pleasantly surprised to see beautiful blister formation and excellent height. The bagel tasted slightly sweet, with plenty of fleshy chew.
The 36-Hour Proof Bagel.
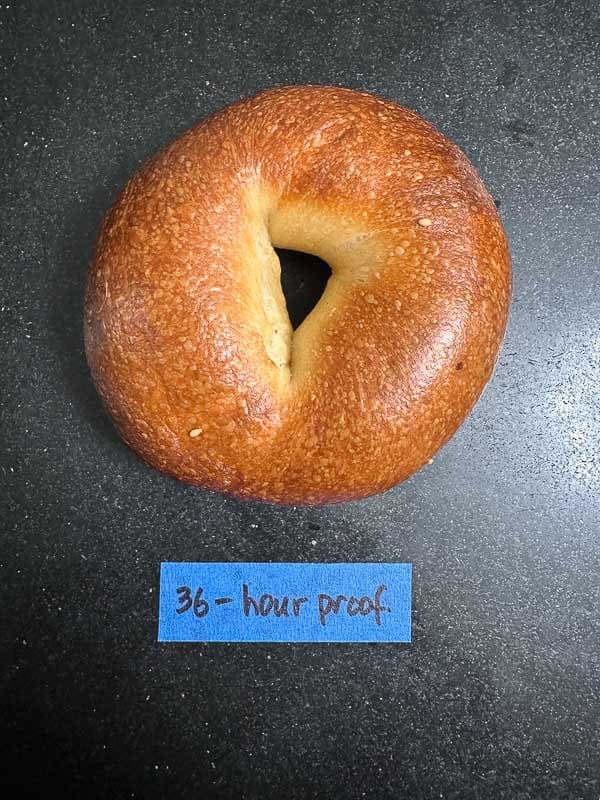
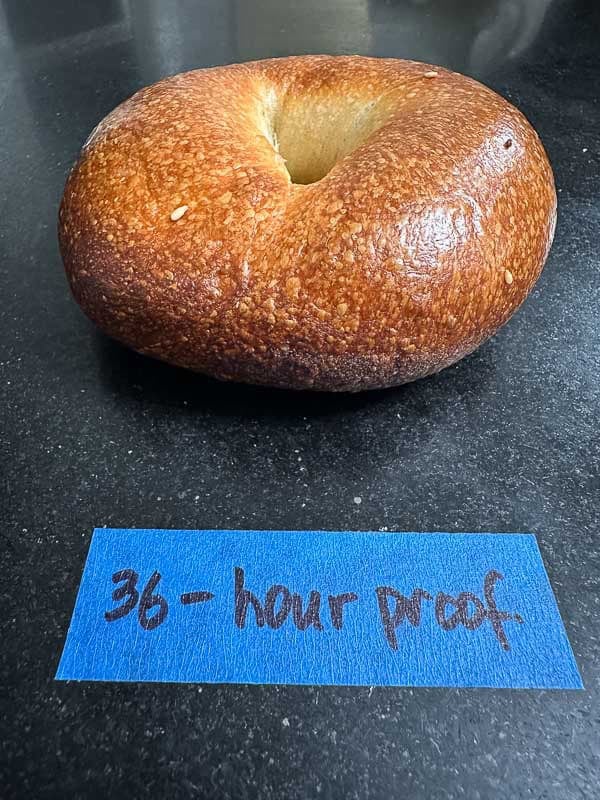
After 36 hours, you get a little more blistering but noticeably more depth of flavor. The malt becomes more pronounced and with more fermentation, the flavors more complex in general. Plenty of height, still, and a soft, chewy interior.
The 48-Hour Proof Bagel.
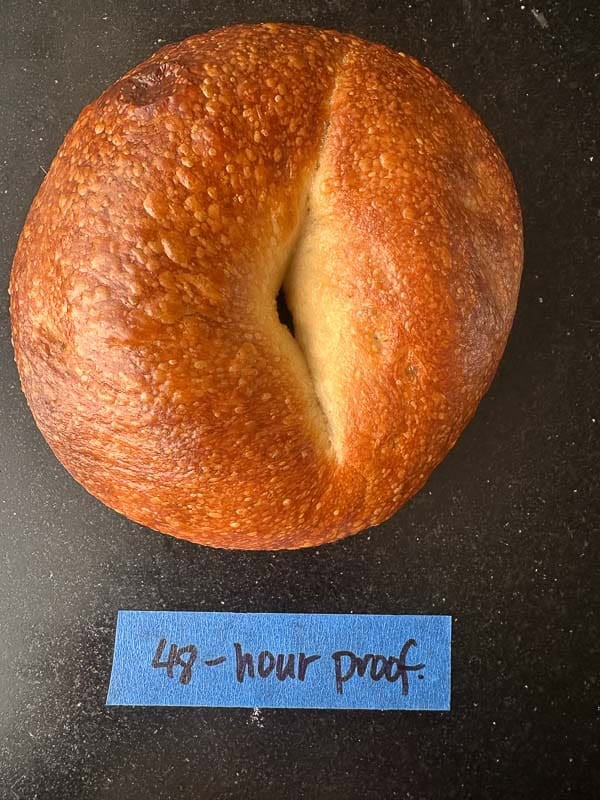
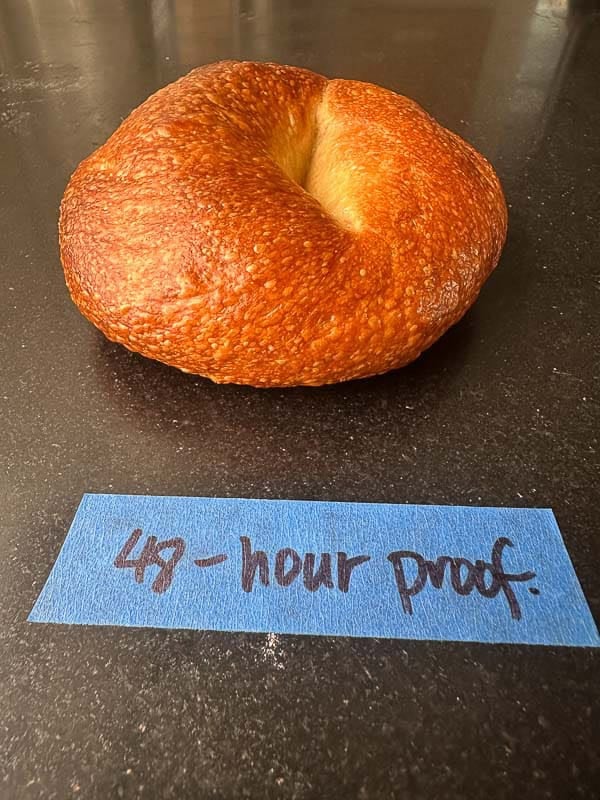
As you can see, the bagel deflated because the bagels overproofed. The bake was uneven, as a result, with some bagels baking up decently while others were quite flat (this one was the best of the bunch). While there was plenty of flavor, the texture was bordering on tough.
Frequently Asked Questions (Every Mistake I made THAT I don’t want you to make).
What is the difference between NY style bagels and other bagels?

The NY style bagel is a direct descendent of the bagel originating from the Jewish enclaves of Poland. Jewish immigrants from Poland (and other parts of Europe) began baking and selling the yeasted ringed bread from their homelands in the boroughs of New York City, most notably the lower east side and Brooklyn.
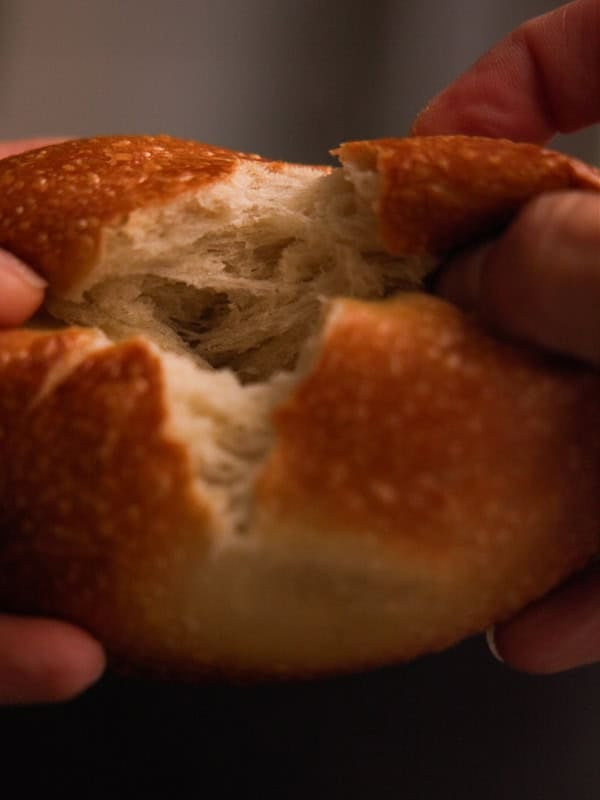
Unlike mass-produced commercialized bagels you’ll find in the grocery store, the NYC style bagel is chewy and dense, usually featuring a molasses hued skin that is blistered, leathery, and even a little crispy. The bagel dough is prepared using malt, then cold-proofed for at least 24 hours (providing for fermentation) before being boiled in water treated with malt barley syrup. NY style bagels are thus known for having a slightly malted, sweet, and complex flavor.
Why are bagels shaped into rings?

The Yiddish word for bagel or “begyl” literally translates into “ring” or “bracelet.” Historically, the yeasted dough was shaped into rings in order to facilitate portability and visibility: vendors would stack them on wooden dowels so they were easy to carry and dispense. The holes also make it easier to boil the bagels evenly before they are baked.
What are the hallmarks of excellent NY style bagels?

Whether making your own NY style bagels or purchasing them, the following are some of the things you want to look for:
-Blistered, leathery, slightly crispy exterior
-Chewy, dense, slightly tan interior
-Malty, slightly sweet flavor
Can you make authentic NY style bagels without NY tap water?
Yes! Although some have posited that the flavor and texture of NY style bagels are a result of minerals in NY’s soft tap water, science suggests otherwise. While the water may play some small role, the real differentiators of the NY style bagel from all the rest lies in the extra long cold proof followed by boiling. Neither of these things require NY tap water!
Can you use a starter (e.g., sourdough starter) in lieu of yeast to make NY style bagels?
Traditionally, NY style bagels are made with yeast. Accordingly, a recipe that’s aiming to stick the authentic NY style bagel will not include a starter, like a sourdough starter. That said, many recent iterations of the traditional NY style bagel recipe have included starters or replaced yeast altogether, in order to enhance flavor and crumb texture.
What kind of yeast should I use to make NY style bagels?
Many NY style bagel recipes use either active dry yeast or instant (rapid rise) yeast. However, instant yeast can sometimes lead to overproofing the bagel dough, especially if you intend to ferment your bagels in the refrigerator over extended periods of time (40+ hours). Overproofed bagel dough will weaken the gluten structure and ultimately result in deflated bagels. In contrast, active dry yeast will provide for a slower rise while your bagels cold proof, hedging against over-proofing. Thus, if you’re a beginner, I would recommend using active dry yeast.
I tried using instant yeast and this resulted in the WORST batch of bagels I made. The bagels overproofed and turned into discs when I boiled them.
If you still want to try using instant yeast for this bagel recipe, use 1 gram less than the recipe calls for, skip the bench proof altogether, and cold proof for no more than 30 hours before boiling.
What is the most common mistake when making NY style bagels?
The most common mistake when making NY style bagels is overproofing the bagels. “Overproofing” is when you let the yeast in your bagel dough feed for too long, creating excess gas that weakens the gluten structure. Your bagels will look “too puffy” and will be fragile to the touch. When the bagels are boiled, they will deflate significantly, collapsing the air pockets in the dough, rendering an unpleasantly tough, cardboard-like texture. While they will still rise a little bit in the oven, they will not have nearly as much height as a properly proofed bagel.
Do I need high-gluten or high-protein flour to make NY style bagels?
NY style bagels are traditionally made using high-gluten or high-protein flour. High-gluten flour, also known as high protein flour, is a wheat flour milled from hard red spring wheat and typically contains anywhere from 13.5% to 15.5% protein. For point of reference, your typical bread flour contains about 12% to 13 % protein. The higher protein content is what’s going to facilitate that dense, chewy texture–one of the hallmarks of NY style bagels.
You can still use regular bread flour to make NY style bagels, though they may not achieve the same chewiness.
What is the best way to knead bagel dough?

For at-home bagel making, the best way to knead bagel dough for optimal gluten formation is a food processor. The blades of a food processor can stimulate strong gluten formation for a low hydration dough like bagel dough in under 2 minutes, while a traditional stand-mixer can take up to 20 minutes. Kneading by hand can take more than twice that time. Many newer food processors, like this Ninja Professional Plus Food Processor, even have a “dough” option that is ideal for kneading bagel dough.
My first few batches of bagels were kneaded using a stand-mixer. I never got the kind of gluten development that led to the beautiful, blistered skin, even with cold-proofing. I thus switched to the food processor and haven’t looked back.
Can I make NY style bagels without using malt?

NY style bagels are traditionally made with malt in both the dough, as well as the water the bagels are boiled in. While recipes have allowed for substituting with brown sugar or brown rice syrup, doing so eliminates the malt flavor that NY style bagels are known for. If you don’t mind missing out on this flavor, you can make bagels without using malt, so long as you substitute with something like brown sugar (for malt powder) and brown rice syrup (for malt barley syrup).
In the beginning, I used brown sugar in my bagel dough and brown rice syrup for my boiling liquid. They produced good bagels, but not my best bagels. You can absolutely tell the difference.
What is the best way to shape your bagels?

There are generally two ways to shape bagels. First, you can shape the dough into tight balls and poke a hole in the center with a skewer or similarly pointy object. Then, using your fingers, gently widen the hole until it is approximately 2 inches wide.
The second technique is to roll the bagel dough into logs and then bring the two ends together to create the classic ring. Traditional bagel makers use this second method because it provides for better tension in the dough, making for a better crust and facilitating more height for the bagels.
If you are a beginner, you can start with the poking method. However, I found that the rolling method yielded a much handsomer looking bagel crust. Plus, I think it’s more fun! And you’ll never get good at it if you don’t practice! If you want to play it safe, make half using the poke and the other half using the roll method!
How come your bagels have no discernible hole?

Sometimes referred to as the “belly button bagel,” bagels that are shaped with a smaller hole to begin with may sometimes lose that hole altogether by the time it is fully proofed and baked. This is because as the dough expands during the cold proofing period, the hole will shrink. If you want to make sure your bagel has a visible hole, roll your logs out a little longer (closer to 8 to 10 inches) before bringing the ends together and sealing the seam.
I prefer to keep my bagel holes quite small, in order to maximize the height of my bagels. The larger the hole, the flatter they tend to be—the dough expands out as much as, if not more than, it expands up.
Can I substitute barley malt syrup for malt powder in the dough recipe for NY style bagels?
Many NY style bagel recipes use barley malt syrup in lieu of diastatic malt powder when preparing the dough. Mine does not. I tried subbing in barley malt syrup and the dough became over-hydrated. This resulted in poor gluten formation (exacerbated by overproofing—this is the batch made with instant yeast) and the worst bagels I ever made.
This doesn’t mean you can’t use barley malt syrup. You’ll just have to adjust the amount of water to account for the additional hydration.
Why do I need parchment paper for making bagels?
Before they are baked, bagels are notoriously fragile. If you handle them too much or without care, they will deflate before they are baked, resulting in a flat, tough bagel. Early on in my bagel making journey, I did not use parchment paper to keep the bagels separated while they proofed or to deposit them in boiling water. I ended up tearing the bagel dough and manhandling them to such a degree, they came out flat or deformed.
This is the same reason I use such a large tray that comes with a lid when proofing my bagels. I tried cold-proofing them in a standard sized baking tray, covered with a loose plastic bag or plastic wrap. Even when sprayed with cooking oil, the bagels stuck to each other or stuck to the plastic wrap. When I tried to remove them for boiling, they tore.
For how long should I boil NY style bagels?

Different recipes provide for differing lengths of time for boiling NY style bagels. The longer you boil them, the thicker the crust. However, the longer you boil them, the more they will deflate. The trick is to hit that sweet spot–boiled long enough to develop that leathery, crispy crust, but not so long that your bagels turn into flat tires.
I’ve had the best luck by making sure my water is at a gentle boil (so as not to over-agitate my bagels) and then boiling them for a total of 20 seconds on each side.
How come you do not proof your dough before shaping it into bagels?

Proofing your dough before shaping (called “bulk proof”) runs a significant risk of overproofing your bagel dough, which results in flat, deflated, tough bagels.
After consulting a ton of bagel recipes, going deep down the Reddit holes, and experimenting with bulk proofing myself, I found it best to skip the bulk proof altogether and simply let the dough rest for 15 minutes in order to facilitate easy shaping.
Do my bagels need to pass the “float test” before cold-proofing?

No. Because NY style bagels call for a chewy, dense interior and because the bagels will proof for more than 24 hours in the refrigerator, they will have plenty of time to proof before they are boiled and baked. Letting them proof for too long after they are shaped (“bench proofing”) runs the risk of over-proofing.
What is the “float test”? It’s when you drop a bagel (or a leftover piece of the same dough you used for the bagels) into a large bowl of water to see whether the dough immediately floats. Many bagel recipes call for administering the float test. I did so for several batches and found that doing so not only risked over-hydrating the bagels I used for the test, the bagels started to look a little over-proofed after I took them out of the fridge.
In lieu of a float test, I just let my bagels bench proof for 30 minutes before sticking them in the fridge. If you live in a very warm climate, you may want to cut this to 20 minutes.
For how long should I cold-proof my NY style bagels?
Cold proofing your NY style bagels is what will give them the trademark blistered skin and complex flavor when you bake them. Thus, every reliable bagel recipe I consulted required a minimum of 24 hours. Many recommend 36 hours as the sweet spot for flavor optimization without risk of overproofing.
I pushed it to 40 hours myself with great results. After that, the gluten started to collapse resulting in flatter, tougher bagels. Depending on how cold your refrigerator can get, you may be able to push it out for longer than I did.
Do I really need bagel boards to make bagels?

Bagel boards are a traditional component of baking NY style bagels. They are planks of solid wood, usually about a foot to a foot-and-a-half long, covered in burlap. Soaked before placing in the oven, they are used to prevent burning the bagels in a scorching oven.
I didn’t think bagel boards would be necessary at first. But in my research, I learned they helped to guard against overcooking your bagels while also trying to maximize their height. The latter is achieved by jacking up the temperature to the hottest levels (500° F), but if the wet dough is subjected to the hot baking surface (I use a pizza pan or sheet pan), it will stick. The soaked bagel boards prevent sticking and offer a gentler alternative, allowing the bagel to get that initial “poof” in the hot oven without the sear. The bagel boards also facilitate the “flip” without handling the bagels themselves (to guard against deflation).
That said, do you absolutely NEED bagel boards? No. You can always line your baking sheet with parchment paper and/or semolina flour and flip them yourself using tongs (though, again, using tongs on your bagels does increase the risk of deflation or otherwise misshapen bagels).
How do I avoid burning the bottoms of my bagels?

In order to guard against burning the bottoms of your bagels, use bagel boards. This will limit how much time your bagel bottoms are subjected to the baking surface and also prevent the bagels from sticking.
In addition to using bagel boards, slide an unused baking sheet into the bottom tray of your oven. You can also use parchment paper on your baking surface to add a layer of protection. Finally, if you don’t mind sacrificing some height, you can lower your baking temperature to 450° F for a gentler bake, though if you do so, you’ll want to increase your bake time by a few minutes.
How do I avoid burning the tops of my bagels?
In order to guard against burning the tops of your bagels, use bagel boards. This will limit how much time your bagel tops are subjected to direct heat and also prevent the bagels from sticking. In addition, make sure to rotate your bagel baking surface about halfway through the post-flip bake. You can also tent your bagels with some aluminum foil for the last 5 minutes. Finally, if you don’t mind sacrificing some height, you can lower your baking temperature to 450° F for a gentler bake, though if you do so, you’ll want to increase your bake time by a few minutes.
What is the best way to top my bagels with toppings?

The best way to top your bagels with any toppings is to add the toppings to a shallow bowl and to gently deposit your boiled bagel—top side down—into the bowl. Press VERY gently to firmly adhere the toppings to the bagel dough before transferring them to your bagel boards (remember, top side down!).
This method facilitates the most even distribution of topping while also guarding against all your toppings coming off during the bake. For my first few batches, I simply sprinkled my toppings on the top of the bagel because I was afraid to handle them too much before baking them. All my sesame seeds fell off during the bake. If your bagels are properly proofed and if you do not over-boil them, they should be able to handle a little face-down love in your toppings without deflating.
How should I store my NY style bagels?
Take a cue from your favorite NY deli and store them in paper bags at room temperature if you plan on enjoying them over the next 2 days. Otherwise, place them in an airtight container in the refrigerator for up to 5 days. Any longer, you’ll want to slice and freeze them (you slice them so they’re easier to toast up).
Recipe Card.
NY Style Bagels
Equipment
- 9-cup food processor
- food scale
- 4 bagel boards
- Parchment paper
- large baking trays with lids
- steel pizza pan or baking sheet pans
Ingredients
Bagel Dough.
- 4 g active dry yeast
- 400 g water (at room temperature)
- 40 g dark brown sugar
- 770 g high protein flour
- 30 g diastatic malt powder
- 20 g Kosher salt
- 24 g vegetable oil (or any neutral oil)
Bagel Boiling Water.
- 2 tbsp barley malt syrup
- 2 qts water
Optional Bagel Toppings.
- 2 tbsp sesame seeds
- 2 tbsp poppy seeds
Instructions
- Add your yeast and brown sugar to your water and stir. Set that aside for 10 minutes, until your yeast mixture foams. It doesn't have to overflow with foam—even a small foamy film is enough.
- Next, add your flour, diastatic malt, and salt to the food processor. Mix on low (or use the "dough" function) for about 5 seconds. Then, slowly pour in your entire yeast mixture (use a rubber spatula to scrape up any sugar or yeast sticking to the bottom of your container). Then, add your oil. Knead on low for four 30-second increments, for a total of 2 minutes (my food processor will knead for only 30 seconds before stopping on its own). This will guard against overheating. When done, your dough will be very stiff and dimply. Don't worry.If using a stand-mixer, knead on low (2 on KitchenAid) for 4 minutes. Then, move to medium-low (4 on KitchenAid) for 8 to 12 minutes, until your dough feels stiff and firm. For more on why I prefer a food process over a stand-mixer, see Food Processor in Special Equipment Section above.Knead your dough by hand for about 15 seconds and then shape into a ball. Place your dough in a lightly greased bowl, cover it, and let it rest for 15 minutes.
- While your dough is resting, cut out parchment paper squares. Make them much larger than you think you'll need to. I make mine 6" x 6".
- After about 15 minutes, your dough ball will still look mottled, but once you start handling it, you'll find it supple and easily shapeable—kind of like Play-Doh. Remove it from the bowl and weigh it (mine is usually between 1,260 to 1,300 grams). Divide this number by 10 to figure out the weight of each bagel (mine usually range from 126 to 130 grams). Then, using a sharp knife or bench scraper, pull off enough dough for one bagel, weighing it to make sure. Place the rest of your dough underneath a plastic bag or kitchen towel to prevent drying out.
- Your dough hunk will usually look like a vague sort of triangle (mine usually does). Pull the top half of your dough hunk and fold it over, into the middle of your hunk. Press it in with the heel of your hand. Roll the top half down again, so that the bottom "flap" is covered and, once more, use the heel of your hand to press down and seal the dough. Then, cup your hands over the top of the dough and gently roll back and forth, until you have a very stubby, short log (around 4 inches long). Set aside under your plastic baggie and repeat with remaining dough, until you have a total of 10 stubby logs.
- Once you've pre-shaped all your dough, move onto finally shaping your NY style bagels. Roll the short log, starting from the middle out towards the ends, so that it's just a bit longer (around 6 inches). Do not make the logs too long, as this will prevent dough tension, yielding a flatter, wider bagel.
- Then, twist the log by rolling up with your right hand and rolling down with your left hand. Grab the right end with your right hand and wrap the log around your knuckles, bringing the two ends together, usually somewhere around your right thumb. Bring your right hand down to your working surface (with the log still wrapped around your knuckles) and roll up and down and from side to side, while exerting pressure on the section where the two ends meet. Then gently roll your right hand down all the way through until it exits the hole completely.This should seal the seam, but if you feel nervous they'll come apart, you can pinch the seam together using your fingers, as well.*For more on why I prefer the roll method (as opposed to the poke method) for shaping my bagels, see FAQ above.
- Spray a tiny bit of cooking spray onto the bottom of your parchment square. Place your shaped bagel on top and carefully transfer to your large baking tray. Repeat with remaining dough. Cover your tray and let it proof for about 30 minutes.
- Place your shaped bagels, covered, in the refrigerator for at least 24 hours and up to 40 hours. Do not proof for longer than 40 hours, as doing so will likely yield overproofed bagels.
- Arrange the racks in your oven so that the uppermost one is set in the middle. Place your baking surface (I use a steel pizza pan—for more on this, see Pizza Pan and Sheet Pan in Special Equipment section above) on that top rack. Place a sheet pan on the bottom rack (this will prevent the bottoms of your bagels from burning). Preheat your oven to 500° F.
- Add 2 quarts of water to your pot and bring it to a gentle boil. When the water is getting hot (but before it boils), add barley malt syrup (the warm water will make it dissolve better).
- While your oven is preheating and your water is coming to a boil, soak your bagels boards (I use 4 total bagel boards—you don't want to crowd them) by running both sides beneath your faucet for a few seconds. Place your soaked bagel boards near your stovetop (i.e., where your water is boiling).
- Measure out whatever toppings you plan on using (e.g., 2 tbsp sesame seeds, 2 tbsp poppy seeds, 2 tbsp Everything Bagel Seasoning) into shallow bowls and place them near your stovetop (i.e., where your water is boiling).
- Do not bring your cold-proofing bagels out of the fridge for even one second before you're ready to boil them, as doing so will risk overproofing them—especially if they're hanging out by a warm stove.When your water (treated with barley malt syrup) is at a gentle boil (not a riotous boil, as this will risk deflating your bagels!), gently deposit one or two of your bagels, parchment paper side down, into the water. Count to 10. Using tongs, gently remove the parchment paper from the bottoms and using a slotted spoon, gently flip the bagels over. Count to 20. Flip them over again. Count to 10. Flip them over once more and then remove each bagel from the water, draining as much water as you can, and gently place them, top side down, on either the soaked bagel boards (for plain bagels) or the bowl with the topping of your choice.
- Using your hands, carefully transfer any bagels treated with toppings to the soaked bagels boards, leaving them top side down. Each bagel board is loaded with no more than three bagels. My pizza pan is only large enough to comfortably accommodate 5 bagels at a time, so I bake in batches.Place two bagel boards directly on top of your baking surface. Bake for 5 minutes. Then, carefully flip the bagel boards so that the bagels are now baking top side up. This will take practice. If you miss or your bagels don't flip but slide off onto your pan, don't worry. Use tongs to flip and position them onto your pan (I did this the other day and they still turned out great). Bake for an additional 5 minutes. Rotate your pan and bake for an additional 5 minutes, until your NY style bagels are blistered and brown and risen to the upper echelons of bagel glory.Using tongs, remove the bagels from your baking surface (mine come right off without sticking—that's the magic of bagel boards) and place on a wire rack or wooden surface to cool. Bake the remaining bagels using the same method as described above.


Thrilled to find this recipe. After moving to Finland from the US, one thing I’ve missed like crazy is bagels. They sell round bread with a hole in the middle and they’re really really bad….think Panera bagels are 100x better bad. I’ve been trying to make bagels for years and have done better than they sell in stores, but this one is the best. We can’t get some of the ingredients like barley malt powder and syrup in regular stores but beer suppliers carry them (I’ve purchased for other attempts). High protein flour isn’t a thing in Finland but I can buy gluten for making seitan (I make a whole lot of this). I just weighed out 2.5g of gluten for 97.5g of flour to make a15% protein mix and it wworks great.
Hi Laura, so happy this recipe brought a little taste of home to Finland. Thanks for enjoying the reipce!
These bagels have changed the game! I’ve made this recipe 3 times now, all with so much success! Ive had major issues with other recipes due to over proofing, and this recipe fixed it!! Love love love.
So incredibly good!
I saw the real where finding a good bagel recipe is a thing you would tell younger self, and I was like either she really loves bagels or these have to be really good! So I searched for your recipe and I’m so glad that I did. I thought this was gonna be like so many things for me…. once and done, but I’m excited to make more! Thank you so much for the delicious recipe!
Hi Andrea, I’m so glad you gave the recipe a try and loved the bagels! It makes me so happy to hear you’re already excited to make them again. Thanks so much for sharing! 🙂
I’ve been on the hunt for a really good bagel recipe for a long time. I have tried so many. When I saw this recipe though, I suspected this was THE recipe I’d been looking for. There were so many very specific detailed instructions in the recipe that directly addressed some of the challenges I’d had previously. So I purchased bagel boards and the covered sheet pan things specifically for this, even though i have a tiny kitchen and honestly have no idea where I’m going to store them long term. I’m so glad I did though. I made the bagels today.
Joanne isn’t kidding about flipping the bagels from the bagel board to the pizza stone being a skill that will take practice. So some of my bagels look like a Dali version of a bagel! But overall it was so much easier and less frustrating than my previous attempts, and the results!! These are so good. The taste, the texture, the everything.
This is the bagel recipe of my dreams.
Hi Deb, lovely to hear! I’m so glad you found the recipe and loved the bagels. Thanks so much for trying it and sharing your experience!
So, do I need bagel boards? Not sure I want to invest in more equipment and I have a very small kitchen with not a lot of storage space….
I forgot to ask if you also have a cinnamon raisin bagel recipe by any chance? ☺️
This bagel recipe looks amazing. I am going to try it asap. Can’t wait. I have also been craving for cinnamon raisin bagels. Living in Germany I have no choice but to bake them myself unfortunately…
Hi Joo, I hope you enjoy the recipe, and I hope you get to try the cinnamon raisin bagels soon too!
Like Mary, no time yet to try this recipe, but I reckon worthwhile asking before I do, your thoughts on using vital gluten flour to up the gluten content? My bread flour has only 12.5% gluten…
Thanks so much for sharing your bagels, Australia is a looooong way from NYC when it comes to a decent bagel.
Hi Jill! Super excited for you to try this and adding vital wheat gluten is a great idea–one that I did see some chatter about in the Reddit threads. As a matter of fact, there are a couple of pretty generous math whizzes who’ve taken the time to create online CALCULATORs so that you can figure out exactly how much vital wheat gluten to add in order to achieve the correct protein content. This is one I just tried out and it looks pretty good! https://foodgeek.io/en/vital-wheat-gluten-calculator/
Give it a whirl and report back! 🙂
There hasn’t been time to try the recipe yet, but I’m commenting anyway; I hope that’s okay! First off, thank you so much for sharing all you learned about making bagels–and especially for the detailed photo sequences for shaping them. I love the “roll one direction with your right hand and the opposite with your left” tip! I don’t have a food processor or a stand mixer so I’ll be kneading by hand; “stiff and dimply” is useful, but do you have any additional advice there as to what the dough should feel like when it’s “done”? (I did a six-month stint in a bread bakery so I’m a pretty decent kneader, but I’m guessing I’ll get a serious workout with this dough.) I know I mustn’t overproof the bagels, but decades in editorial means I can’t not proof as I read: I think you want double quote marks, not single, when you say to make your parchment squares bigger than you might think you want: 6″ x 6″, not 6′ x 6′. I absolutely love your intensity: “Do not bring your cold-proofing bagels out of the fridge for even one second before you’re ready to boil them” is simply brilliant–and so necessary for someone like me! -m.
Hi Mary!!! Thanks for the note on the typo! I caught that myself this morning while eating breakfast and meant to get to that! It’s fixed!
In regards to your question, I haven’t been brave enough to try kneading by hand myself. But in terms of what you want, you want a dough that doesn’t tear when you pull it, that bounces back when poked. But it is a very low hydration dough (even for bagels), so it will likely not pass the “window pane” test–the dough will just be too stiff to get it that thin. Hopefully the photos give you some indication of what it should look like. I’ve read that it can take up to 40 minutes to properly knead bagel dough by hand!! 😅 But if you were a bread baker, maybe you have more upper body strength than I do!! LOL!
And yes! I made the mistake of bringing out my bagels and letting them sit while the water boiled (20 minutes). I left them right next to the pot (silly me!). And, sure enough, they over-proofed and deflated the minute they hit the boiling water. I was SO BUMMED!! Some folks have successfully allowed the bagels to poof a little right before boiling, but like I said, I always err on the side of underproofing, because mine keep flattening.
I wish you the best of luck Mary! And encourage you to keep trying until you arrive at the perfect bagel for you!! <3