Easy & Delicious Hi-Protein Chickpea Cutlets

Hi-protein.
Hi-fiber.
DELICIOUS.
We’ve been eating these chickpea cutlets almost daily for the last 3 weeks! That’s how much we love them! They’re packed with nutrients and absolutely scrumptious, but the best thing about them is how easy they are to prepare. Not only that? You can make a whole bunch of the dough in advance, freeze it, and then portion out however much you need, making meal planning a BREEZE. I developed the recipe for these vegan chickpea cutlets after seeing them on the menu of our favorite Italian restaurant here in LA!
Let’s get into it!
Disclaimer: Some of the links in this post may be affiliate links for products I use and love. If you make a purchase after clicking one of those links, I may earn a small affiliate commission, perhaps enough to buy some extra gochujang or gochugaru 🙂
Chickpea Cutlets: the legumes of the sea?

Sicilian chickpea cutlets or “panelle,” like kimchi (I had to throw that in), have been around for over a thousand years! Introduced to the southern region of Italy by Arabs during the Arab occupation between the 9th and 11th centuries, chickpeas were crushed and milled into a unique flour. Like so many of today’s popular Italian dishes (and, once again, like kimchi), panelle was created as a food for the poor — those who could not afford fish. Enriched with parsley and lemon juice (like a filet of fish), these chickpea cutlets were sold as cheaper “fish substitutes” or “panelle fish.”
With time, though, this less privileged dish became a favorite of the wealthy. Why not? It’s delicious, easy to prepare, and really good for you! These chickpea cutlets are also really easy to personalize — don’t like parsley, replace with coriander. Love garlic? Add some to the dough! Want something a little more smokey? Throw in a little smoked paprika!
I’ll tell you what my own adaptation to this Sicilian classic is: tofu. I know, I know. Anthony’s nonna is probably up in heaven going, “Che cosa?!?!,” but it seemed so natural to me! I had a whole brick of super firm tofu sitting in my fridge and I figured some of the natural moisture in the tofu would help the dough stick together and prevent the cutlet from being overly tough and dry. And I was right. So, just so we are crystal clear — this is not a traditional Sicilian recipe for chickpea cutlets. This is my Korean-y adaptation of the same, inspired by this humble Italian dish!
Key Ingredients and Notes on Substitutions For Chickpea Cutlets.

The following are the key ingredients as well as substitution recommendations for these chickpea cutlets:
Chickpeas.
I had someone in the comments yesterday leave a bad review for my Spicy Doenjang Jjigae because they substituted chickpea miso for doenjang and it didn’t turn out the way they expected. I thought I made it clear in the recipe that there is no substitute for doenjang in something literally called doenjang jjigae, but apparently, I did not. So let me say this very clearly — you CANNOT SUBSTITUTE FOR CHICKPEAS IN SOMETHING CALLED “CHICKPEA CUTLETS.”
If you want to try a different legume because you don’t have any chickpeas on hand, I totally get that. But then they won’t be chickpea cutlets. They will be “[insert substitution] cutlets”! But, I cannot be held responsible if they don’t come out the way I describe in this recipe!
I used canned unsalted chickpeas for this recipe, but, of course, you can also use homemade cooked chickpeas.
Super Firm Tofu.
As I mentioned above, I had a thing of tofu lying around in my fridge that needed to get used before it went sour. I decided to incorporate them into the “dough” for these vegan chickpea cutlets and I am SO GLAD I did. Super firm tofu is perfect, because it has so much of the water already expressed. However, if you don’t have super firm tofu, you can use extra firm tofu that has been pressed for at least 20 minutes. You can also use tempeh, if you have that, though you may need to add a little more vegetable broth in order to keep your dough nice and pliable.
Chickpea Flour.
Chickpea flour is a traditional ingredient for panelle, and therefore, my recipe for these crispy chickpea cutlets also includes chickpea flour. It’s gluten free and as the name suggests, milled from chickpeas! I was able to get some from my local grocery store. I would not recommend subbing this ingredient out. Not only does it help to bind the dough, it also provides immense flavor.
Corn Starch.
I really wanted to keep this recipe gluten-free friendly, so I ditched the all purpose flour and used corn starch instead. The flour will help to create a stable dough for these cutlets. If you don’t have corn starch, you can try subbing with potato flour/starch or even arrowroot flour. And of course, if you don’t have a gluten intolerance, you can always use plain old flour. You can also try adding more chickpea flour, but I’ve found that corn starch or potato starch does a better job of acting like a “glue” to hold this altogether.
Garlic Powder, Onion Powder, Dried Herbs.
I stuck to the basics for this recipe for chickpea cutlets in terms of seasoning: garlic powder, onion powder, dried Italian herb blend. These will add flavor to your chickpea cutlets, so definitely don’t skimp on this. Otherwise, your chickpea cutlets will turn out a bit bland. Of course, if you like, you can also add a dash of paprika or cayenne or cumin or whatever seasoning you like! You can also throw in some fresh herbs like parsley or coriander.
Breadcrumbs.
In addition to coating the chickpea cutlets with breadcrumbs, I add 1/2 cup of bread crumbs to the dough. I didn’t do this for my first test of this recipe and regretted it. The dough became too wet and too difficult to shape. A modest scoop of breadcrumbs fixed it in a jiffy! If you want to keep this recipe gluten-free, just make sure to use gluten-free breadcrumbs. There are so many on the market now, but I’ve always preferred Ian’s because I can count on them being egg and dairy free!
Vegetable Broth.
A little vegetable broth will not only combine with the dry ingredients to create a glue, it’ll add flavor to your chickpea cutlets! However, if you don’t have veggie broth on hand, you can substitute with water.
Extra Virgin Olive Oil.
Both the chickpeas and the tofu are relatively low in fat. Accordingly, most of the recipes I consulted for panelle included a couple tablespoons of extra virgin olive oil. If you’re trying to keep this low-oil, you can skip the EVOO for the cutlet dough (though you’ll need to spray some on for when you’re cooking the cutlets). If you find your dough is a little dry and not adhering, just add a tablespoon of vegetable broth until it becomes tacky enough to shape.
equipment you’ll need for Making Chickpea Cutlets.
This recipe for crunchy chickpea cutlets does require a food processor. You can, of course, use a mortar and pestle, or even your bare hands (!) to grind your chickpeas and tofu. I imagine that’s the way it was done back in the day, after all! However, if you don’t use a food processor, your cutlet dough will likely be a little chunkier and harder to shape.
Step-by-Step Instructions to Making Chickpea Cutlets.
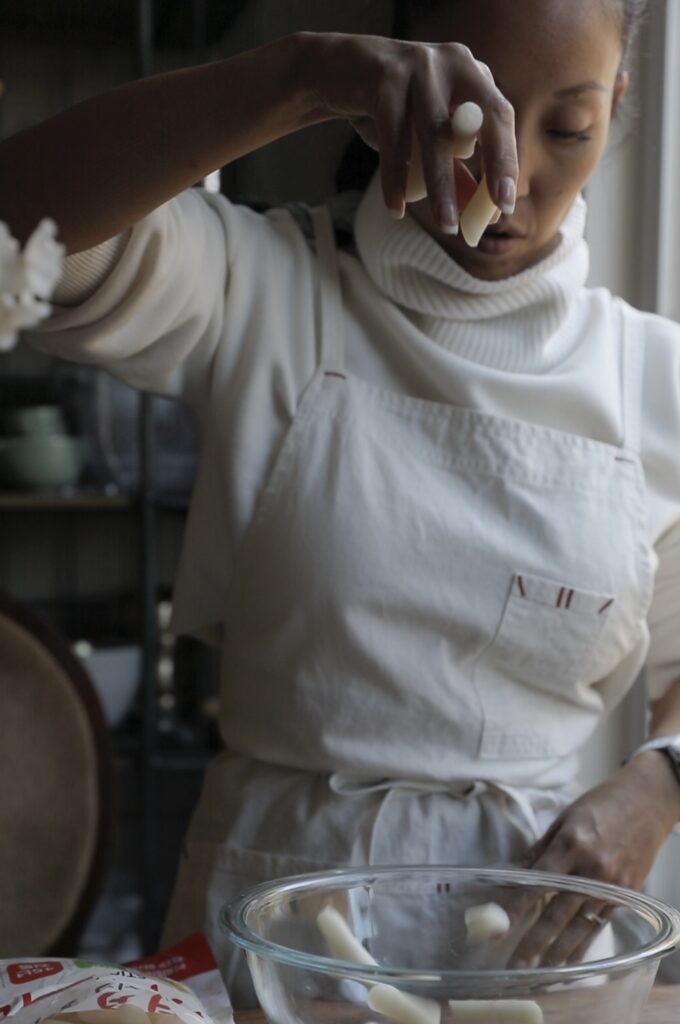
Step 1: Make the Cutlet Dough.
Place the chickpeas and the tofu into your food processor (or a large bowl, if you’re going to do this by hand!). Pulse the two until they get nice and crumbly. Then, add the chickpea flour, onion powder, garlic powder, Italian dried herbs, 1 teaspoon of salt, pepper, corn starch, bread crumbs, vegetable broth, and extra virgin olive oil. Use the “chop” mode on your food processor until a dough forms (about 1 minute).


Step 2: Shape Into Cutlets.
Shape the dough into cutlets, roughly the size and thickness of your hand. You don’t want them to be too thick, or they’ll be dense. You also don’t want them to be too thin, or they’ll fall apart. I know, I know, everyone’s hand size is different, but generally speaking, my cutlets were about 6 inches long, 4 to 5 inches wide, and about 1/2-inch thick. But if you’re making these for sandwiches (which I do all the time), you can shape them more like thin burger patties. Pour bread crumbs into a shallow bowl large enough to house at least one cutlet. Add about 1/2 teaspoon of salt and stir. Coat the cutlets with a thin layer of breadcrumbs.


Step 3: Cook the Cutlets.
Add vegetable oil to a skillet so that the bottom of the pan is fully coated with oil over medium-high heat. Allow the oil to get nice and shimmery (about 1 minute). Place the cutlets gently on the oil (do not crowd the pan — I can usually only cook 2 at a time). Cook for about 90 seconds to 2 minutes, until the bottoms are golden brown. Flip and repeat.


You can also ditch the stovetop by spraying both sides of the cutlet with a little cooking oil and placing them in the air-fryer at 400°F or placing them on a baking sheet and baking them at 450° F for 10 minutes on each side, until they are crunchy. They won’t be as “golden” (unless you literally drowned them in oil), but they’ll be absolutely delicious!!
Step 4: Drain and Serve.
Place the cooked cutlets on a wire rack or paper towel to drain any excess oil. To serve, drizzle with a little fresh lemon juice. These chickpea cutlets are great on their own, served with pasta (I like to top my Vodka Pasta with these), or between two slices of bread!


Frequently asked questions.
Are these chickpea cutlets gluten-free?
They can definitely be made gluten-free! Just make sure to use gluten-free bread crumbs, like Ian’s Gluten-Free Breadcrumbs, for the dough and for coating. Otherwise, the rest of the recipe is gluten-free!
Can I make the chickpea cutlet dough in advance?
Absolutely. You can make the chickpea cutlet dough in advance and place it in the fridge for up to 5 days. Then, use only as much as you need to shape, bread, and cook. You can also freeze the premade dough and simply thaw in the fridge before making.
What’s the difference between chickpeas and garbanzo beans?
There is no difference! They refer to the exact same legume. “Chickpea” comes from the French word “pois chiche,” while “garbanzo” has a Spanish lineage. Both are used in the United States.
What’s the difference between chickpea cutlets and falafel?
Well, the shape is quite different. The cutlets look more like, well, a cutlet. They’re flat and long and sometimes wide. Falafel are shaped into balls. You’ll also find the texture quite different–chickpea cutlets are relatively smooth on the inside, while falafel tends to pack quite a bit of texture, even on the inside.
Is tofu a traditional component of panelle or Sicilian chickpea cutlets?
No, tofu is not a traditional ingredient in panelle or Sicilian chickpea cutlets. This recipe for chickpea cutlets incorporates tofu because the recipe developer had some in her fridge and didn’t want to waste it!
Recipe Card.

Hi-Protein Vegan Chickpea Cutlets.
Equipment
- 1 food processor
Ingredients
- 2 cups chickpeas (cooked)
- 16 oz super firm tofu (can substitute pressed extra firm tofu)
- 1/2 cup chickpea flour
- 2/3 cup corn starch (can substitute potato starch)
- 1 tbsp garlic powder
- 1 tbsp onion powder
- 1 tbsp dried Italian herbs
- 1 1/2 tsp salt
- 1 tsp black pepper
- 2 tbsp extra virgin olive oil
- 1/2 cup vegetable broth
- 1 cup bread crumbs
- 1/4 cup vegetable oil (for frying)
- lemon juice (for garnish)
Instructions
- Place the chickpeas and the tofu into your food processor (or a large bowl, if you're going to do this by hand!). Pulse the two until they get nice and crumbly. Then, add the chickpea flour, onion powder, garlic powder, Italian dried herbs, 1 teaspoon of salt, pepper, corn starch, bread crumbs, vegetable broth, and extra virgin olive oil. Use the "chop" mode on your food processor until a dough forms (about 1 minute).
- Shape the dough into cutlets, roughly the size and thickness of your hand. You don't want them to be too thick, or they'll be dense. You also don't want them to be too thin, or they'll fall apart. I know, I know, everyone's hand size is different, but generally speaking, my cutlets were about 6 inches long, 4 to 5 inches wide, and about 1/2-inch thick. But if you're making these for sandwiches (which I do all the time), you can shape them more like thin burger patties. Pour bread crumbs into a shallow bowl large enough to house at least one cutlet. Add about 1/2 teaspoon of salt and stir. Coat the cutlets with a thin layer of breadcrumbs.
- Add vegetable oil to a skillet so that the bottom of the pan is fully coated with oil over medium-high heat. Allow the oil to get nice and shimmery (about 1 minute). Place the cutlets gently on the oil (do not crowd the pan–I can usually only cook 2 at a time). Cook for about 90 seconds to 2 minutes, until the bottoms are golden brown. Flip and repeat.You can also ditch the stovetop by spraying both sides of the cutlet with a little cooking oil and placing them in the air-fryer at 400°F or placing them on a baking sheet and baking them at 450° F for 10 minutes on each side, until they are crunchy. They won't be as "golden" (unless you literally drowned them in oil), but they'll be absolutely delicious!!
- To serve, drizzle with a little fresh lemon juice. These chickpea cutlets are great on their own, served with pasta (I like to top my Vodka Pasta with these), or between two slices of bread!
Notes
- Please make sure to review the detailed Ingredients section for any substitution recommendations!
These were so delicious and I love that the tofu adds a bit more protein
Absolutely delicious!
So happy to hear, thanks for enjoying the recipe, Eleanor!
I’m a seasoned plant-based cook and decided to try this recipe. It needed some add in of flour to hold a firmer patty texture, so I added about 1 Tbsp. flour and bit more seasoning. After a few adjustments it turned out well. I like that it’s a high protein patty for those looking to increase more protein into their diet.
Incredible. So delicious! Made these today and followed the recipe except for only using 1 T of olive oil and substituting the other T with a T of vegetable broth. The dough made 12 4-ounce cutlets which I put between small squares of pre-cut parchment paper. Made one for lunch in the air fryer (400 degrees for 10 minutes) and the cutlet did brown as I sprayed it lightly with olive oil. Served the cutlet over a bed of greens, with a sprinkle of lemon, diced avocado and sliced baby Persian cucumber. It was so good I feel like canceling my dinner plans and having another for dinner!
Hi Anne Paddock, Love the vegetable broth substitution, and that serving combination sounds absolutely delicious. So glad you enjoyed it!!
These were great! Had them with greens on top with a lemon dressing, reminded me of an Ina Garten chicken recipe from years ago, but vegan. Everyone loved them, will make again!
Hi Lisa Dennis, I love that they reminded you of a favorite recipe, and the greens with lemon dressing sound delicious. So glad everyone enjoyed them!