The BEST Vegan Kimchi (김치) Recipe (Easy & Homemade).
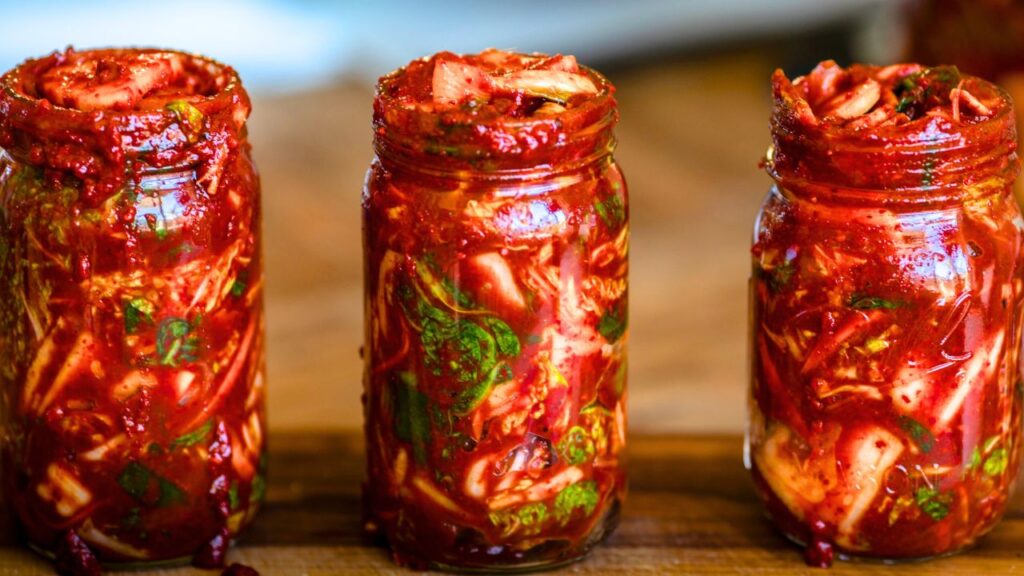
Easy. Simple. Authentic. Delicious.
This is the perfect recipe for your first time making your own kimchi, incorporating both the traditional method and easy tips on optimizing the fermentation process at home!
The very first thing I knew I needed to veganize when I adopted a plant-based diet and started The Korean Vegan was, of course, my own homemade kimchi recipe. It is the most iconic food in Korean cuisine and the most popular kind of kimchi uses napa cabbage leaves. If this is your first time making vegan kimchi, I want to make sure that the process is as simple and easy as possible (because my first time wasn’t simple OR easy!). This is the PERFECT recipe for those who want to make their own homemade kimchi because it will be the BEST kimchi you’ll ever eat!
- What Even is Kimchi?
- What Does Kimchi Taste Like?
- Why You'll Love This Recipe For Easy Vegan Kimchi.
- Health Benefits of Kimchi.
- Key Ingredients for This Vegan Kimchi & Substitutions.
- Equipment You'll Need for this Vegan Kimchi Recipe.
- Step-by-Step Guide to Making Vegan Kimchi.
- Video: Watch Me Make Kimchi!
- Storing Kimchi.
- Troubleshooting Your Vegan Kimchi.
- Frequently Asked Questions
- Recipe Card
- Questions & Comments
Disclaimer: Some of the links in this post may be affiliate links for products I use and love. If you make a purchase after clicking one of those links, I may earn a small affiliate commission, perhaps enough to buy some extra gochujang or gochugaru 🙂
What Even is Kimchi?
At bottom, kimchi simply refers to pickled vegetables and is, hands down, the most prevalent traditional Korean side dish or banchan. My father cannot eat a single meal (breakfast included) without some kimchi. While many people associate the word “kimchi” with the spicy, red Napa cabbage leaves populating the tables of your local Korean restaurants or packed into those large glass jars you can find at your local Asian grocery store, kimchi isn’t limited to salted cabbage.
For example, “white kimchi”–which does not include any Korean red pepper powder or gochugaru–is also a very popular kind of kimchi in South Korea that’s less spicy and often utilizes daikon radish or Korean radish as much as (if not more than) Napa cabbage. In fact, there are over 200 different kinds of kimchi.

One of my favorite food writers for the New York Times, Eric Kim, once said “Think of Kimchi as a Verb,” and I could not agree more. In fact, he texted me the other day, saying he’d made “celery kimchi,” to which I replied, “you can pretty much kimchify anything!”
What Does Kimchi Taste Like?
Surprisingly, the most frequent question I ever get asked about kimchi is the most basic:
“What does it taste like?”
Good kimchi will have the following characteristics:
- Salty
- Sweet
- Tart
- Crunchy
If you’ve never had kimchi before, I like to think of it as a cross between sauerkraut and bread pickles. Kimchi is not as finely chopped or sour as sauerkraut, but neither is it as sweet or thickly cut as bread pickles. But if the two got married and had a baby… it might be kimchi!
Obviously, the best part about making your own kimchi is that you can tailor it to your taste. For example, my mom likes her kimchi salty, where I prefer mine a little sweeter. That said, in my opinion, all good kimchi requires all of the above. So, if you taste something called “kimchi” that’s just salty, or just sour, or just sweet, or tastes mushy–chances are, it isn’t “good” kimchi.
But what about the spice? Believe it or not, the earliest kimchi (some believe it was invented over 4,000 years ago) did not have any chili flakes or fish sauce (more on this later). The earliest kimchi was just cabbage and salt water. It wasn’t until fairly recently (relative to a 4,000-year life span) that garlic, green onions, chives, shrimp paste, and Korean chili powder were added to enhance both the flavor and the fermentation process.
I therefore don’t think of “spicy” as a mandatory taste component for kimchi. The kimchi in this recipe will definitely include Korean red pepper flakes and will therefore bring the heat! However, if you want to try a less spicy version of kimchi, check out my Mom’s Baek (White) Kimchi recipe!
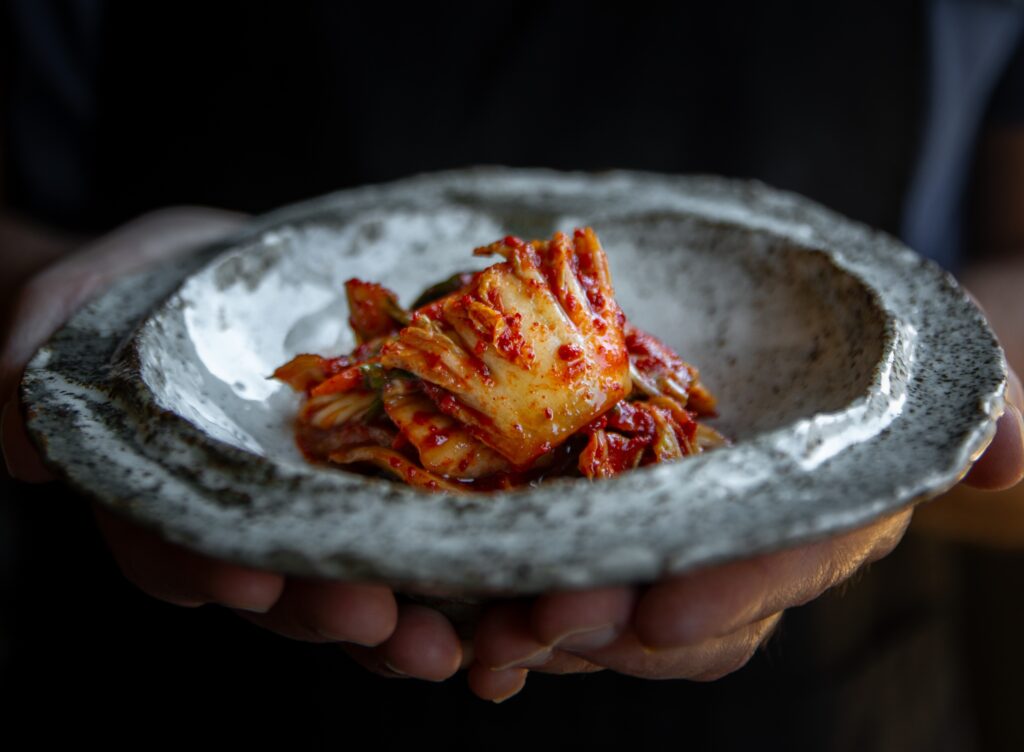
Why You’ll Love This Recipe For Easy Vegan Kimchi.
This vegan version of traditional kimchi is:
- Easy
- Simple
- Authentic
- Delicious
This recipe is actually a vegan version of a classic kimchi recipe called Mak Kimchi (막김치), which literally translates into “careless” kimchi. Don’t worry–“careless” doesn’t mean “less delicious.” It just means this recipe for kimchi is easier than the longer, more complicated kimchi preparation (which I’d recommend doing as a group activity when it’s cold so you’re not sweating the whole time). And lest you worry that this means it’s somehow “not authentic,” Mak Kimchi is 99% of the kimchi you’ll see at the Asian market, the Korean restaurant, and in an Ajummah’s refrigerator.
This easy vegan kimchi recipe has only 14 ingredients, doesn’t involve hours of saucing and rolling, and yields 2 large mason jars (or 4 to 5 smaller jars) of the best kimchi you’ll ever eat.
Health Benefits of Kimchi.
The secret’s out of the bag: there are many health benefits to kimchi.
The primary ingredient to any kind of kimchi–including this one–is a vegetable. Accordingly, you’re already ahead of the game here in terms of fiber, antioxidants, and other life-promoting micronutrients. But like all fermented foods, kimchi is also an excellent probiotic, promoting good gut health and the development and maintenance of good bacteria in your microflora.
But what about the salt content? As you’ll see, salt plays a vital role in the preparation of good kimchi. Does all that salt lead to hypertension? Studies, like this one, have shown that consumption of kimchi does not lead to an increase of hypertension in humans. In fact, this study even suggests that the lactic acid found in kimchi can actually help to prevent certain types of cancer.
Key Ingredients for This Vegan Kimchi & Substitutions.
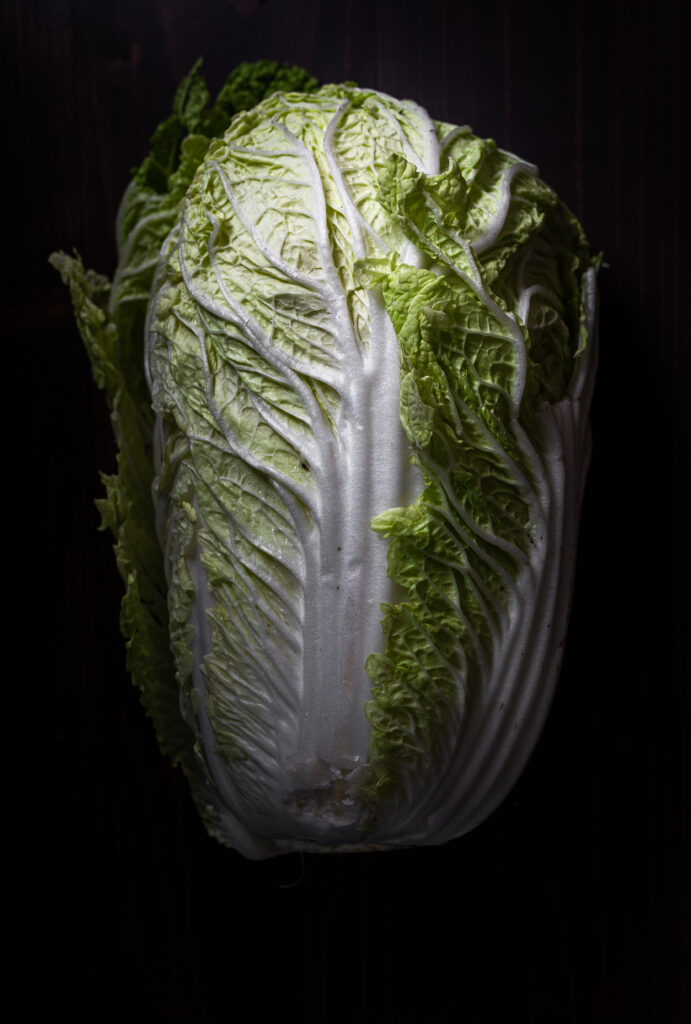
The following are the key ingredients for this vegan kimchi recipe:
- Napa cabbage. To make Napa cabbage kimchi or baechu (배추김치), you need Napa cabbage. In this recipe, we utilize 2 large heads of Napa cabbage. Sure, you can substitute a different kind of cabbage (green cabbage, Savoy cabbage, red cabbage); however, it won’t be traditional kimchi and both the salting period and fermentation process will be different. But, as I said in the beginning, you can “kimchify” anything, so if all you’ve got is some regular cabbage, this recipe will provide all the tips you need to identify what modifications you might need to make for different vegetables.
- Sea salt. The next most important ingredient to making this vegan kimchi is sea salt. If you can get Korean kimchi salt, that is your best option. However, if you don’t have easy access to course Korean sea salt, a coarse Kosher sea salt is your next best option. Coarse Kosher sea salt has a very similar salinity to Korean salt. You can also order Korean kimchi salt online!
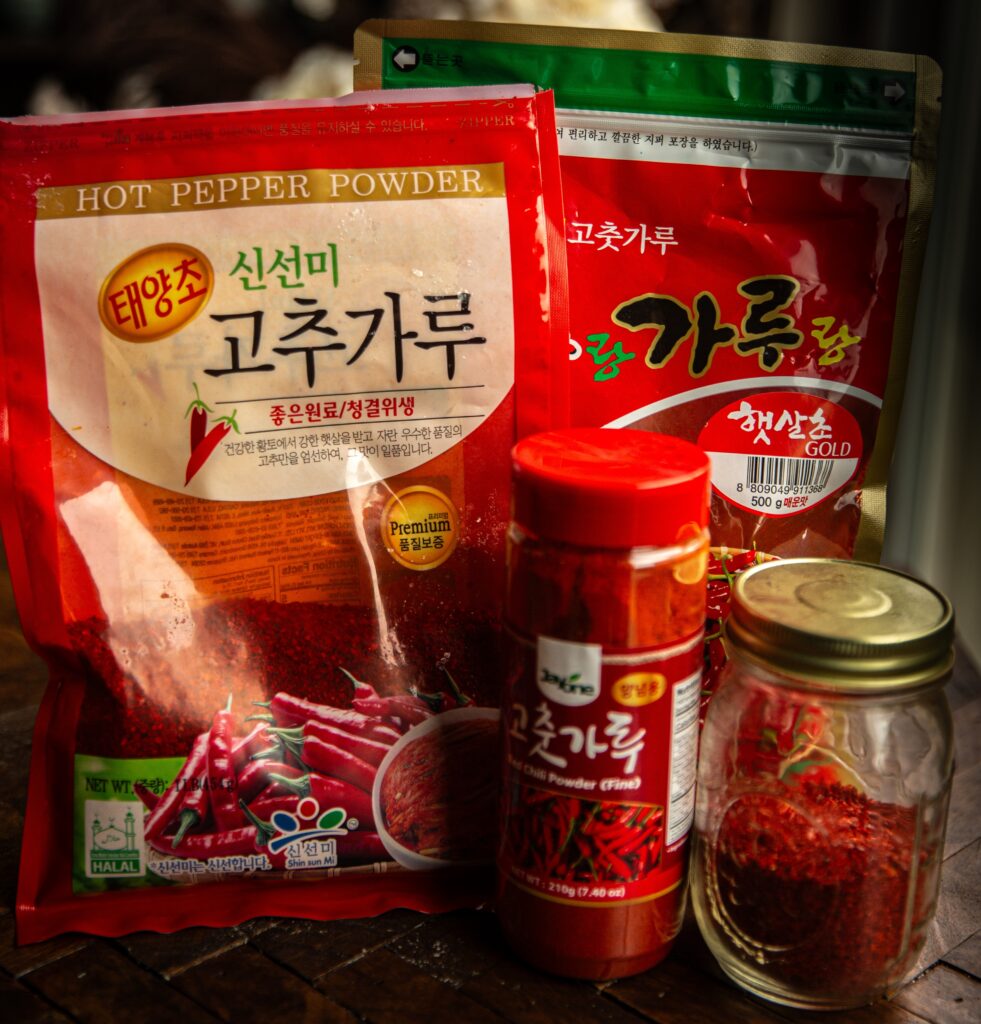
- Gochugaru. The most frequent substitution question I get is whether you can switch out gochugaru (Korean red chili flakes) for something like paprika. To be honest… not really. While it isn’t as central as cabbage, gochugaru is practically a definitional ingredient. In other words, you’d be hard pressed to call something “Mak Kimchi” without it. I realize, however, that gochugaru isn’t yet available at most non-Korean grocery stores, so if you must, you can use a mix of paprika and cayenne in place of gochugaru. You can also order it online!
- Apple or Korean Pear. Most kimchi recipes rely on fruit not just for flavor and sweetness, but to optimize fermentation. This vegan kimchi recipe relies on either apple (which is easily accessible) or Korean pear (which is less easily accessible). I prefer using both in my recipe, but go with whatever is easier. In terms of what kind of apple, the best would be to get a Fuji apple. But if you can’t find Fuji apples where you are, go with a sweeter variety (as opposed to a tart one), like honeycrisp or gala.
- Korean Radish. In addition to cabbage, this vegan kimchi recipe also includes Korean radish, which will pickle and ferment along with the cabbage. They provide excellent flavor to your vegan kimchi but, more importantly, they provide a great CRONCH! Korean radish looks a lot like daikon, but is larger, sweeter, and has a pale green color towards the root end. If you can’t find Korean radish, you can substitute with daikon.
- Vegan Fish Sauce. The reason this vegan kimchi recipe is the BEST vegan kimchi recipe is because we don’t skip the fish sauce. We just veganize it! If you don’t have time to make my vegan fish sauce or “Fishy Sauce,” you can certainly substitute with a strong soy sauce or even Yondu (a savory Korean flavored broth enhancer); however, I promise you, it won’t be as good.
- Plum Syrup. Korean pantries contain numerous different kinds of sweeteners and I find plum syrup or Maesil Dang (매실당) to offer the perfect balance of sweet and tart for kimchi. However, if you can’t find plum syrup, you can also substitute with maple syrup, brown rice syrup, or organic cane sugar.
- Glutinous Rice Flour. In order to make the kimchi paste, this recipe uses glutinous rice flour or sweet white rice flour. What you don’t want to do is substitute with regular rice flour. That will not work. You can, however, substitute with just plain old white rice (see FAQ below for this substitution).
Equipment You’ll Need for this Vegan Kimchi Recipe.
The following is a list of equipment that will make your kimchi making even easier:
- Large bowls. Even 2 heads of cabbage, when cut into bite-sized pieces, will yield a lot of greens. Think about the biggest salad you’ve ever made–and then double it. You’ll also need to add a great deal of cold water to the cabbage. As a result, get your hands on some large stainless steel mixing bowls (plastic bowls will undermine the pickling process).
- Large colander. In order to drain the cabbage of excess brine and rinse them of excess salt, you will need a massive colander. Otherwise, you will have to work in batches.
- Blender or food processor. In order to make the kimchi paste, you’ll need to puree a bunch of vegetables and even fruit. You’ll therefore need a reliable blender or food processor (a large one).
- Small saucepan. There isn’t a lot of “cooking” involved in kimchi preparation, but in order to make the rice flour paste or “pul” (풀), you will need a small saucepan.
- Kimchi Storage. I like to use two 1/2 gallon mason jars, or a combination of a 1/2 gallon mason jar and smaller 16 ounce or 8 ounce mason jars (for giving away to very lucky friends!).
Step-by-Step Guide to Making Vegan Kimchi.
There are generally three parts to making this vegan kimchi recipe: (a) salting, (b) saucing, and (c) fermenting.
Part One: Salting.
The single most important step to making kimchi is salting your cabbage. This is why it’s so important you get the right salt (as we talked about above). It’s also important to ensure even distribution of the salt. In traditional kimchi, the cabbage remains largely intact, with minimal chopping (this aids fermentation), and the kimchi salt is massaged into each individual leaf. But in this “careless” or easy kimchi recipe, you are going to cut the kimchi into bite sized pieces in advance. Then, you will soak the pieces in salt water and simply sprinkle them with salt.
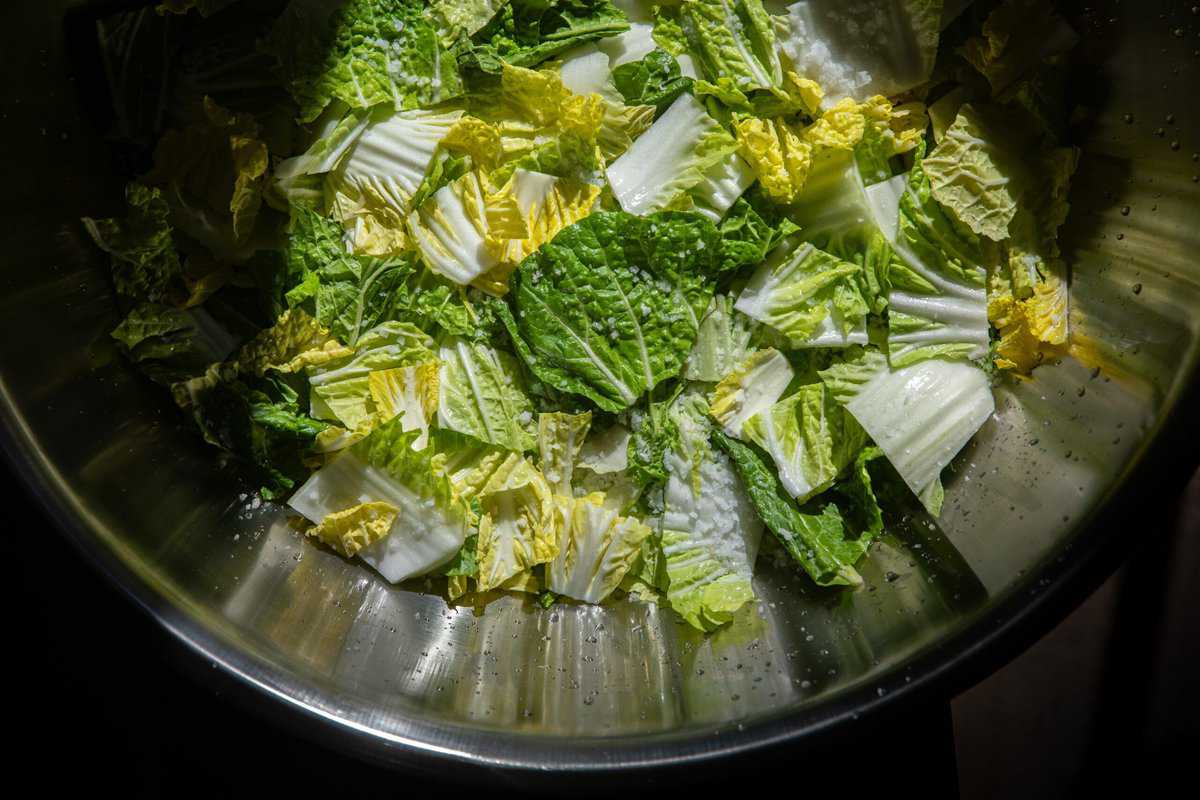
In order to make sure that each individual piece of cabbage gets equal “love” from the salt, at about the midway point–about 2 hours after the initial salting–you’re going to flip the cabbage leaves so that the ones on the bottom are now on top. Then, you’ll allow the cabbage leaves to marinate until they are sufficiently pickled to move onto saucing.

How do you know your cabbage leaves are ready for saucing? Usually, it will take at least 2 more hours from flipping (for a total of 4 hours). However, depending on the weather, how thick your cabbage leaves are, and the salinity of your salt, your cabbage leaves may require longer: up to 6 total hours of marination.
Tip: The most helpful “visual cue” that your cabbage is ready for saucing is that it is “bendy.” You should be able to bend the thickest part of the cabbage leaf (i.e., the part closest to the end) without snapping it. The other helpful cue is taste: rinse off the excess salt on a single cabbage leaf and give it a taste. It should taste “too salty” even after being thoroughly rinsed.
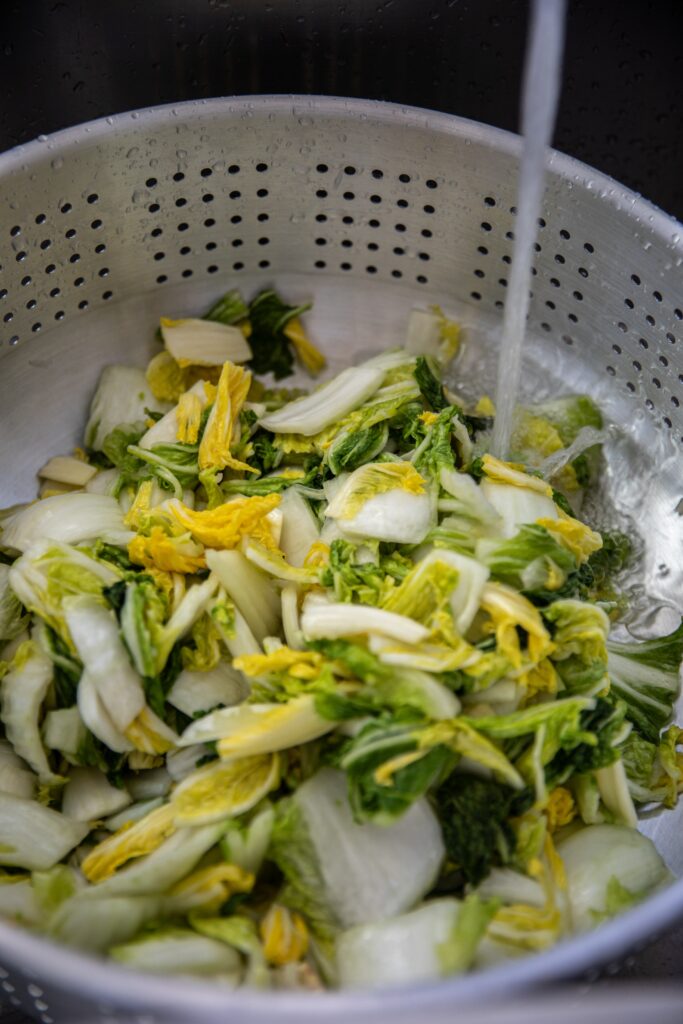
Once you’ve determined that your cabbage leaves are ready to sauce, drain all the salt water and make sure you rinse the cabbage leaves thoroughly in cold water. Pat them dry as best you can with a kitchen towel and place them in a large bowl.
Part Two: Saucing.
Now let’s get to the fun part of making this vegan kimchi! I love making the hallmark, red kimchi sauce. It’s the part that always makes my mouth water!

The sauce for this vegan kimchi is made up of five parts:
- Chopped vegetables (daikon radish, carrots, green onions)
- Pureed vegetables and fruit (onion, garlic, ginger, apple)
- Fishy Sauce
- Gochugaru
- Pul (glutinous rice flour paste)
First, make the pul by mixing some sweet white rice flour together with some water over low heat. I recommend that you use a whisk to do this in order to prevent it from getting lumpy. Keep whisking over low heat until you achieve a consistency that looks and feels like glue. Set this aside and allow it to cool.
Next, julienne the carrots or chop them into “matchsticks.” They don’t need to be perfectly uniform, but the thinner they are, the easier they will be to incorporate into your kimchi. The prettiest kimchi always has thinly julienned carrots, so if you can afford to spend some time, try and make them as thin as possible. But if you really want to live up to the name of this kimchi–Careless Kimchi–you can just use a julienner and save yourself the trouble!
In addition to the carrots, you’ll be adding fresh scallion greens to your vegan kimchi. My mother advised me to cut them on a bias (see video below), but you can just cut them into 2-inch pieces. The last bit of freshly chopped vegetables will be the daikon radish. I like to cut these into bite sized pieces that mimic the size of the cabbage leaves, to make them easier to eat. Simply place all of these chopped veggies into a large bowl.
Video: Watch Me Make Kimchi!
Next, you’ll blend some rough chopped onion, scallion whites, garlic, ginger, and apple, together with some plum syrup (or your preferred syrup). You’ll end up with a pale green mixture that’ll look a little bit like the sludge you played with in junior high chemistry class, but trust me–this stuff is GOLD! Pour this straight into the same bowl as your chopped vegetables, together with the pul.

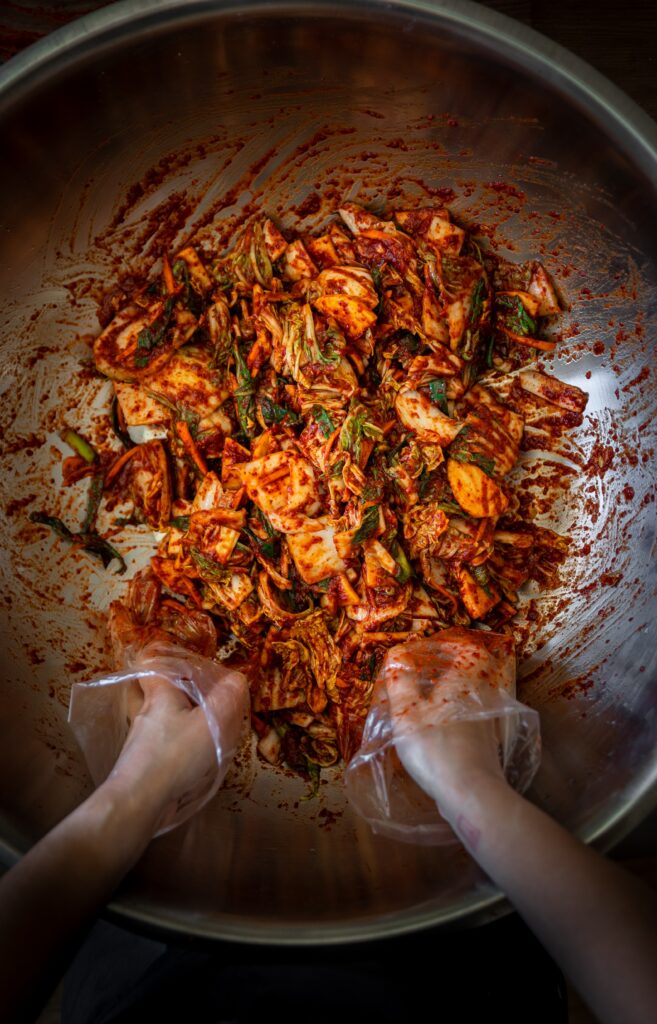
The last two components to the sauce—Fishy Sauce and gochugaru–can be added directly to the bowl containing everything else. Mix thoroughly until all the ingredients are well-combined. Give it a taste to see if you need more Fishy Sauce (if you like it salty) or more plum syrup (if you like it sweeter). Once you’re happy with the flavor of your sauce, pour it into the bowl of rinsed cabbage leaves and mix until all the cabbage leaves are evenly coated with the sauce. And now, you’re ready for Part 3: Fermenting!

Part Three: Fermenting.
Once you’ve completed saucing all the cabbage leaves, place them in an airtight container by packing your vegan kimchi in as tightly as you can. It would be best to use containers that are not too large, in order to optimize fermentation. What works best are two 1/2 gallon wide-mouthed jars or 4 to 5 smaller mason jars. Add any leftover sauce to the top of your kimchi. If you have space left over in your last jar, sprinkle it with a little extra sea salt in order to prevent the growth of yeast.
In terms of fermentation, the typical rule of thumb is to leave your vegan kimchi out at room temperature for 24 hours. Afterwards, you place your kimchi in the refrigerator and wait anywhere from 4 to 10 days (or even longer, if you like your kimchi really sour) before enjoying. One of the best parts about vegan kimchi is that it lasts longer than traditional kimchi, because it doesn’t contain any fish sauce or shrimp paste (which hastens fermentation). Accordingly, you can enjoy your vegan kimchi for months and months!
Tip: Instead of cramming all your kimchi into one container, divide your kimchi into at least two storage containers. The first one, you leave out at room temperature for the first 24 hours and then into the fridge. The second container you can place directly in the refrigerator, in order to maximize its “shelf life.”
Storing Kimchi.
After the initial 24 hours, your vegan kimchi should be stored in the refrigerator. How long will kimchi stay “good” for? Technically speaking, kimchi never goes “bad,” at least not in the traditional sense. It just gets more and more sour and soggy, over time. Finding the sweet spot to your kimchi is about personal taste (some like it less fermented while others like it practically rancid), but generally speaking, 2 to 3 weeks is usually when kimchi starts tasting amazing.
The good news is vegan kimchi stays in the sweet spot a lot longer than non-vegan kimchi. My mother is always shocked at how good my vegan kimchi stays, long after her non-vegan kimchi gets too sour to eat raw.
Once your vegan kimchi has passed its sweet spot, it’s ready to be cooked! Here are a couple of recipes that utilize aged kimchi:
Troubleshooting Your Vegan Kimchi.
Even the most experienced Korean moms can screw up their kimchi. But the good news is that even the biggest screw ups are usually repairable. Here are a couple of common mistakes and “fixes” for those mistakes, to ensure that this vegan kimchi is truly the best!
- Not Salty Enough. As I said, your cabbage leaves should taste “too salty” right before saucing. Why? Because the saltiness will dissipate over time. You’ll know within the first 24 hours of fermentation whether your kimchi is salty enough. You’ll taste your vegan kimchi and scratch your head, wondering how something that tasted so salty could taste so bland within just a day. Luckily, the fix for this is easy–simply add 2 tablespoons of kimchi salt to each 32 ounce mason jar or 1 tablespoon of salt to each smaller mason jar. You don’t even need to mix it in. It will taste overly salty, at first, but after a few days to a week, it will be perfect.
- Too Salty. On rare occasion, your kimchi will be too salty–for real. This usually means that you kept your cabbage in the brine for far too long. If this happens to you, no worries! Simply cut up some more of your daikon radish and mix it into your kimchi. The radish will suck up the extra salt and in a few days, your kimchi will taste great!
- Yeast on my Kimchi. Sometimes, you might see the formation of white “mold” on the top of your kimchi. But, it actually isn’t mold! It’s yeast and usually forms when your kimchi is exposed to too much oxygen. The good news is, you can simply remove the kimchi on top that has the yeast and the rest of your kimchi is just fine. However, in order to guard against this type of thing happening, make sure you use an airtight container. If you have a lot of space between your kimchi and the lid to your container, consider sprinkling with a little sea salt or adding plastic wrap over the top before sealing the container. Finally, your kimchi should be submerged, as much as possible, in its own juices.
Frequently Asked Questions
What is vegan kimchi made of?
Vegan kimchi is made using Napa cabbage, sea salt, gochugaru, and vegan fish sauce.
What makes kimchi NOT vegan?
The most popular kimchi includes both fish sauce and shrimp paste. Some recipes also call for oysters and mussels. Vegan kimchi excludes these animal products, opting for plant-based sea flavors (like dashima).
Does vegan kimchi taste noticeably different from non-vegan kimchi?
When prepared correctly, vegan kimchi tastes indistinguishable from non-vegan kimchi.
Is vegan kimchi still probiotic?
Both vegan and non-vegan kimchi produce lactic acid as a result of the fermentation process. Accordingly, both will have probiotic effect.
How do I substitute cooked rice for “pul” (rice flour paste)?
In lieu of making pul (the sweet white rice flour paste), simply add 1/4 cup of cooked rice to the blender, when you are blending the onion, garlic, ginger, apple mixture. You can also elect to skip pul or rice, altogether, though doing so may impact the fermentation of your kimchi.
Is there a less spicy version of kimchi?
Yes! Kimchi comes in all shapes, sizes, and even spice levels. You can, of course, reduce the amount of gochugaru in this vegan kimchi recipe, but you can also try making White (Baek) Kimchi! White Kimchi contains no gochugaru (red chili flakes) and therefore is far less spicy than this version.
Recipe Card
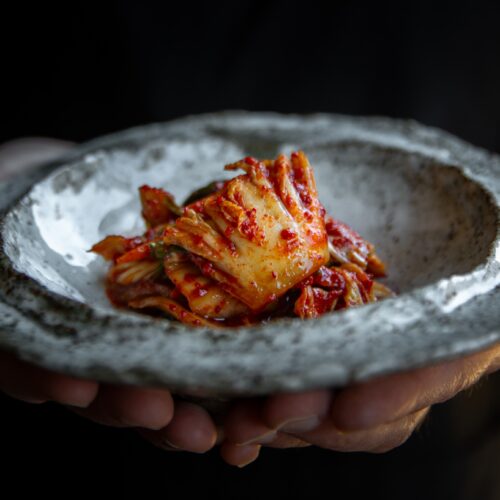
Best Vegan Kimchi
Equipment
- One 16 qt colander
- 1 blender or food processor
- 1 small saucepan
- Two 32 ounce mason jars (or 4 to 5 smaller mason jars)
Ingredients
- 2 1/2 cup kimchi salt (can substitute coarse sea salt)
- 2 heads Napa cabbage (~ 4 to 6 pounds)
- 1/4 cup glutinous rice flour
- 1 1/2 cup rough chopped apple (or Asian pear)
- 1/2 cup rough chopped onion
- 1/2 cup rough chopped scallion whites
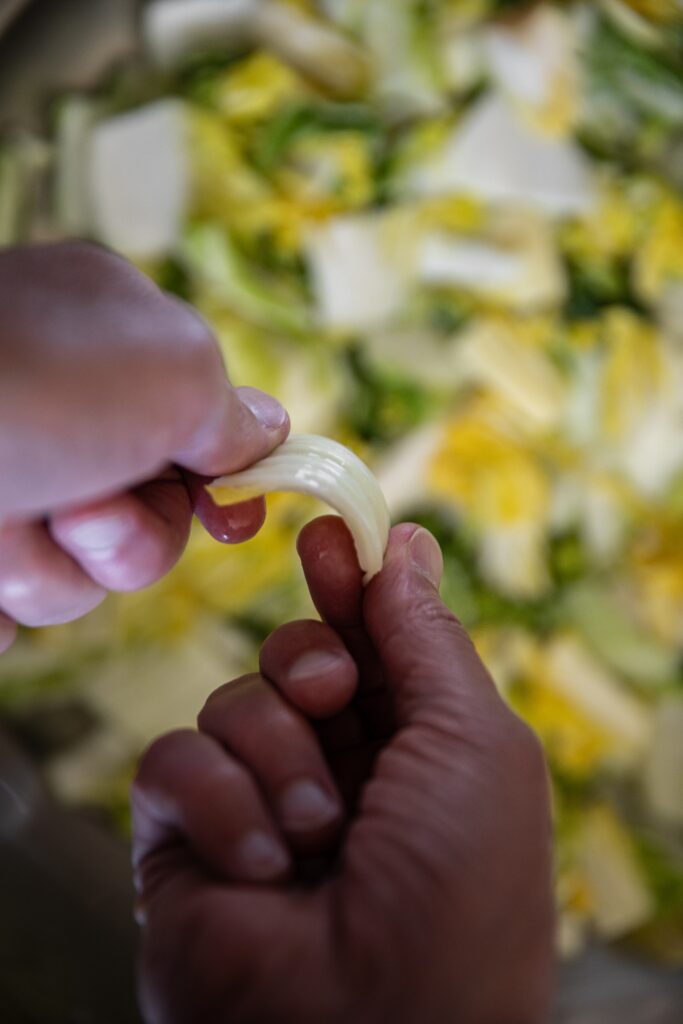
- 1/2 cup garlic cloves
- 1 thumb ginger
- 1/2 cup vegan fish sauce (can substitute store bought vegan fish sauce or soy sauce)
- 1/4 cup plum syrup (can substitute brown rice syrup, maple syrup, sugar)
- 2 cups julienned carrot
- 2 cups scallion greens, chopped into 2-inch pieces
- 2 cups Korean radish (or daikon), sliced and cut into 1/4-inch thick pieces
- 3 cups gochugaru
Instructions
Salting the Cabbage.
- Add 1 cup of salt to 6 cups of water. Stir and set aside until the salt dissolves. Remove any heavy stubs on the ends of your cabbage heads. Then, using a sharp knife, create a 2-inch slit down the middle of the root end or “butt” of the cabbage heads.
- Then, using your hands (utilizing your hands to split the cabbage heads will partially preserve the delicate and natural shape of the leaves) split each cabbage head in half. Repeat with each cabbage half to create quarters. Cut the cabbage quarters into large, bite-sized chunks (like you would for a salad).
- Place one quarter of the cabbage pieces into a very large bowl. Sprinkle with a quarter of the salt, then pour a quarter of the salt water over the cabbage. Repeat with the remaining cabbage, salt and salt water. Set aside until the cabbage leaves begin to wilt (around 90 minutes to 2 hours). You will know they are ready for the “midway flip” when they are pretty bendy. Using your hands, flip the cabbage leaves so that the ones resting at the bottom of your bowl are now on top and vice versa.
- Set aside until the cabbage leaves are very wilted and quite salty, at least 90 minutes but up to 4 hours, depending on the thickness of the cabbage leaves. You can test that your cabbage is ready for saucing by taking a piece from the thickest part of the cabbage leaf (I.e., right by the “butt”) and checking to see that it bends quite easily without breaking. Then, give it a good rinse before tasting it—if it tastes VERY salty (you’ll think too salty), it’s ready. Once your cabbage leaves are sufficiently wilted and salty, drain all of the excess water and rinse the leaves thoroughly with cold water.
Saucing the Cabbage.
- To make the sauce, prepare the rice “glue” by adding the sweet white rice flour with 1 1/2 cup of water in a small pot over medium heat. Use a whisk to stir the mixture continuously until it turns into a thick glue-like consistency (about 3 minutes). Set the “glue” aside and allow it to cool.
- Meanwhile, place the apple (or pear), onion, scallion whites, garlic, ginger and plum syrup into a blender and blend on high until smooth (about 1 minute). Mix together the rice glue, the blended garlic mixture, scallion greens, carrot, radish, Fishy Sauce and gochugaru.
- Pour the sauce over the rinsed cabbage leaves. Using your hands (wear gloves!), spread the mixture over the cabbage leaves to makes sure they are evenly and well coated. Place the kimchi into airtight containers (I use two 32-ounce mason jars), pressing down with each scoopful to remove air pockets. If you have a lot of space left at the top, sprinkle with a handful of salt (this will prevent the growth of any yeast).
- Store the kimchi at room temperature for the first 24 hours. Then place in the refrigerator. Your kimchi will be ready to enjoy by the third or fourth day, though it will mature and taste even better if you wait a couple weeks.





Just made this… loved the clear instructions. I’ll keep you posted but looking beautiful already
I have the little nipple tops for jars for making sauerkraut, they have a small pin hole so you can burp it. Can I use these for the kimchi?
i’m currently waiting for my kimchi to ferment, and just tasting it pre-fermentation it already makes me want to never buy it again. like, this is so much better than any overpriced vegan kimchi that’s out there (all the ones on the market just omit the ‘fishiness’ altogether and it definitely hurts the flavor imho) thx you! 🙂
This was my first time making kimchi, it was incredibly delicious and easy. The recipe was approachable and easy to follow. I’ve been wanting to do this for years, I cried when my partner tried a fresh bite from my gloved hands and said how proud he was. Thank you for sharing this!
Giving this a try today (Boxing day), looks great and think it will be time well spent. Thank you for the recipe.
I’d love to hear how it turns out—enjoy the recipe!
Can I use mung bean starch to make the “glue”?
Hi Lisle! Thanks so much for your question. I’ve never used mung bean starch, nor have I ever seen it being used for kimchi making. I worry that the flavor might get in the way and have zero idea whether it will help with fermentation (which is partially what the rice paste is for). In lieu of mung bean starch, I would (a) use some mashed up rice, OR (b) skip the glue altogether. Many kimchi-makers do not include it all the time and it still turns out delicious! Good luck!!
Excellent as written, however I just made this for the second time with my nieces and nephews, and in the commotion ended up forgetting to add the fishy sauce and it still turned out great – thanks for this great resource!
Ok but imagining you making this with all your nieces and nephews just absolutely made my day 🥹
Can I halve the recipe if I don’t want that much kimchee?
Yes
I really want to make this Agus but I dont have go gochugaru but only gochujang how do I need to change the recipe ??? Pls help
Excited to try this recipe! I cannot eat sugar. Is it possible to make this recipe without the sugar? Thank you.
Totally!! It might be a little saltier than mine, but my mom makes it without sugar all the time. You’ll still get sweetness from the apple and pear and carrots and onion!
xlnt recipe. simple. easy. perfectly delicious,
Thank you for enjoying the recipe, Pamela!
Not just the best vegan kimchi, but the best kimchi in general!
I decided to make this recipe because I was tired of spending 8 bucks for a small 500g jar of kimchi at my local stores, and had some cabbage that had been hanging out in my fridge for a while. OH my god, it’s so good. Easily the best kimchi I’ve had outside of Korea, and so easy to make as well! I gave some to a friend as well, and he immediately asked me to make him a batch as well haha
I used gluten free soy sauce/tamari instead of the fishy sauce, and added some MSG for additional savouriness. It was already delicious before I even let it ferment, but after letting it sit on the counter for a day and hanging out in the fridge for 4 days, it’s the perfect balance of salty, sweet, savoury, and tangy. Will definitely make this again!
Hi Antonia, Thanks so much for trying the recipe. Yay! Thrilled it’s the perfect balance for you and that it’s easy to make too.
Finally coming back to this. I used your recipe about half a year ago, and it was fantastic. You were very right not to underestimate bowl size, and I ended up using several mason jars at the time. This time around, I’ve decided to get myself a larger fermentation jar.
Thanks for the great recipe, and I’m looking forward to making it again next weekend.
Hi Joanne,
This kimchi recipe looks absolutely AMAZING. I’m going to be making it very soon. However, I had a quick question about the amount of onion. In the recipe card, you list 1/2 cup onion. But in this video: https://youtu.be/OWonr264qLg?si=pWMsUZrhXAh7H2kj when you are chopping the onion to go in the blender, it says on the bottom of the screen: 1 1/2 cups chopped onion. How much should I use? Thanks!
Hi!! That’s such a great question. Stick with the 1/2 cups chopped onion, as the amounts set forth in the video is a typo. Thank you for clarifying!!
Thanks for this! Finally made good kimchi for the first time with it. Two changes: used cooked brown rice in a high-speed blender instead of pul/rice porridge, and used agave syrup as a lower glycemic sweetener. They worked great. Ty
This recipe sounds so good – I’m not just vegan, I can’t tolerate the flavor/smell of anything fishy (i.,e., can’t eat seaweed). I am going to try this recipe without the vegan fish sauce and hope that it gets close. Thank you!!
Hi Kristi! Many ppl make this recipe without the fishy sauce so I’m confident you’ll love it. If you want, you can always sub in soy sauce or even Yondu! Good luck!!
This recipe is beyond delicious. I started getting the shakes after my first batch was gone and had to immediately make more. NOTE: This would require FOUR 32-ounce Mason jars, not two as the directions say. I use two 64-ounce jars and cap them with Masontops pickle pipes so they don’t build up pressure. Works great. Thanks, Joanne!
Chris this makes me so so so happy!!!
I have been looking for a recipe that is bang on with my taste preferences and this nailed it! Being a vegetarian I found it so difficult to find store bought that had the flavor I was looking for. I am making another double batch as I write this. My taste buds thank you!!!!
This is absolutely delicious, definitely gonna be making this more often in the future! I struggled a bit converting everything into European measurements, but I figured it out and adjusted the ingredients so I ended up with a smaller quantity of kimchi that’s a little easier to finish as a single person household. Thank you for the recipe Joanne, much love from Germany ♡
Hi Joanne, how can I find Korean glutinous rice flour? Like, what does it say on the package? Is it called 참쌀가루? You can let me know in 한글, as I buy my Korean products mostly in Asian/Korean supermarkets. Thank you in advance!
Hi Joanne, how can I find Korean glutinous rice flour? Like, what does it say on the package? You can let me know in 한글, that would actually be most helpful as I buy my Korean stuff at Asian/Korean supermarkets here in the Netherlands. Thank you in advance!
hi, im not joanne but i do live in the netherlands. korean glutinous rice flour is the same as any glutinous rice flour, which often have a english translation as well. the packaging is often green.
I appreciate your reply but I would like to know the Korean name since the Korean name is often on the packaging and that’s the only way to be 100% sure 😉
Hi Renate! The brand my mom and I use most often is actually called “mochiko.” But that’s only because that’s what’s readily available here where we live. In Korean, it is called 찹쌀가루 or chapssahlgaru: sweet rice flour. This shouldn’t be confused with mepssahlgaru (which is typically sold frozen).
Hello Joanne,
I have a question:
I followed your instructions for the kimchi. It looks absolutely delicious and i was soo excited to finally make your recipe.
I left it outside to ferment for 24 hours and since then it has been in the fridge. It has been 6 days.
I tried it today and it doesn’t taste fermented at all. It doesn’t have that pungent kimchi taste.
Should it taste like kimchi by now? Or does it need more time?
It doesn’t necessarily taste bad. Just not fermented.
Thank you for sharing your absolutely delicious recipes!
Rebecca
Hi Rebecca! Thanks for your message. I would leave it out at room temperature for another day or so. It’s hard to tell because I don’t know what the climate is like by you and more importantly, I don’t know your taste! I made mine just a few weeks ago and left it out at room temp for 1 day and then in the fridge. It hit my sweet spot in about 3 to 4 days and then got QUITE funky by Day 11. But if you prefer “funky” right away, then sticking it out at room temp for another day can hasten that process.
Kimchi is less of a science and more of an art, given the ride range of taste preferences. With a little practice, you’ll know exactly how to achieve YOUR sweet spot. Thank you again for trusting me with your kimchi!
Hi! I’m looking forward to trying this recipe but I do have a question. How do you ensure that the jars you keep the kimchi in don’t break due to expansion from the fermentation? I want to try this but don’t want the glasses to break.
Hi Brianna! This is a great question–thank you for asking it! Three things: (a) don’t screw your lid on too tightly–keep it a little loose to allow a little gas to escape during the first 3 days; (b) give your kimchi jar a little “burb” every day for the first 3 days; and (c) do not overpack your kimchi jar (I did this a few days ago because my cabbage heads were humongous and I didn’t want to get another jar–my kimchi jar didn’t explode but I found it very hard to open)–you should only fit what comfortably fits in the jar, while pushing down with moderate pressure. I hope this helps!!
I used the Masontops pickle pipes and they work great! (https://www.masontops.com/collections/fermentation-tools-for-wide-mouth-mason-jars/products/pickle-pipe)
That’s great to hear! Masontops Pickle Pipes are such a handy tool for fermentation—they really make the process easier and more consistent. Thanks for sharing your experience!
ABSOLUTELY FREAKIN BANGING.
also I love your vid
WHOOOHOOOO!!!! Thank you!!!!
I just finished making my second batch. This is delicious! And, I love being able to control what goes into it and how it’s sourced.
Yay!! Now you’ll never not have kimchi!
I made this kimchi but used half the ingredients to make one 32 oz jar. The cabbage was only half submergered at first but reduced in size so much that it was all under the liquid after a few hours. I left it about 4 hours in total until it was very bendy and very salty. I had to substitute to rock salt, little red raddishes and paprika and chilli instead of gochugaru. My issue is that the end product after 24 out, then 7 days in fride is extremely salty still and I don’t see any evidence of fermentation at all. Any advise would be appreciated
paprika and no gochujaru? you basically just made a spicy salt salad with radishes.
Wow! I made this as a gift for my sister. She said it was very tasty. I set aside a small batch for myself and fell in love with it. My stepdaughter found it in the fridge and she loves it, too! I decided to make another batch just for our house!
*I made/used the fishy-fish sauce for the first batch. Glad to have that as an option moving forward.
Yay!!! I’m so glad it got so much good feedback!!!!
i made this recipe and i loved it!
some things i adjusted:
– i used a wok instead of the mixing bowls, since i didnt have mixing bowls of that size
– i used 1 cup of gochugaru, which was still a bit spicier than store-bought vegan kimchi, but yum even for people who dont handle spice well
Thanks Winnie! and the use of a wok is BRILLIANT!! LOL. So glad that using less gochugaru worked out for you!
Hi Joanne- i’m looking forward to creating my own fishless kimchi! So at the store I remembered the 2 heads of cabbage, ~4 lbs. Each of my heads is a little over 4 lbs. Should I have 4 lbs TOTAL or 4 lbs each head? And is it acceptable to leave the darker outer leaves as part of the mix or should they be removed? Thank you for making this available ❤️
Judging from other comments they are both describing the total required for the recipe! Obviously this is simply an educated guess, making this recipe in a few days based on this presumption, will report back! ✨?
Hey Sam! You are correct. the 4 lbs refers to roughly the total weight. each of my cabbage heads weighed about 2 lbs!
Hi Deborah! that’s a great question and I’ll clarify with an edit, but you must have gotten your hands on some LARGE napa cabbage heads! The total weight should be between 4 to 5 lbs. In your case, I would use only 1 cabbage head, as I worry you will otherwise not have enough sauce!
Hi, I’m a little confused about what size jars I need for storage. In the section about equipment you say that you store in two 1/2 gallon (64oz) jars but then in the actual recipe you say 32oz jars. Which is it?
Hi Whitney!! Pls excuse my unfamiliarity with the metric system! you should use 64 ounce jars!
Hi Joanne! Is the initial 1 cup of salt that goes in the water part of the 2 & 1/2 cups in the ingredient list or in addition to that? Thank you!
Correct! The amount set forth in the recipe is the full amount of salt you will need!
Hi! I just made this and followed your recipe. Yay! I just jarred mine up and it’s ready for the 24 hour room temp fermentation. I’m a little worried about a fermentation explosion. How do you suggest I prevent it / should I even be worried? THANKS!
Hi Sarah! TBH, I’ve never had a problem with exploding kimchi in all my years, but I have had to deal with “leaking kimchi”! My mom says the best way to guard against this is to leave just a little space at the top but make sure there’s sauce at the top to avoid yeast (see FAQ on that). My mom also says that “exploding kimchi” often happens when the kimchi is under-salted—maybe that’s why I never have it lol! Otherwise, place a kitchen towel or paper towel underneath your kimchi in the fridge just in case there’s a little leakage. Good luck and I can’t wait for you to try your homemade kimchi!!!
Thanks so much! Mine was so salty my lips puckered lol, so I hope it’s good!
I just want you to know how delicious this is! I am of eastern European heritage and cabbage has been a staple in our diet. While I just finished the batch, the flavors are amazing. I had to use multiple subs for this batch, I have ordered the true Korean pepper powder, shrimp paste and sweet rice flour. I truly look forward to these products arriving so I may create a more authentic version. But I may keep the turnips because korean radish is difficult to find.
Jackie!! This makes me so so so happy to hear!! I love how you were resourceful and figured out appropriate subs. I think turnips sound great!!! Here’s to all your kimchi adventures!
May I use ‘regular’ fish sauce in this recipe? If yes, would it be a 1:1 substitution? (I’m not strictly vegan, so OK by me. Also hard to find ingredients in my area.) Many thanks
Ciao Wendy! Yes it would be a 1:1 substitute!
Thanks!
Hi! Its my 2nd time to make the vegan kimchi and it just gets better and easier.. thanks so much for sharing the recipe! Its very delicious.. best kimchi!!!
Ahhhhh!!! I love this!!!
Hi! I made your kinchi recipe yesterday and it already looks very good! I had a question though, is it supposed to have more sauce than vegetables? I halved the recipe and it just seems like a lot of sauce when I compare it to other kimchi recipes. I cannot wait to try it though!!!
Hi Emma! The amount of sauce to veggie ratio will depend upon how large your cabbage is. Mine were massive but they were picked right here in SoCal. For example, I had another person comment that she ran out of sauce! That said, I DO prefer having more sauce than less as this guards against bland kimchi. If you still feel like you have way too much, set it aside and make some radish kimchi or guhtjuree (barely pickled kimchi)—you can find recipes for both in the cookbook!!
OMG i made this and everyone that tasted it LOVED IT!
WHOOHOOO Leslie!!!!
Hello,
I don’t have Korean radish in my country. What can I substitute it with?
Thank you
Probably you could use any radish if you cannot find a type like Daikon. It just wouldn’t be able to be sliced into matchsticks. Or you could probably leave it out.
This vegan kimchi recipe is a real winner! I am used to the non-vegan version, however, imo this taste better! Thank you!
Absolutely delicious- hands down favorite vegan kimchi of all time! Go tkv!
Wow before Veganism i loved Kimchi! i never realised it could be Vegan aswell! Thanks for sharing!
Good!!!
Thanks JM!
So much fun, and extremely tasty. Definitely a labor of love! super excited to see how the flavors develop further. Perfect recipe for a snowy day, when we are all cozy inside. 🙂
Mireya, Thank you so so much. I agree–kimchi is perfect for colder weather!! I can’t wait for you to try your kimchi in a couple days….!!!!
Is it ok to make Kimch the without the sugar?
Hi Karen! Did you mean the plum syrup? As this recipe doesn’t use any sugar, though I do mention sugar as a substitute for plum syrup. If you are asking whether you can omit any type of sweetener at all (other than the fruit), yes, you absolutely can–in fact, my mother often prefers hers that way, since she likes her kimchi a little salty. I would encourage you to try the sauce before dressing your cabbage leaves with it–if you feel it needs a little sweet to balance it out, add whatever is your preferred sweetener (maple syrup, brown rice syrup, agave, coconut sugar, even Stevia) until it tastes how you like it! Good luck with the recipe!
Can I use yondu as a 1:1 substitute for vegan fish sauce?
Yes, that’s a great idea for a substitute! It’s not as salty or sharp as fish sauce, but it’ll certainly amp up the flavor of your kimchi!
Is it possible to make this with much less salt, for health reasons?
Unfortunately, the salt is necessary to ensure proper pickling and fermentation. If you do not add enough salt, your kimchi will not taste right and possibly develop yeast. However, keep in mind, that Korean salt (which the measurements in this recipe are based on) is FAR LESS salty than table salt or even Himalayan sea salt. Moreover, you are washing off a LOT of the salt when you rinse the cabbage leaves before saucing. In lieu of skipping the salt, I would say skip the Fishy Sauce if you are concerned about excess sodium. Hope this helps!
Could you say more, please, about how you would use ‘normal’ rice as a replacement for glutinous rice flour?
Also, I had a batch of kimchi go mouldy. Could you offer advice on how to prevent that, please?
Hi there! I included a section in the FAQ about how to replace with cooked rice. Simply add 1/4 cup of cooked rice to the blender, when you blend up the apple, onion, garlic, etc. You can also just skip the rice flour/rice altogether. I’ve always made it that way, but others have reported that it makes minimal difference to the flavor/fermentation.
In terms of the mold, it’s actually not mold–it’s yeast! I added the answer to your question in detail in the “Troubleshooting” section, but long story short, you can remove the “yeasty” pieces of kimchi and the rest of your kimchi should be fine. The reason yeast forms is because your kimchi has had too much exposure to air. Next time, especially if you have some space between the top of your kimchi and the lid of your container, sprinkle with some sea salt and ladle some of the kimchi juice over the top. You can also place some plastic wrap over the top before sealing the lid. Hope that helps!
In addition to being an amazing recipe, this is a super interesting read!