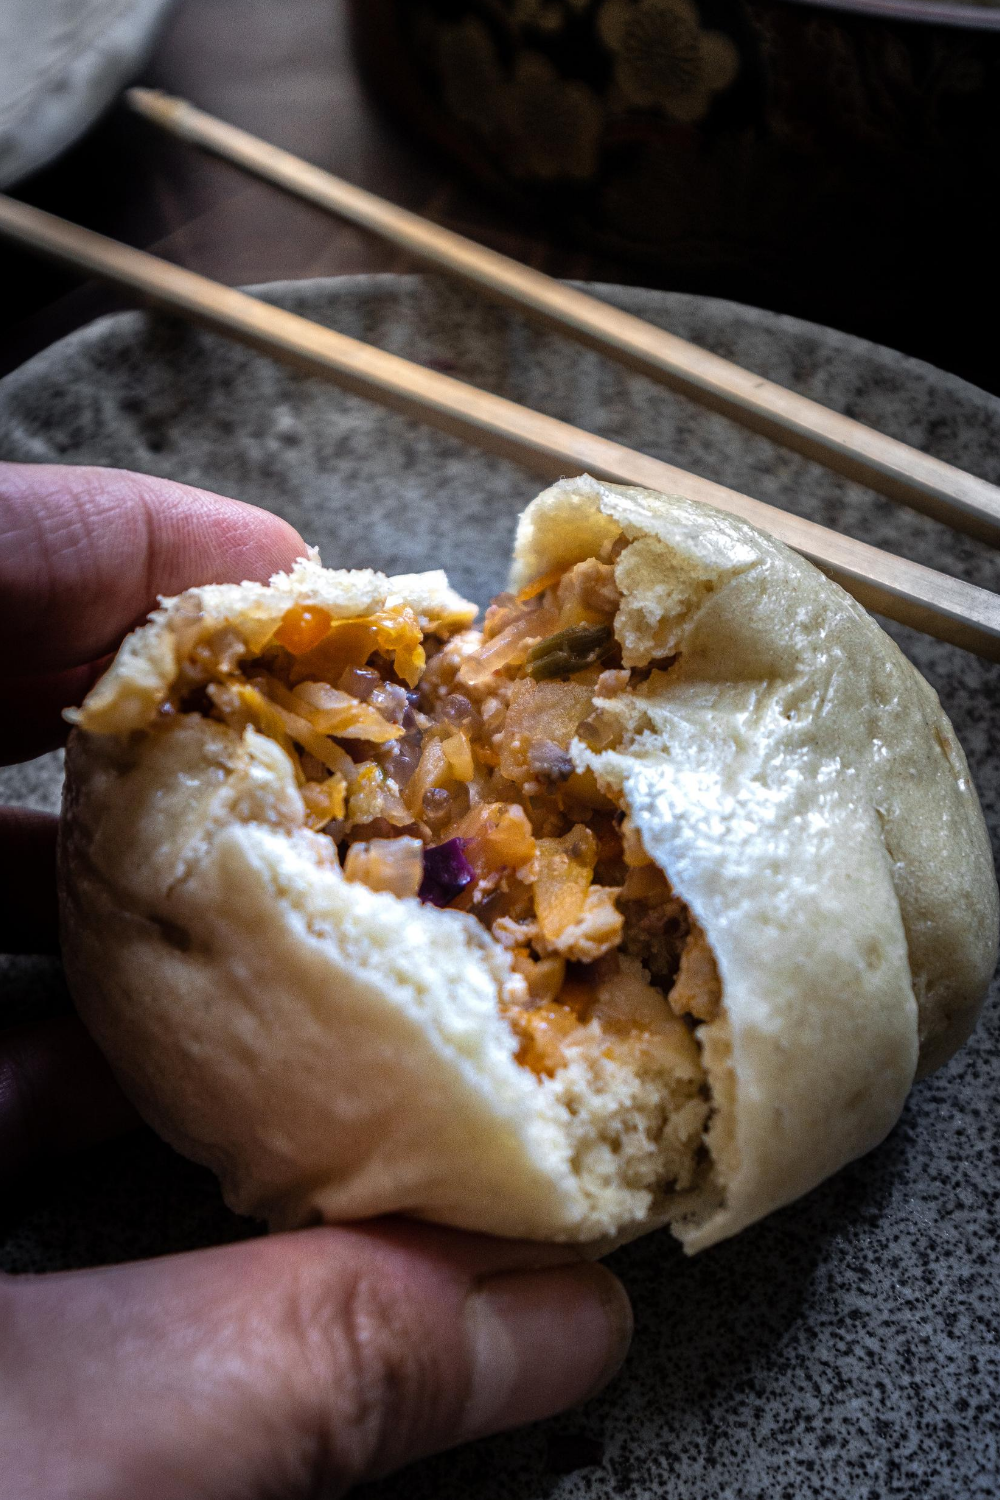
One of the best parts of going to HMart when it first opened its doors here in Illinois was undoubtedly the Korean food court. In place of Sbarro’s and Panda Express were diminutive eateries advertising Jjajangmyun and Kimbap. It was like Korean food HEAVEN. There were so many choice, but for me, I started very meal at the food court with Steamed Buns. There was a beautiful dumpling (“mandoo”) shop at the far end of the food court, and while my brother and cousins lingered by the noodle restaurant or the bakery, I always made a beeline for the dumplings.
I went back after going vegan and of course, was sad to learn that I could no longer enjoy their buns. So, I decided it was high time to make my own and the results were GLORIOUS.
Now, not gonna lie—this is a labor intensive recipe. You will spend a couple hours putting these babies together, but you get a total of 16 buns and they will taste so delicious, you’ll wonder why you never bothered trying this before. At least, that was the reaction I had. What is they say? Necessity is the mother of all invention?
Here are a few tips to make this recipe really come together for you:
- Use ingredients YOU like for your filling, but be mindful of excessive moisture. You don’t want a totally SOGGY filling. That is why we press the tofu, here.
- Adding a tablespoon of soup (or light) soy sauce really brings the flavors alive in your filling.
- Use a food processor on the vegetables, saving your poor hand and wrists from carpal tunnel.
- Use a rolling pin to flatten the dough into discs (I had a huge one, but a nice small one would be perfect)—the thinner they are, the harder they will be to fill without tearing, BUT, the more delicious they will be!
Steamed Kimchi Buns
Ingredients
- 1 cup warm water
- 2 teaspoons active dry yeast
- 1 Tablespoon sugar
- 3 cups flour
- 2 Tablespoons vegetable oil
- salt
- pepper
- 1 16 ounce block extra firm tofu pressed
- 1 teaspoon plus 1 Tablepsoon sesame oil
- 5-6 cloves garlic just peeled
- 1 shallot (or 1/4 onion) chopped
- 1 carrot chopped
- 5-6 mushrooms chopped
- 1 potato chopped
- 2-3 leaves red cabbage chopped
- 3 whole scallions chopped
- 1/2 cup kimchi
- 1 Tablespoon extra virgin olive oil
- 1 Tablespoon soup (light) soy sauce
- 1 cup vermicelli noodles cooked
Instructions
- Add the yeast and sugar to the cup of hot water and set it aside to “proof.”
- Add the flour, vegetable oil, and a pinch of salt to a large bowl. Next, add the proofed yeast mixture and begin stirring everything with a wooden spoon (or your hands) until a dough forms.
- Knead the dough for approximately 5 minutes. Shape it into a smooth ball. Add a teaspoon of sesame oil to the bottom of your bowl and place the dough ball in the bowl and cover it with a towel. Set it aside in a warm place for approximately 1 hour, until the dough doubles in size.
- In the meantime, add 1 tablespoon of extra virgin olive oil and 1 tablespoon of sesame oil to a large pan. When the oils are hot, add the garlic, shallot, carrot, mushrooms, potato, cabbage, scallions, and kimchi to the pan.
- Cook the vegetables for about 2 minutes and then add 1 tablespoon of the soup (light) soy sauce. Cook for an additional 7 to 8minutes, until the vegetables are nice and softened.
- Add the vegetables to a food processor, together with 1 cup of cooked vermicelli noodles. Grind the vegetables and noodles until they are the size of a small pebbles.
- Place the vegetable filling back into a bowl and add the pressed tofu, using your hands to break the tofu apart. Incorporate the tofu into the vegetables. Set the filling aside in the refrigerator until you are ready to use it.
- When the dough has proofed for about an hour, punch the dough to release excess gas. Knead the dough for about 1 minute and roll it back into a nice smooth ball. Place it back into its bowl, cover it with a towel, and let it rest for another 35 minutes.
- Once the dough has completed its second “proof,” knead the dough once more for about 1 minute and then divide it into 16 equal pieces.
- Using a rolling pin, flatten a small piece into a round disc, about the size of your hand. Place the disc on your hand, scoop about 2 tablespoons of the filling onto the disc, and then fold and pinch the edge of the disc, until the filling has been completely enclosed.
- Place the ball, seal side down, and roll it between your hands to smoothen the seal. Place the bun on a square of parchment paper and into your steamer, while you repeat with the remaining pieces of dough.
- Allow the buns to proof for an additional 20 minutes beforesteaming. Steam them for 20 minutes.
